DISASSEMBLY PROCEDURE
PHOTOS
93
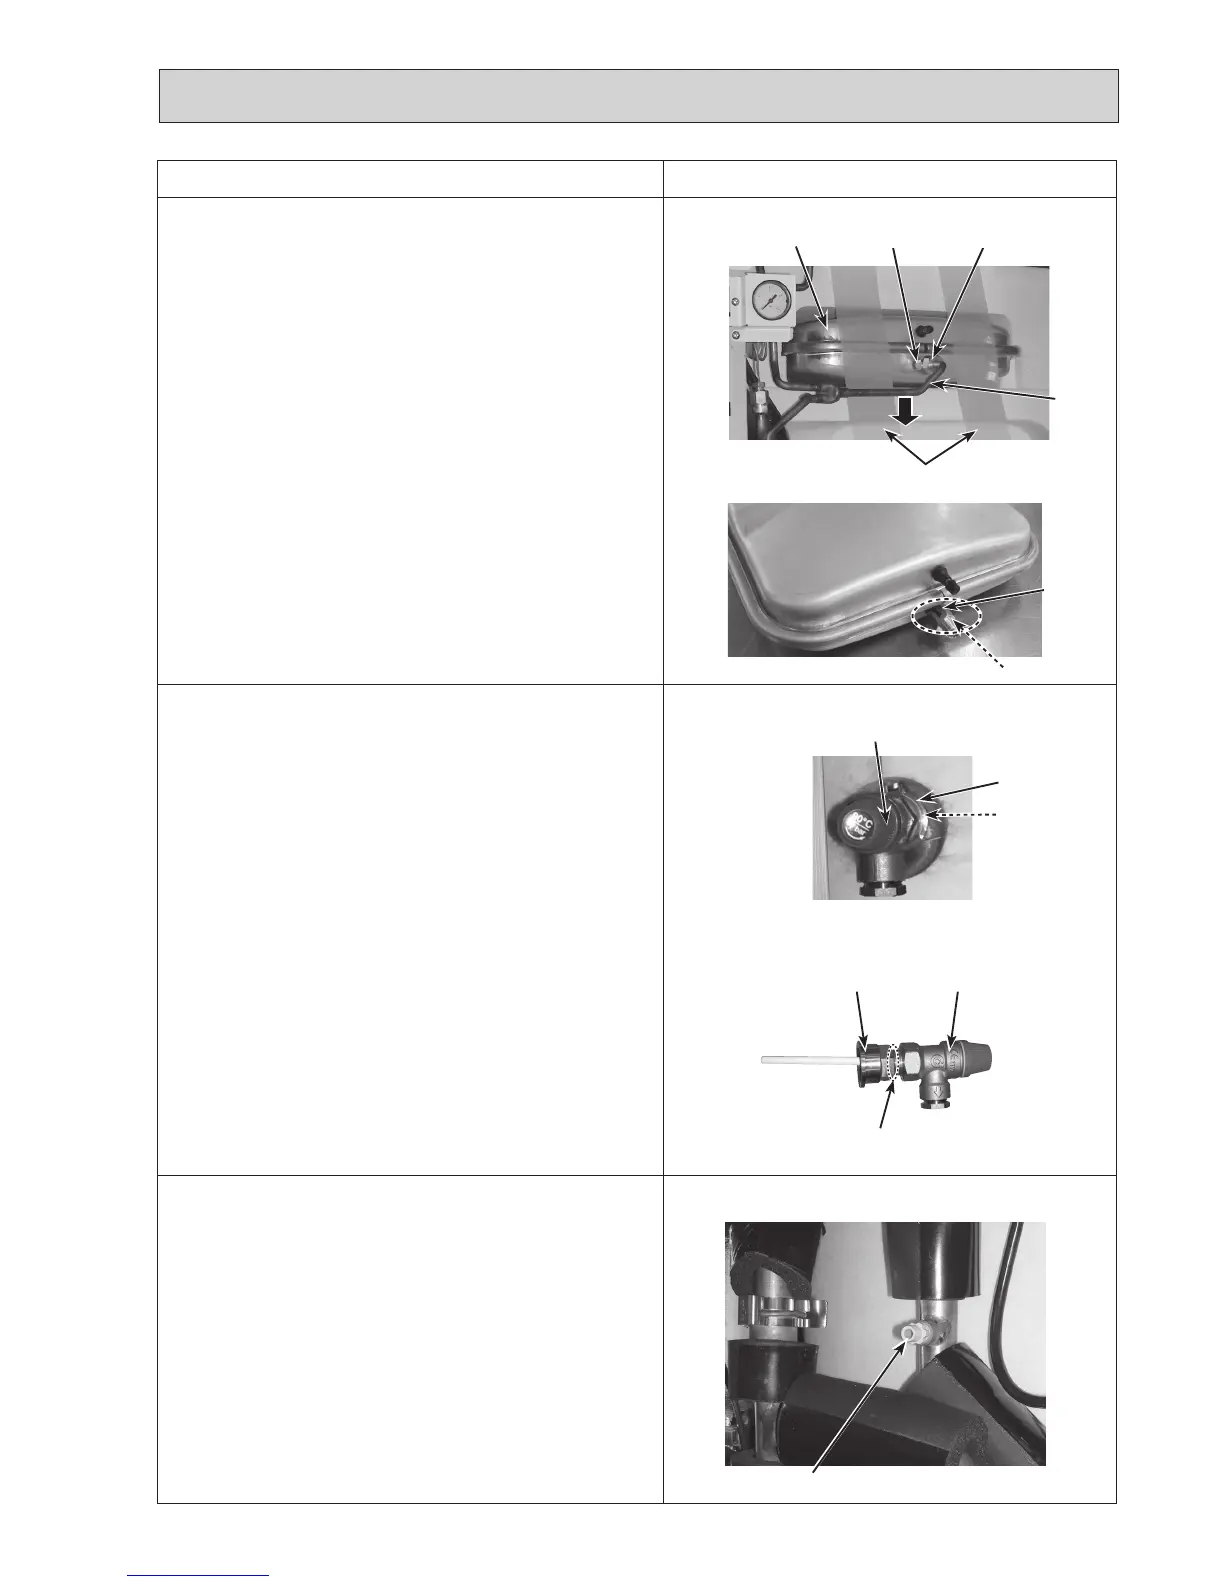
Photo 13-1
13.
How to remove the temperature and pressure (T&P) relief
valve
(EH*T20*-MHCW models)
(1) Remove the front panel (Refer to Procedure 1).
(2)Swingthecontrolboxtothefront(RefertoProcedure4).
(3)RemovethefieldpipingfromtheT&Preliefvalve.
(4)
Detach the quick connection. (Photo 13-1)
•
Whenreinstallingthequickconnection,useanewO-ring.
•RefertoProcedure23forhowtoattachanddetachthe
quick connection.
(5)RemovetheT&Preliefvalveusing2spanners:oneto
holdtheT&PjointandtheothertoturntheT&Prelief
valve. (Photo 13-2)
(6)Eliminateloctiteonthethreadsurfacesusingremover.
(Photo 13-2)
•
Before reinstallation, apply locktite over the thread sur-
faceontheT&PreliefvalveandinstalltheT&Prelief
valvewiththeT&Pjoint.
•WhenreinstallingtheT&Preliefvalve,pointthenutto
the bottom as specified. (Photo 13-1)
•Formoredetailsabouttheloctiteandtheremover,refer
toPage101.
12.
How to remove the expansion vessel
(1) Remove the front panel (Refer to Procedure 1).
(2)Swingthecontrolboxtothefront(RefertoProcedure4).
(3) Remove 2 tapes. (Photo 12-1)
•Theremovedtapecanbedisposedof.
(4)Removetheflarenutusing2spanners:onetoholdthe
flarejointandtheothertoturntheflarenut.(Photo12-1)
(5)Displacethepipeslightlydownwardandpulloutthe
expansionvessel.(Photo12-1)
(6)Removetheflarejointfromtheexpansionvessel.(Photo
12-2)
•
Whenreinstallingtheflarejoint,useanewG3/8"gasket.
Note:Toavoiddroppingoftheexpansionvessel,holdit
byhandwhenremovingit.
Photo 12-1
T&Preliefvalve
14. How to remove the air vent (manual)
(1) Remove the front panel (Refer to Procedure 1).
(2)Removetheairvent(manual)byturningtheairvent
(manual).
Air vent (manual)
Pipe
Flarejoint Flare nut
Expansionvessel
Photo 12-2
Flarejoint
Photo 13-2
Gasket(G3/8")
Photo 14
Tapes
Quickconnection
O-ring
T&Pjoint T&Preliefvalve
Threads for application of loctite

 Loading...
