DISASSEMBLY PROCEDURE
PHOTOS
87
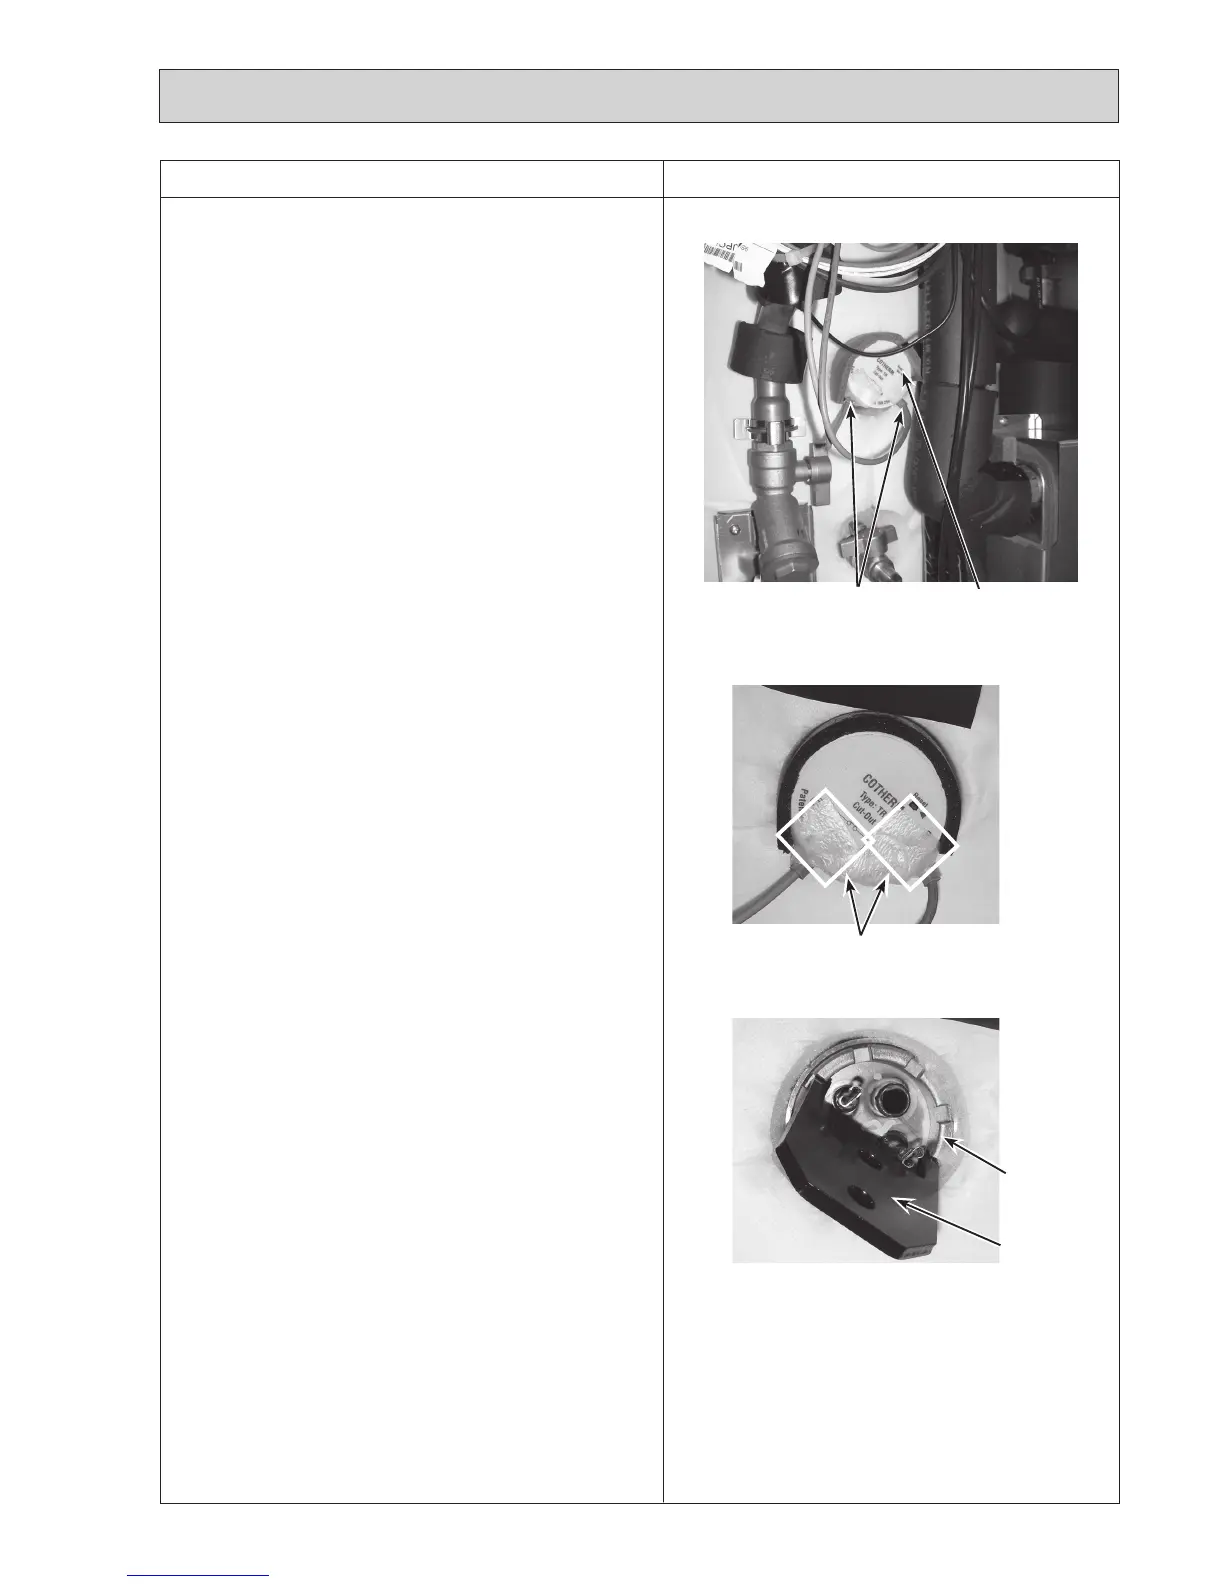
9. How to remove the thermostat/immersion heater
<Thermostat>
(1) Remove the front panel (Refer to Procedure 1).
(2)Peeloffthewater-prooftapesontheplasticheadofthe
thermostat in order to reveal the thermostat terminals,
anddisconnecttheleadwiresfromtheterminals.
(Photos 9-1 and 9-2)
•Usenewcommerciallyavailablewater-prooftapesto
covertheterminalsagain.
(3) Pull out the thermostat.
<Immersion heater>
(4) Remove the tab cover and remove the back nut (G1-
3/4")usingthetoolincludedwiththeimmersionheater.
(Photo 9-3)
(5) Pull out the immersion heater.
•Whenreinstallingtheimmersionheater,useanew
G1-3/4"gasket.
Note:
Whenreplacingtheimmersionheateronly,skipStep(2).
Afterreinstallingthebacknutwiththetabcoverontothe
tank,inserttheimmersionheaterstraightintothetank
throughthebacknutinordertoprovideadequatesealing.
Failuretodosomaycausewaterleakage.
Alwayscheckforwaterleakageafterinstallation.
Water-proof tapes
Photo 9-2
Photo 9-3
Tool (*1)
Back nut
(G1-3/4")
(*1)Whenthemodelisthecylinderunitincludingimmersionheater,
thetoolisincludedwiththeunit.Thetoolisalsoincludedwith
the immersion heater of optional parts.
Photo 9-1
Thermostat/
Immersion heater
Leadwires

 Loading...
