DISASSEMBLY PROCEDURE
PHOTOS
89
Continuetothenextpage.
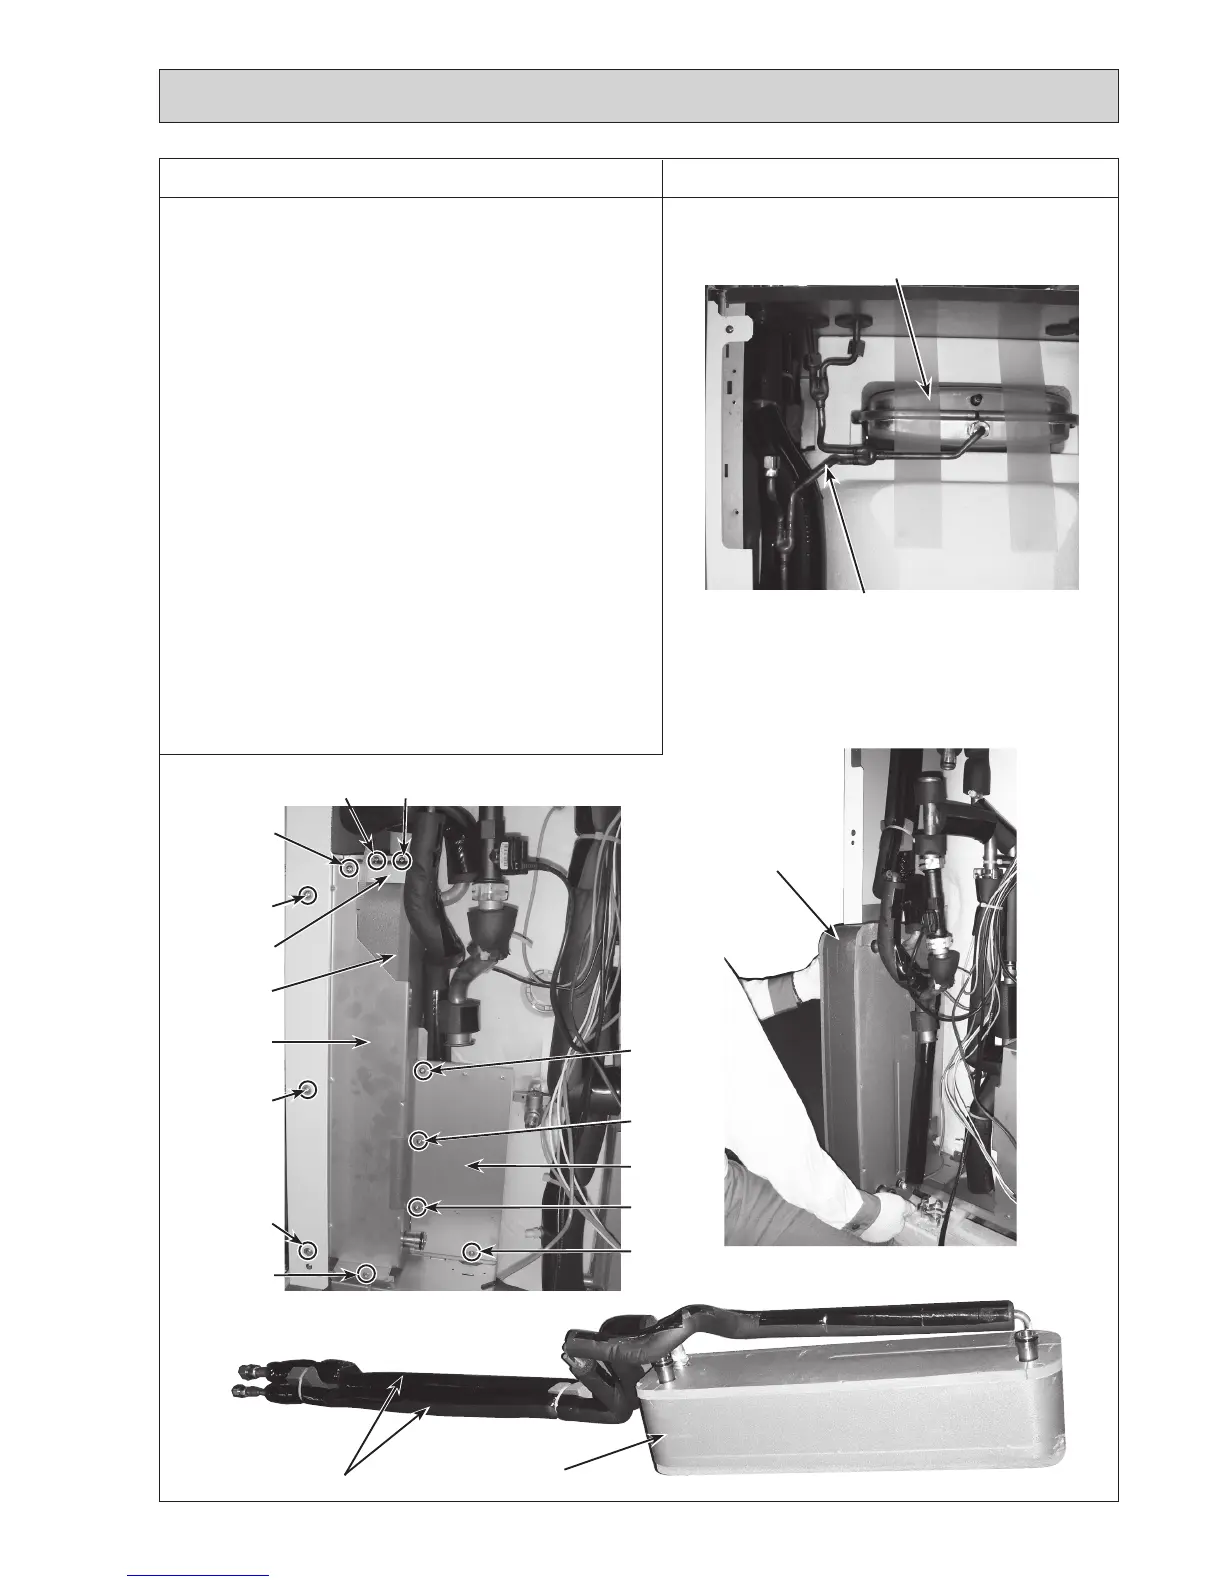
Photo 10-4
Refrigerantpipes
P-HEX
Fromthepreviouspage.
10. How to remove the plate heat exchanger (P-HEX)
(Refrigerant - Water)
(7) Remove the thermistor (TH2) from the thermistor pocket
(Refer to Procedure 20).
(8)Removethemanometerwiththemanometercover
(Refer to Procedure 11).
(9) Loosen the flare nuts for Air vent (automatic) and
pressure relief valve (3 bar), and remove the Air vent
(automatic)andpressurereliefvalve(3bar)together
withtheflarejoints.(RefertoProcedure11)
(10)Loosenandremovetheflarenutwhichconnectsthe
expansionvessel.(Photo12-1)
(11) Loosen and remove the flare nut on booster heater,
then remove the pipe. (over B.H.) (Photo 10-4)
(12)Removethestrainervalve,thewaterpumpandthe
pump valve (Refer to Procedure 5).
(13)Removethenut(G1")ontheBsideof3-wayvalveto
make the connection part free. (Photo 6-1)
•Whenreinstallingthenuts,useanewG1"gasket.
(14) Remove the booster heater (Refer to Procedure 8).
(15)Removethewatercoilcoverbyremovingthescrew1
to5.RemovetheW.C.topcoverbyremovingthescrew
6and7.Removethepumpstaybyremovingthescrew
8 to 11. (Photo 10-5)
•Reusethese3platesandfixingscrews.
(16)
Pull out the P-HEX. (Photos 10-6 and 10-7)
Photo 10-5
Photo 10-6
Photo 10-7
Expansionvessel
Pipe (over B.H.)
P-HEX
Screw7Screw6
Screw3
Screw5
W.C. top cover
P-HEX
Screw2
Screw1
Water coil
cover
Screw4
Screw8
Screw9
Pump
stay
Screw10
Screw11

 Loading...
