DISASSEMBLY AND REASSEMBLY
Alternator and regulator
unit
Alternator removal and instaDation
(1) DiscoIlIlect wires
betw
e
en
alternator and regula t
t'lr
unit and disconnecl ground harness (2)_
Loo","
.djusting plate bolt (3) and remove fan belL
(2) Loosen . Iterrullor bracket bolts
(4)
and remove
alternator assembly (5) from engine.
(3) To imtall the all •
.".tor.
follow the reverse
of
removal
proce
du
re.
'·Wlfltt between Ilter"ator
.nd
regulator
ul'Ii(
2-Ground
3·Adi
ust
i:'l9
plals
bolt
snd
WinhlH
4·801($,
nuts
and
WIlmet!!,
12
pes
ea:et'l.}
5·Altemator assemb
ly
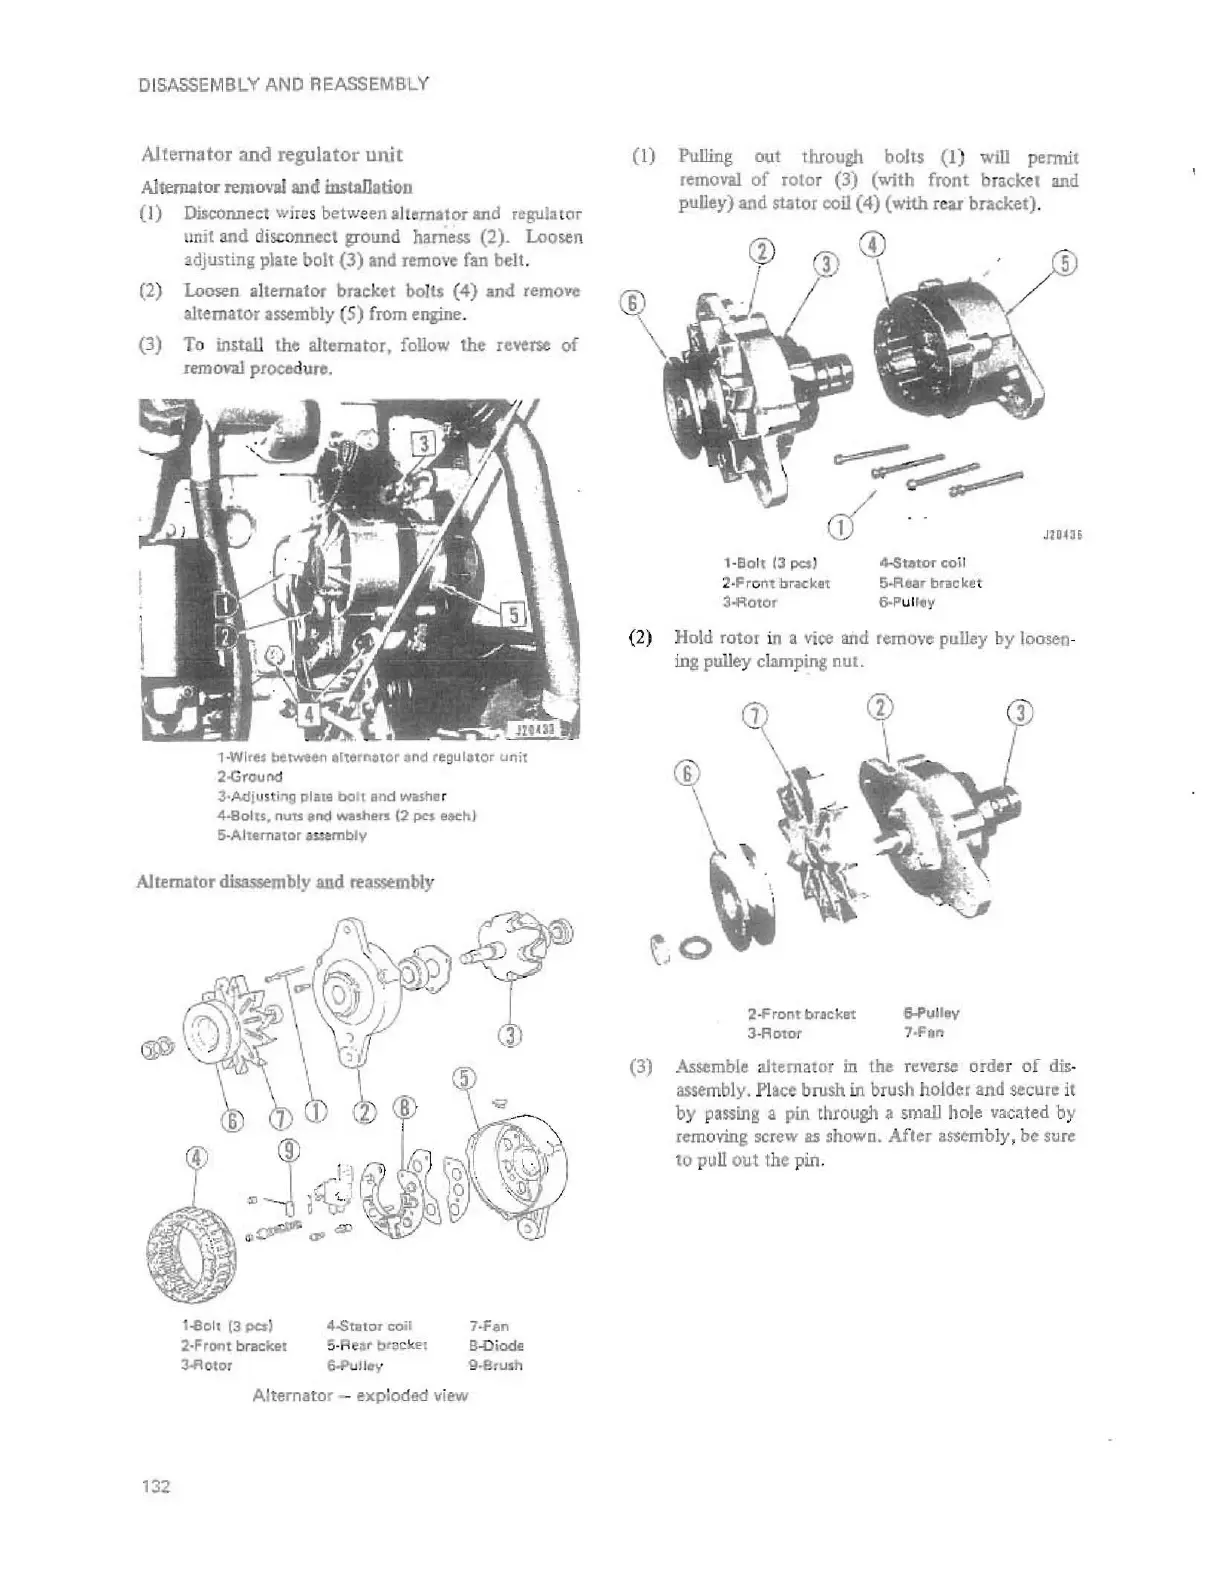
Allemator disassembly and reassembly
~
132
~
j A
"
~~
~CJ1iI""
""
or>
1-8011
{3
pc:sj
2·Front bracket
3-Rotor
4-5tator coil
5-
Rear
bti;,l
ck
l!t
&-Pull...,.
Alternator -
exploded
view
7·Fen
B-Diode
9·BtUlh
(I)
Pulling
out
through bolts
(I
) will
penni(
removal
of
r
olor
(3) (with front brackel and
puUey) and stator coil
(4)
(wtth reas bracket).
(2)
(3)
.....-
~
c1
.......-
P"""'::
---
Iii'
1
1
-13
0 1, (3
poe:s
)
2
·F
ront
brae
kit
3.f1:otor
4-StatOT
co
il
SoAaar
mcke
t
6-p
ul
rey
J1U4H
Ho
ld
rotor
in
a vi
ce
and
remo,'e
pulley
by
loosen
-
ing pulley clamping nut.
G<
~~,~
, .
.
,
~,
2-
Frol\t
br.l!lckllt
3-
Aol0r
6-Pull.V
7·F,.n
Assemble
alternator
in
the
reverse
order
of
dis
-
assemb
l
y.
Pl
oce
brush in brush hold
..
and secure it
by passing a pin
th
rough a
,maJJ
hole vacated by
removing screw
as
shown. After assembly, be
Sure
to
pull ou t the pin.
 Loading...