by
the locating pins provided
on
the front place,
and s
ecu
re the cast
hy
tightening a
lot31
of
13
volts
.
InstaU
injection
pump
gear
cover (2).
(3) Inslall waler pump pulley (5) and crank p
ull
ey (6)
by
driv
ing them onto respective shafts witb In-
stallers (B) (C).
5·W~
ner
pump
pulley
B-lnstallc~
I
ns
t allIng
pum
p polley by
dr
iving
!5·Crunk
pulley
C-
l
n,t.II.,
Ins[alling crank pull
ey
by drLving
~,
. ,
~
(4) Fit the washer to crank puUey and fasten down
the pulley by tightening the nut.
(5) Pass the
fa
n belt around the pulleys and install the
coollna
fan
.
Adjus
t
me
belt
fo
r
proper
tensIOn
i:!
S
d
escrib
ed
in
t
he
par
t tllied "
Fan
belt
tension
ad
j
ustment."
Belt
tension
is
specified
in
terms
of
"belt deflec.tion"
and
is presc
ribed
to
bt
12
nlm
(0.472 in.) (denectioll) uoder thumb pres;ure.
Lubrication system
on
fdter
removal
and
insraU.tion
The oil filter
is
bolted to the crankcase.
RemoVlIlg
the
four bolts (1) allows the filter (2)
to
be detached from
the
engme
!'or
removal
.
When
installing [he fitter,
mak
e
DISASSEMBLY
AND
REASSEM6LY
sure that the seat
ing
face is clean and that the
packing.
is
ill
good
condition.
8
0lt
and
~$het
(4
p~
es'Ch)
2-Oil
filter
Bssembly
Removi
ng oil
fi
l
te
r
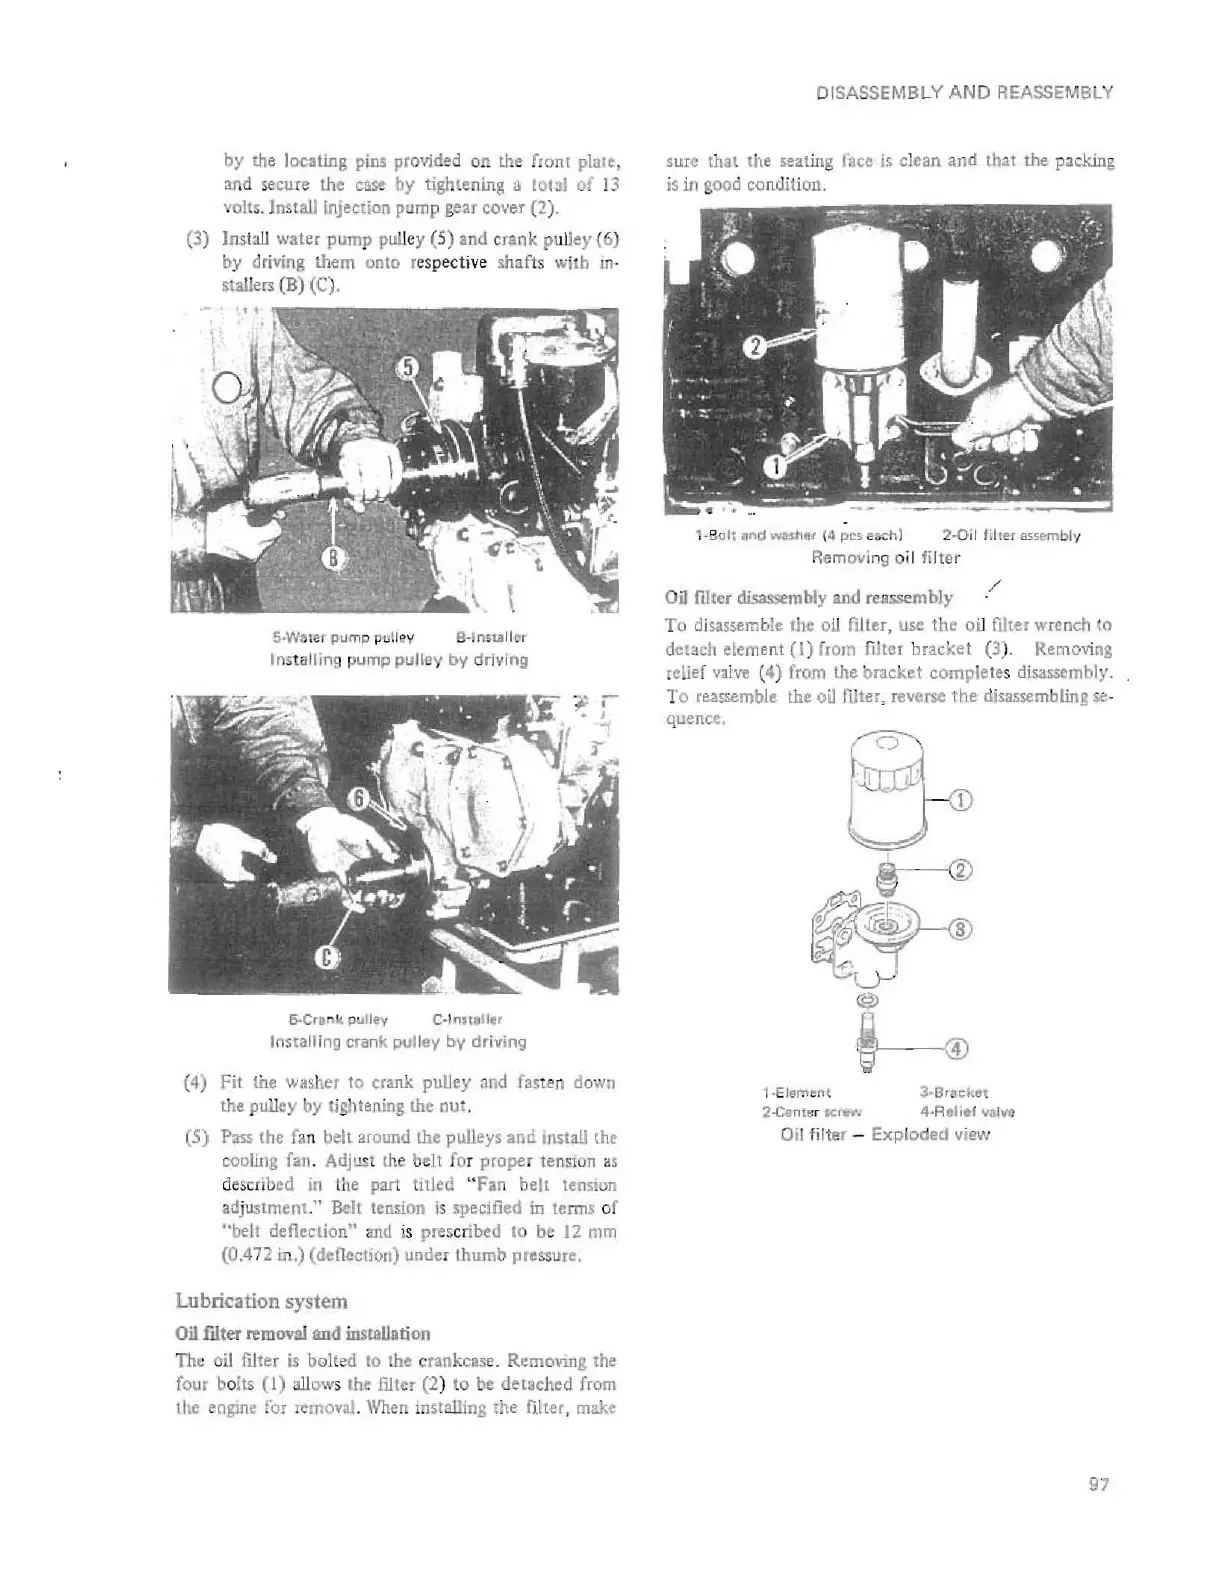
Oil
ftlter disassembly and r""ssembly
/
To disassemble the oil filter, use
the
oil filler wrench to
detach element (1) from filler bracket (3). Removing
relief .alv. (4)
from
the bruck,t completes disassembly.
To
re.assemb
le
the
oiJ
niter,
rev
erse
the
disassembling
Sot
·
quence.
o
1
h
1-
E
ll!lment
3~Brollol;ket
2-Ce-nte
r
K:
l
tw
4·Re
li.
f
valve
Oil filter - Exploded view
97
 Loading...