35
Chapter 3: Operation
Sequence After Power Being Turned On
Plug the AC power end of the power cord into an electrical outlet. The loudspeaker will “beep” and test
all indicators while the controller executes its self test. After being turned on, the instrument will go
through the following sequence:
1. “beeper”
2. indicators for TORR, MTORR, MBAR, µBAR, Kpa, and Pa
3. 10 LED indicators for set points and other functions
4. all four digits will light, including decimal points
5. display shows the model number of the instrument, 908A
6. display shows software version, e.g. 1.10
The PDR 2000 will go into normal operation and begin measuring pressure. If the CDG is not connected,
the display will show OFF. If the system pressure is greater than 10.00 ktorr, the display will show OFF.
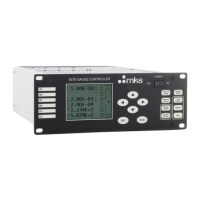
Front Panel Controls
The Model PDR 2000 allows flexible configuration of operation using simple entry from the front panel
buttons labeled GAUGE SELECT, SELECT, RAISE and LOWER. Parameters, which you may adjust,
are selected by scrolling through list that begins with SET PT 1 HIGH. Each time the
SELECT button is
pushed, the led indicator advances to the next parameter. The
LED indicators will be lit to indicate which
parameter is being adjusted, and the digital display will flash to indicate the value of the parameter being
adjusted.
Each push of a button will give a short “beep” from the loudspeaker to confirm that the button was
pushed. If you have reached the limit of adjustment or if the button push is not allowed, the loudspeaker
will give a long “beep”.