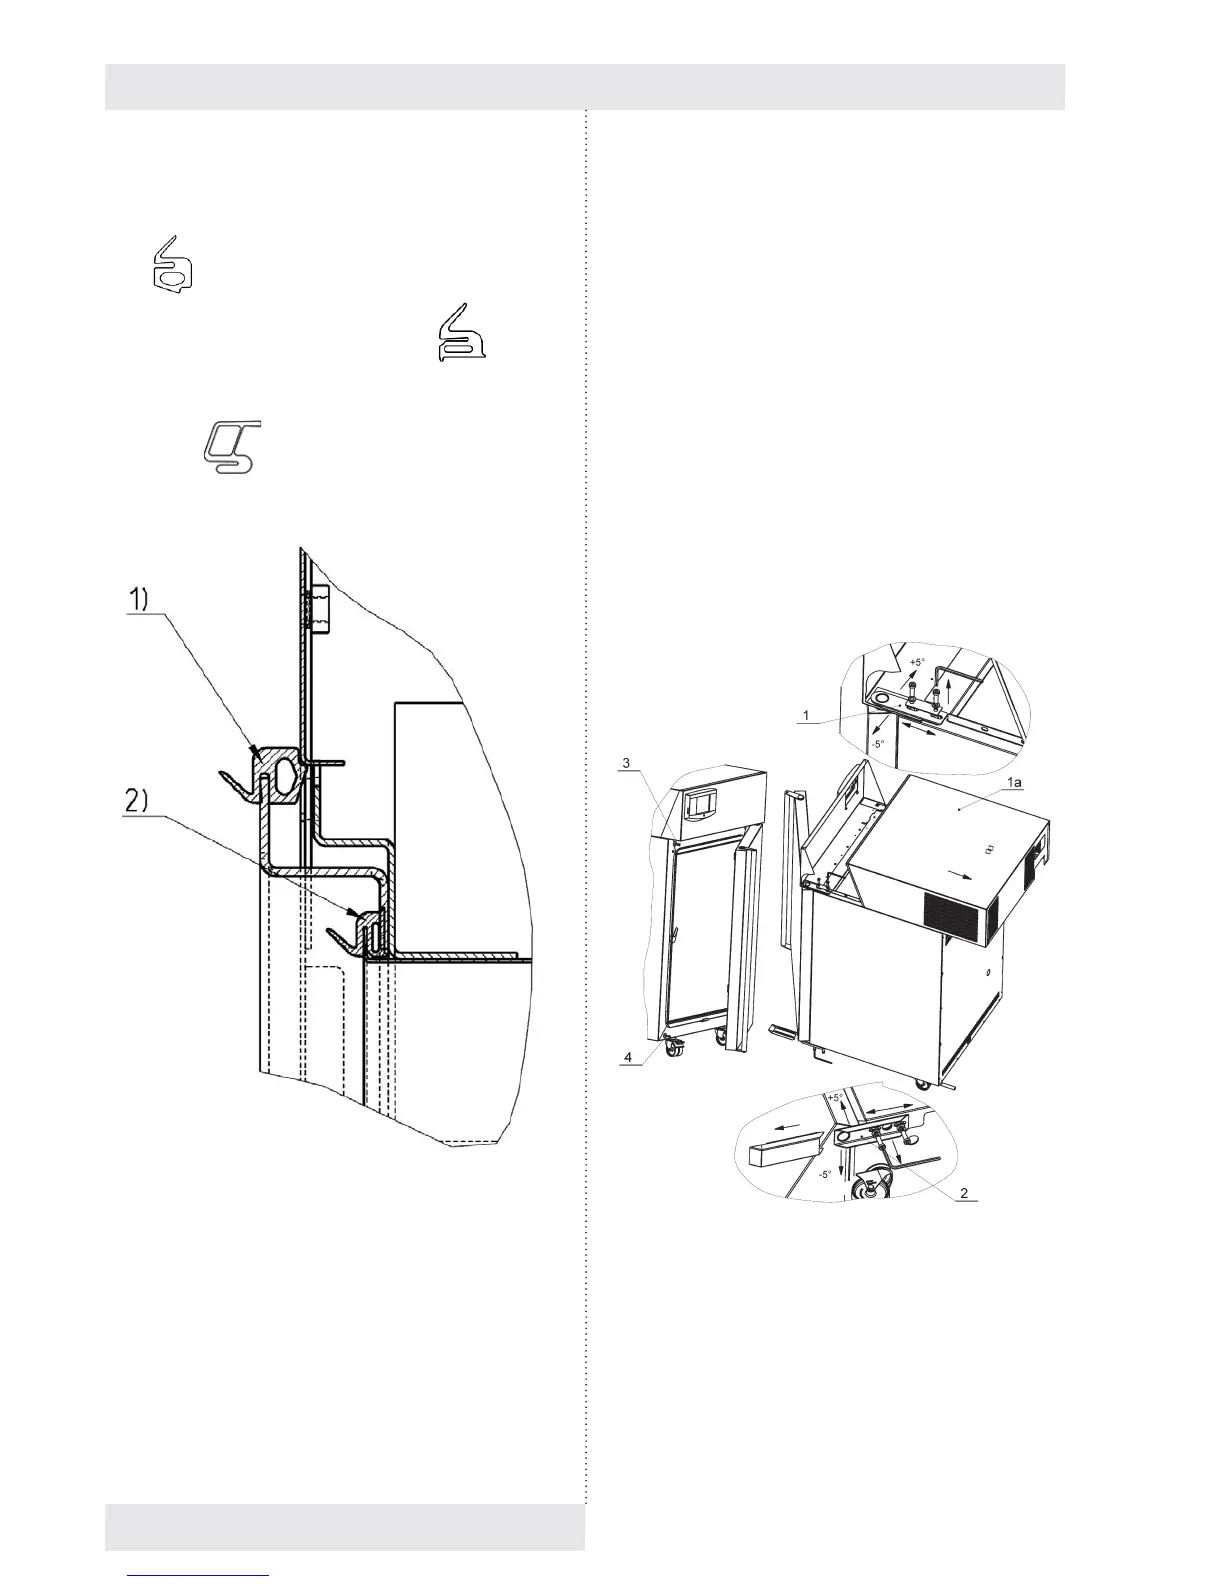
10.2 DOOR SEALING REPLACEMENT
(1) Outer door sealing (m. No. 0672719 size 111 - 707)
(2) Glass door sealing (m. No. 0672718)
(3) Sealing between doors (m. No. 0672720, only size
707)
(4) Sealing of outer door, different for size 1212.
Fig. 76
a) The sealing (1) is inserted between the chamber and the
shell.
b) The sealings (2) and (3) are put on the sheet edge – you
can remove them easily (start from the bottom centre).
c) Re-apply a new sealing on the edge (start from the
bottom centre).
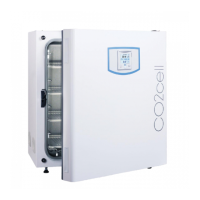
10.3 DOOR ADJUSTMENT
The glass door has a fi xed position and it can be only turned
around its axis or get out of hinges.
The outer sheet door is adjustable in all the four positions
(see Fig. 76):
a) (1a) – unscrew three cross screws and extend the super
structure towards the rear part of the device.
b) (1), (2) – four screws with inner hexagon (imbus 6).
c) (3), (4) – screws secured with a nut (cross-head
screwdriver, wrench 10).
Adjust the door in such a way so as – after their closing –
the rubber sealing of the chamber is pushed on the whole
circumference to the sheet of the fl oating door. Check it in
such a way that before full closing of the door insert a sheet
of paper between the sealing and the sheet of the fl oating
door – after the door closing, the paper may be taken out
based on slight resistance.
Fig. 77
Instructions for use
42 CLIMACELL EVO_np_en_1401_mmm_V1.01