18
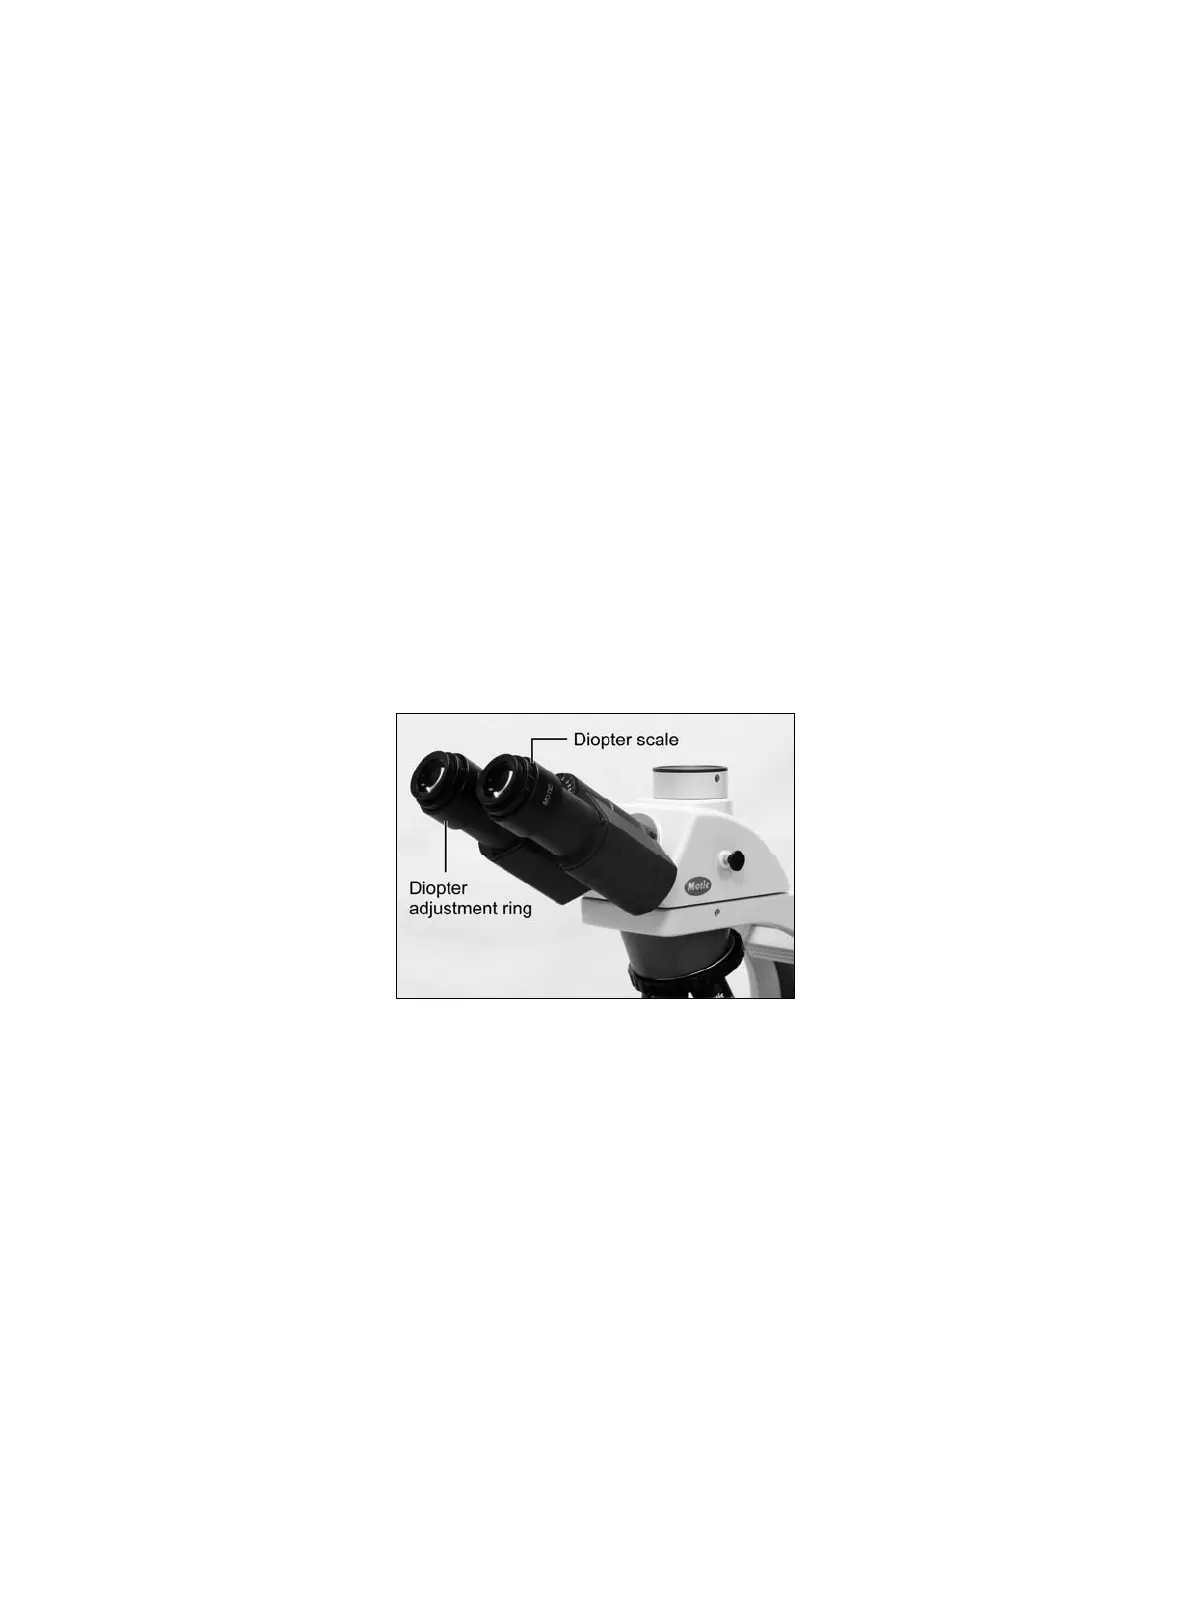
4.7 Diopter adjustment
Every human eye is different, to adjust the Instrument to best performance adjustment can be
necessary.
Set the diopter on both eyepieces to the “0” position.
Change to 10x Magnification and focus the image of the specimen with one eye only.
Use the Eye which is most convenient for first focusing.
When the best focus position is reached, close this eye and use the other eye for the
following steps.
- Correct the focus for the second eye by using only the Diopter adjustment Ring (Fig.13), do not
use the coarse / fine focusing knob!
- Change to a higher magnification to verify the result and if necessary repeat the procedure to
match the sharpness for higher magnification.
- Keep this final diopter position for all magnification / lenses. The diopter position for each user
can be recorded from the scale (Fig.13), so it can easily be reset.
(Fig.13)
4.8 Centering the condenser
Fully open the field of view diaphragm and condenser aperture diaphragm.
Set the specimen on the stage with the cover glass facing up.
Bring the specimen image into focus, using the 10X objective.
Close the field of view diaphragm to its minimum setting by means of the field diaphragm ring.
Turn the condenser focus knob to bring the field diaphragm image into focus on the specimen plane.
Adjust the condenser centering screws so that the image of the field diaphragm appears at the
centre of the field of view. At this time, stopping the field diaphragm image, just short of the
maximum field of view, may be convenient for centering.
Adjust and centre the field diaphragm so that it is just outside the field of view for each
magnification change.