EasyManua.ls Logo

Motic AE2000 - User Manual

Motic AE2000
28 pages
Print Icon
To Next Page IconTo Next Page
Loading...

Questions and Answers

  • L
    Logan JordanJul 31, 2025
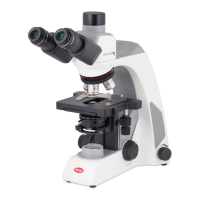
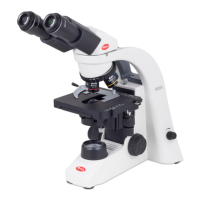
    Why is my Motic Microscope field of view uneven or only partially visible?
    • S
      Stephen VaughanAug 1, 2025
      Uneven brightness or a partially visible field of view in your Motic Microscope can occur due to several reasons: The bulb may not be installed properly, so ensure it is correctly installed. The filter slider might be in an intermediate position, so adjust it to the correct position. The phase slider may not be in the click-stop position, so set it correctly. Also, check the condenser mounting and correct it if necessary. Other potential causes include the aperture diaphragm being closed too far (open it), the revolving nosepiece not clicked into position (click it into position), or the optical path selector lever in an intermediate position (adjust it, for trinocular models only).
  • P
    Pamela SanchezAug 4, 2025
    What to do if the Motic AE2000 Microscope lamp does not light?
    • D
      Dr. Angela WilsonAug 4, 2025
      If the lamp of your Motic Microscope doesn't light, check the following: Ensure the power supply is properly plugged in. If it is, verify that the lamp is installed correctly. If you have left the microscope under auto mode for more than 15 minutes, reset the auto mode. Finally, the lamp may be burnt out, in which case you should replace it.
  • D
    Deanna RivasAug 8, 2025
    Why does my Motic AE2000 Microscope lamp flicker?
    • K
      Karla ScottAug 9, 2025
      A flickering lamp in your Motic Microscope could be due to a few reasons. First, check that all connectors are securely connected and if not, secure them. The lamp might be near the end of its service life, consider replacing it. Finally, ensure the lamp is securely plugged into the socket.
  • S
    Samantha EvansAug 13, 2025
    Why do I have eye strain using my Motic AE2000?
    • J
      Jamie JohnsonAug 13, 2025
      Eye strain or fatigue when using your Motic Microscope can occur if the interpupillary distance is not adjusted, so adjust it. Another reason is that the diopter adjustment may not be made, so make the diopter adjustment. Also, inadequate illumination can cause eye strain, so increase the illumination. Finally, the field of view of the left and right eyepiece may differ, so match the field of view of the left and right eyepiece.
  • J
    johnkingAug 17, 2025
    Why is the image quality poor under phase contrast on my Motic AE2000?
    • J
      Jared EllisonAug 18, 2025
      Poor image quality under phase contrast, or an inability to view details with your Motic Microscope, can be attributed to several factors. You might be using a brightfield objective, so use the correct phase contrast objective. Ensure the phase annular diaphragm is in the optical path. The phase annular diaphragm and objective phase symbol may not match, so match them. If the slider annular ring image has moved away from the objective phase plate image, realign them. Lastly, the thickness of the specimen holder might be outside the compensating range of the objective, so use a specimen holder within the compensating range.
  • S
    susannicholsonAug 22, 2025
    Why is my Motic Microscope lamp blowing out immediately?
    • J
      jeffreyyoungAug 22, 2025
      If the lamp in your Motic Microscope blows out immediately, it may be because you are not using the specified lamp. Ensure that you use the specified lamp.
  • M
    Mr. James TaylorAug 27, 2025
    Why is the brightness inadequate on my Motic AE2000 Microscope?
    • J
      Jennifer MillerAug 27, 2025
      Inadequate brightness in your Motic Microscope might be because the specified lamp is not being used. Make sure to use the specified lamp.

Summary

VI. Troubleshooting Table

1. Optical and Operating Problems

Details common optical and operational issues with their possible causes for microscope users.

2. Electrical

Outlines common electrical problems and their potential causes, such as lamp issues and power connections.

VII. Care and Maintenance

1. Lenses and Filters

Provides instructions for cleaning lens surfaces and filters using specific solutions and techniques.

2. Cleaning of Painted or Plastic Components

Advises on cleaning painted or plastic parts of the microscope, warning against organic solvents.

3. When Not in Use

Guides on proper storage of the microscope and its accessories when not in use to prevent damage.

4. Warning lable

Explains the meaning of warning labels and symbols found on the microscope for safe operation.

I. Nomenclature

1. Application

Describes the application of the AE2000 microscope, highlighting its optical system for various observations.

2. Nomenclature

Identifies and labels key components of the AE2000 microscope with an accompanying image.

3. Technical Data

II. Setting-up the Instrument

1. Working Environment

Specifies ideal environmental conditions for microscope operation, including temperature, humidity, and location.

2. Input Voltage and Power

Details power requirements and safe connection procedures for the microscope's power supply.

III. Assembling the Microscope

1. Installing the Bulb

Provides step-by-step instructions for safely installing or replacing the microscope's illumination bulb.

2. Filter Holder

Explains the location and function of the filter holder for easy filter replacement.

3. Mounting the Condenser

Details the process of mounting the condenser onto the microscope's dovetail mount using a screwdriver.

4. Installing the Objectives

Guides on removing the stage insert and installing objectives onto the revolving nosepiece.

5. Mechanical Stage

Describes the adoption of mechanical stages and holders for specific sample types like petri dishes.

6. Mounting the Eyepieces

Instructs on removing dust caps, inserting eyepieces, and tightening clamp screws for proper mounting.

IV. Microscopic Procedure

1. Interpupillary Distance Adjustment

Explains how to adjust the interpupillary distance for comfortable binocular viewing of the specimen.

2. Diopter Adjustment

Details the diopter adjustment process to compensate for vision differences between eyes for clear focus.

3. Coarse and Fine Focusing

Describes the use of coarse and fine focus knobs for achieving sharp specimen images.

4. Coarse Focus Torque Adjustment

Explains how to adjust the torque of the coarse focus knob for smoother operation.

5. Change Illumination between Halogen and LED

Provides instructions for switching between Halogen and LED illumination sources on the microscope.

6. Brightfield Microscopy

Guides on setting up the microscope for brightfield microscopy, including diaphragm adjustments.

7. Phase-Contrast Microscopy

Details the procedure for phase-contrast microscopy, including objective and diaphragm selection.

8. Filter Selection

Lists different filter types and their recommended procedures for microscopy and photomicrography.

9. Auto Power Off Function

Explains the operation of the auto power off feature and its switch settings.

V. Photomicrographic Procedure (Model AE2000 trinocular)

1. Brightfield Photomicrography

Details how to set up the optical path for brightfield photomicrography using the AE2000 TRI model.

Motic AE2000 Specifications

General IconGeneral
TypeBiological Microscope
Magnification40x-1000x
Focusing MechanismCoaxial Coarse and Fine Focusing
Power SupplyAC 100-240V, 50/60Hz
HeadTrinocular
EyepiecesWF10x
Objective LensesPlan Achromat 4x, 10x, 40x
Stage140mm x 140mm
IlluminationLED or halogen
CondenserAbbe Condenser N.A. 1.25 with iris diaphragm

Related product manuals