June 3, 2005 6815851H01-O
2-10 Standard Configurations: Antenna Installation
1. Make sure that there is sufficient slack in the antenna cable.
2. Make sure that the collar of the antenna cable plug is loose and does not bind.
3. Make sure that the mini-UHF jack is tight in the radio housing.
4. Slide the collar back against the flange. Insert the antenna cable plug’s pin fully into the radio
jack, but do not engage the threads.
5. Ensure that the plug’s and jack’s interlocking features are fully seated. Check this by grasping
the crimp on the cable jack, rotating the cable, and noting any movement. If the features are
seated correctly, there should be NO movement.
6. Finger-tighten the antenna cable plug’s collar onto the radio’s jack.
7. Give a final tug, by hand, to the collar, and retighten by hand as firmly as possible.
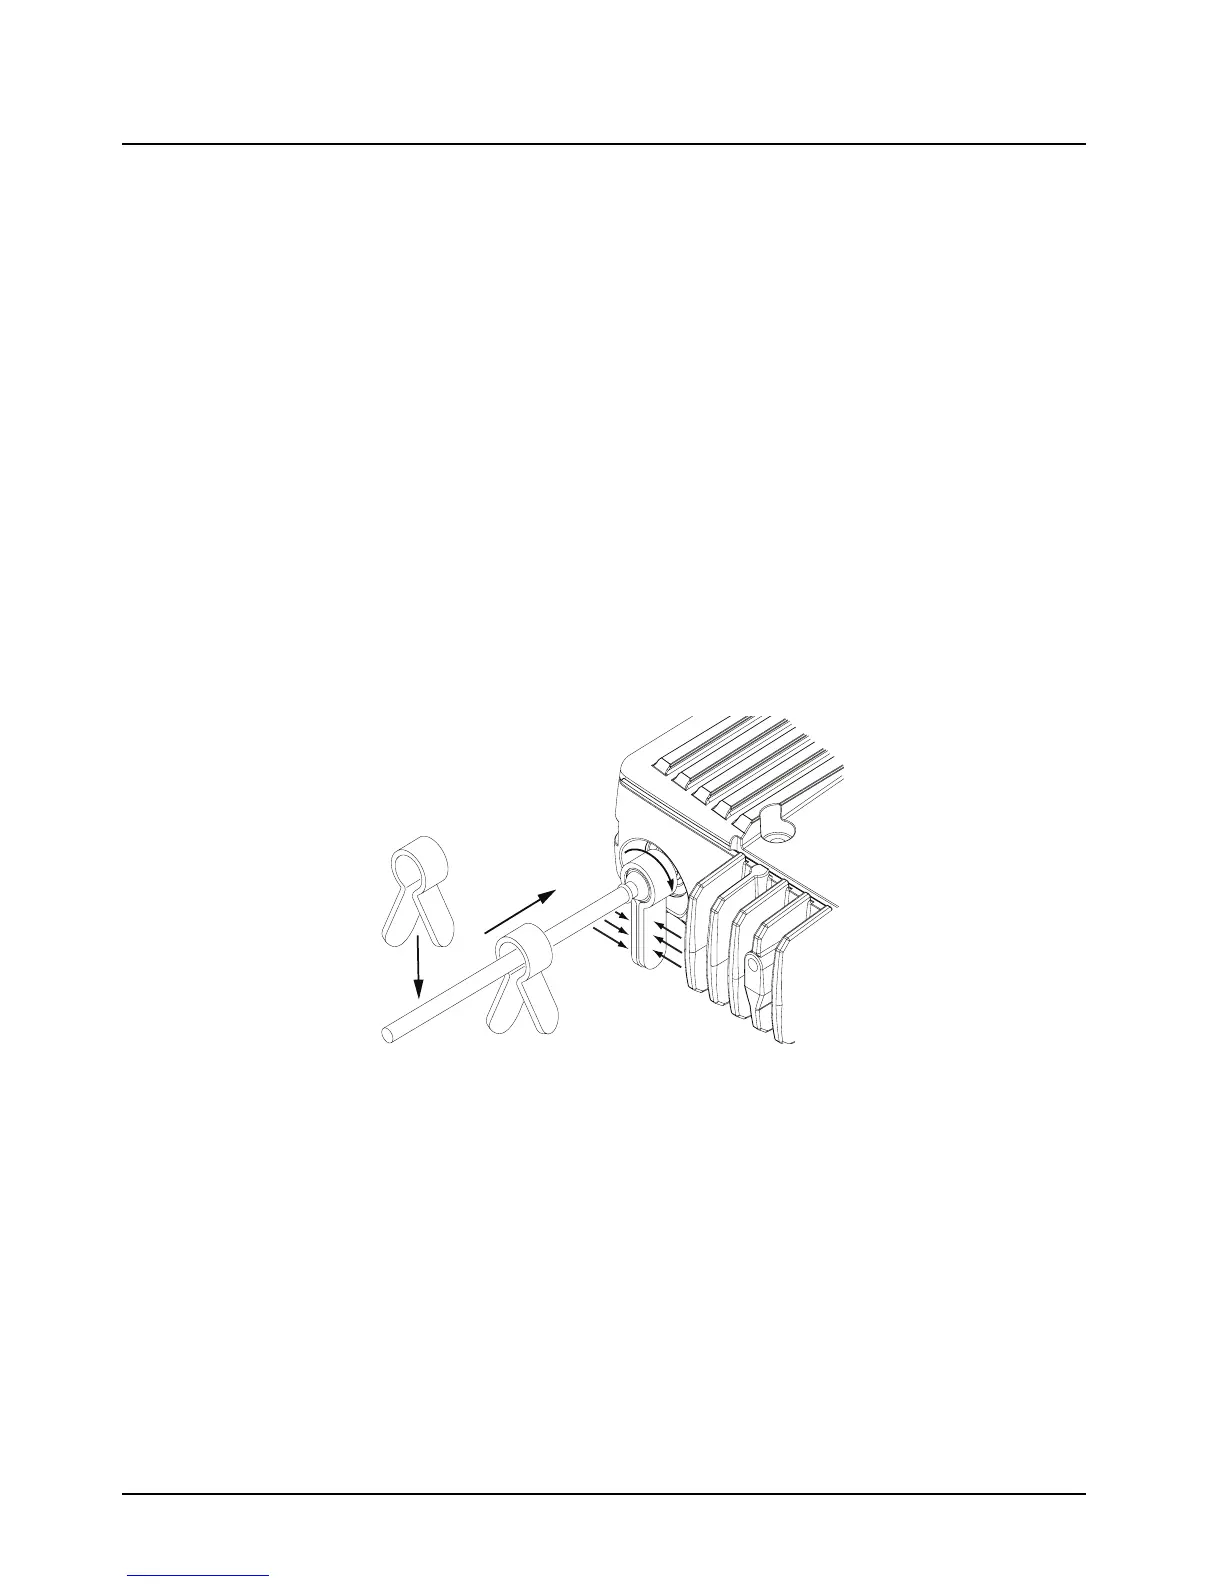
8. Slip the mini-UHF connector tool over the coaxial cable, using the gap between the tool’s legs
(see Figure 2-11). Then, slide the tool up onto the plug’s knurled collar. Squeeze the two
straight legs of the tool firmly together between your thumb and index finger and turn
clockwise (as shown) to tighten the collar. It should take 1/4 turn or less. When you feel the
tool slipping on the collar, the connection has been properly tightened. The tool can also be
used to loosen a tight collar.
NOTE: DO NOT use pliers or any other device to grip the tightening tool. It has been designed to
allow you to achieve the proper torque on the collar without overtightening. Overtightening the
collar can damage the connector and the radio.
Figure 2-11. Mini-UHF Connector Tool
(1) Squeeze
Firmly Together
HLN6695_
(
2
)
T
i
g
h
t
e
n

 Loading...