First-Time Installation and Configuration
Before installing the AWK-1131A, make sure that all items in the Package Checklist are in the box. You will need
access to a notebook computer or PC equipped with an Ethernet port. The AWK-1131A has a default IP address
that must be used when connecting to the device for the first time.
• Step 1: Select the power source.
The AWK-1131A can be powered by a DC power input. The AWK-1131A will use whichever power source
you choose.
• Step 2: Connect the AWK-1131A to a notebook or PC.
Since the AWK-1131A supports MDI/MDI-X auto-sensing, you can use either a straight-through cable or
crossover cable to connect the AWK-1131A to a computer. The LED indicator on the AWK-1131A’s LAN port
will light up when a connection is established.
• Step 3: Set up the computer’s IP address.
Choose an IP address on the same subnet as the AWK-1131A. Since the AWK-1131A’s default IP address is
192.168.127.253, and the subnet mask is 255.255.255.0, you should set the IP address of the
computer to 192.168.127.xxx.
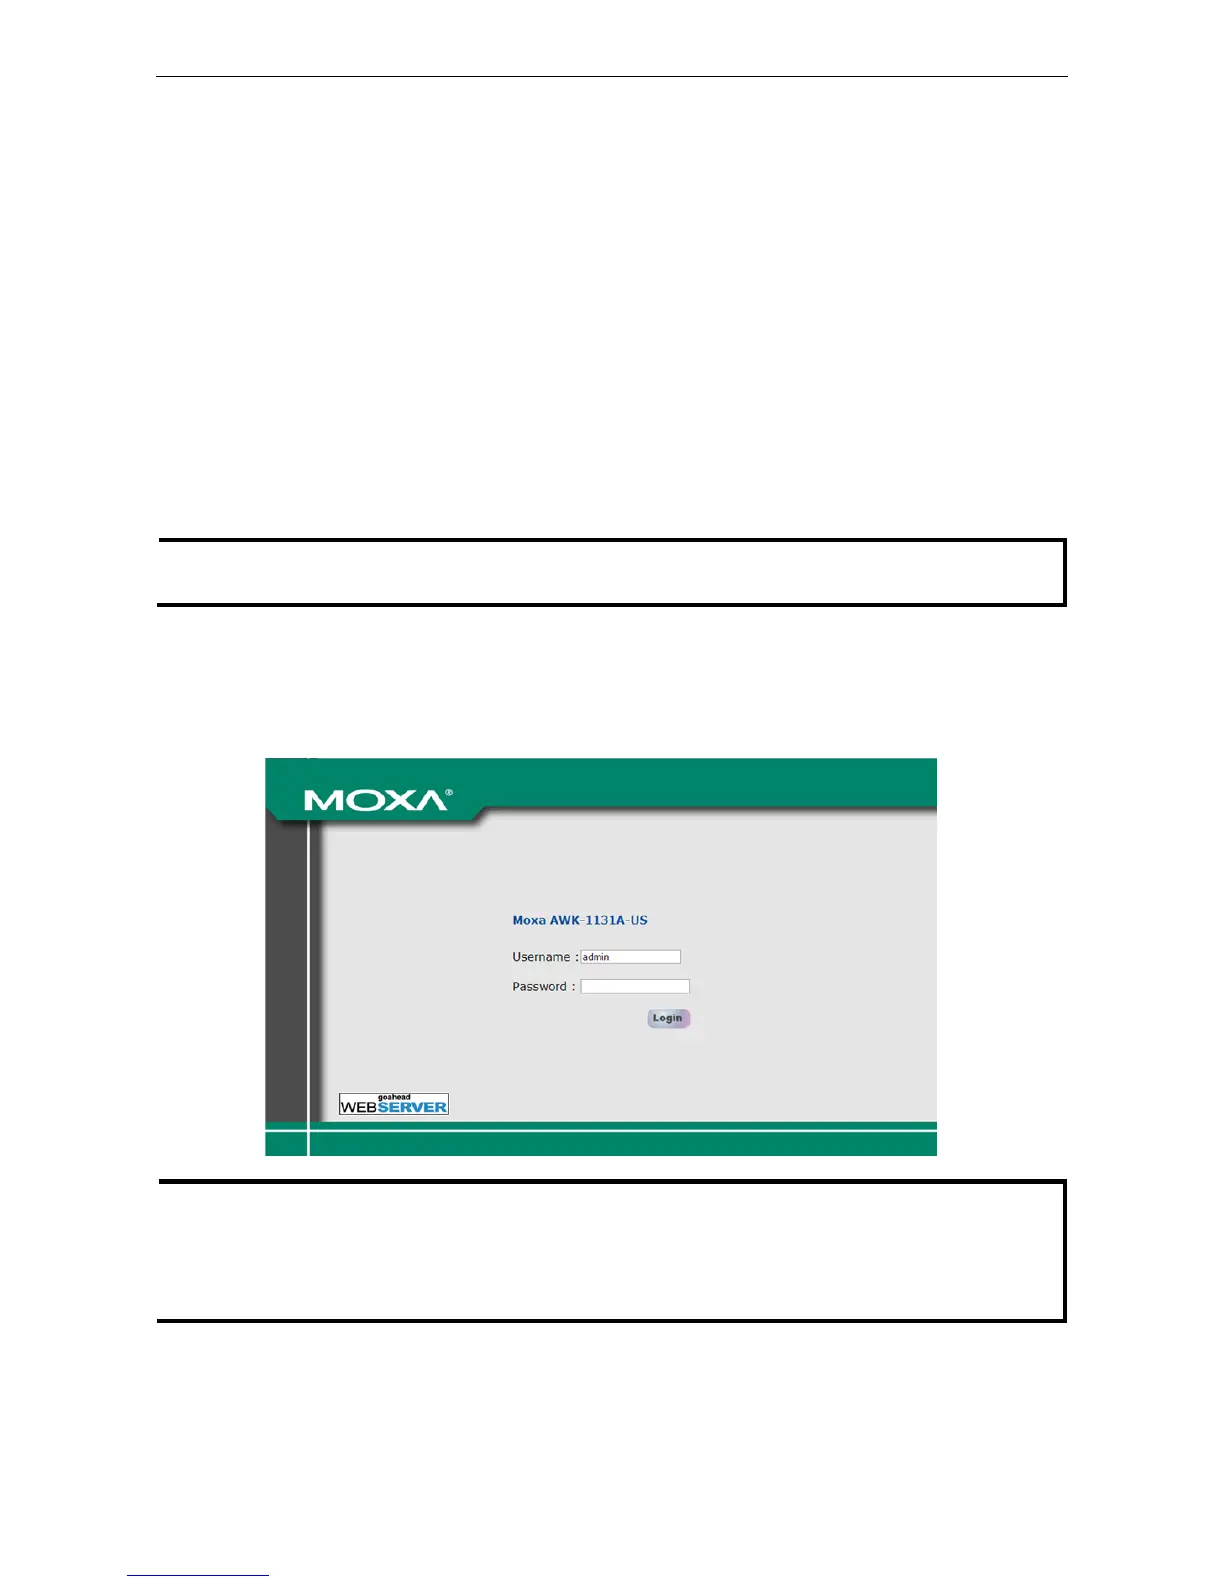
• Step 4: Use the web-based manager to configure the AWK-1131A
Open your computer’s web browser and type http://192.168.127.253 in the address field to access the
homepage of the web-based Network Manager. Before the homepage opens, you will need to enter the user
name and password as shown in the following figure. For first-time configuration, enter the default user
name and password and then click on the Login button:
For security reasons, we strongly recommend changing the default password. To do so, select Maintenance
 Loading...