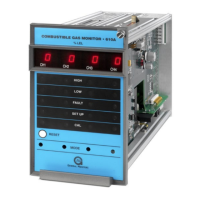
23
1. Press and hold the Mode button until the SETUP LED begins flashing (about twenty
seconds).
2. Continuing to press and hold the Mode switch until the SETUP LED stops flashing
(about five seconds more).
3. When the SETUP LED stops flashing and stays on, release the Mode button and the
unit enters the Setup mode.
3.7.1 Entering the Password
This option applies to the Setup mode only:
• If the Password option is enabled, the right digit of the display is blank and a 0
appears in the lef t digit on the display. Press the Mode button until the f irst
number of your password displays, and then wait about five seconds.
• The lef t digit of the display blanks out and a “0” appears in the right digit on t he
display. Press the Mode button until your correct pass word number di splays,
then wait about five seconds. If the password is correct, the unit proceeds t o t he
Password Enabled/Disabled option. If the password is incorrect, the user cannot
proceed and the unit returns to the normal operating mode. Once in the operating
mode, the user may re-enter the Setup mode. The f actory def ault pas sword is
00.
3.7.2 High Alarm Options
Next, the High LED is flashing while the energized/de-energized opt ion d is play s. This
option is available for discrete relay configurations only. The display indicates the current
selection, (En or dE). Press the Mode button to toggle the selection. De-Energized (dE)
is the factory default for this selection.
The High LED on the front panel flashes while the latching/non-latching option displ ays .
The display indicates the current selection, (nL or LA). Press the Mode button to toggle
the selection. Latchi ng (LA) is the factory default for this selection.
The last High alarm option to appear on the display is the alarm set point (t rip level). If
this level is reached or exceeded, the High alarm outputs activate. The display indi cat es
the current High alarm set point (5 to 60 in increments of 5). Press the Mode button
repeatedly, until the desired High alarm set point appears on t he d ispl ay. The f act ory
def ault for this selection is 60. In case of common alarms, this option is avai labl e at the
master board only.
NOTE: The High set point cannot be set lower than the current Low set point. To
accomplish this, you need to go through set-up twice. The Low set point should
be set lower than the desired High set point, then re-enter the Setup mode and
set the High set point.
3.7.3 Low Alarm Options
Next, the Low LED flashes while the energized/de-energized option displays. This option
is available only f or discrete alarm conf igurations. The display indicates the current