B-9
WARNING
Use the proper size wire to any equipment connected to the
Chillgard RT Relay Module relay; otherwise, a fire or
electrical damage may result.
1.
Refer to FIGURE B-2 for the relay wiring entries into the Chillgard
RT
Relay Module.
2.
Remove the hole plug(s) required and route the relay wiring
through the hole(s) using proper hardware/conduit (not supplied).
3.
Strip each relay wiring conductor.
4.
Determine the relay functions necessary (see front door label for
relay l
ocations and contact information). Insert each stripped relay
wiring conductor into the connector for the desired function.
5.
Tighten each screw within the connector to secure each wire.
6.
Pull on each wire to ensure that it will remain in place. If a wire
comes out of the connector, loosen the screw, reinsert the wire
and
re-t
ighten the screw.
7.
Once wiring is complete, close and secure the front panel of the
C
hillgard RT Relay Module.
CAUTION
Do not allow the front panel of the Chillgard RT Relay
Module to remain open during use.
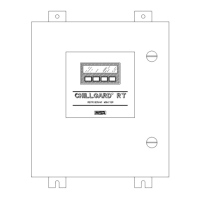
Operation
Front Panel Indicators
(see FIGURE B-1).
Power Indicator
The power indicator shows that power is properly applied to the unit.
• I
f this indicator is not ON when power is applied, refer to the
Se
ction 4, Troubleshooting Guidelines.
Troubl
e Indicator
The Trouble Indicator turns ON and remains ON when a trouble
condition is detected. The trouble condition may exist at the controlling
Chillgard RT Refrigerant Monitor or it may exist locally at the Chillgard
RT Relay Module.