USER MANUAL V1.0 | Updated January 19, 2019 15
INSTALLATION PROCEDURES
See at QUICK GUIDE.
GETTING STARTED
Install the machine on your conveyor according to the installation instructions. See the Quick
Guide for more information.
Set print direction and appropriate throw distance to obtain best print quality (1-3 mm).
Insert ink cartridge.
Plug the power cord into an appropriate power source to start up the machine.
Insert keyboard receiver to keyboard port, turn on wireless keyboard.
EXTERNAL DEVICES CONNECTIONS
NOTES:
Machine is able to operate with External Sensor, Encoder, Alarm at a time. Consult your
supplier for further supports on the settings and connections.
To connect machine with External Sensor, Encoder, Alarm, etc…, additional connector
DB15 (male) will be required.
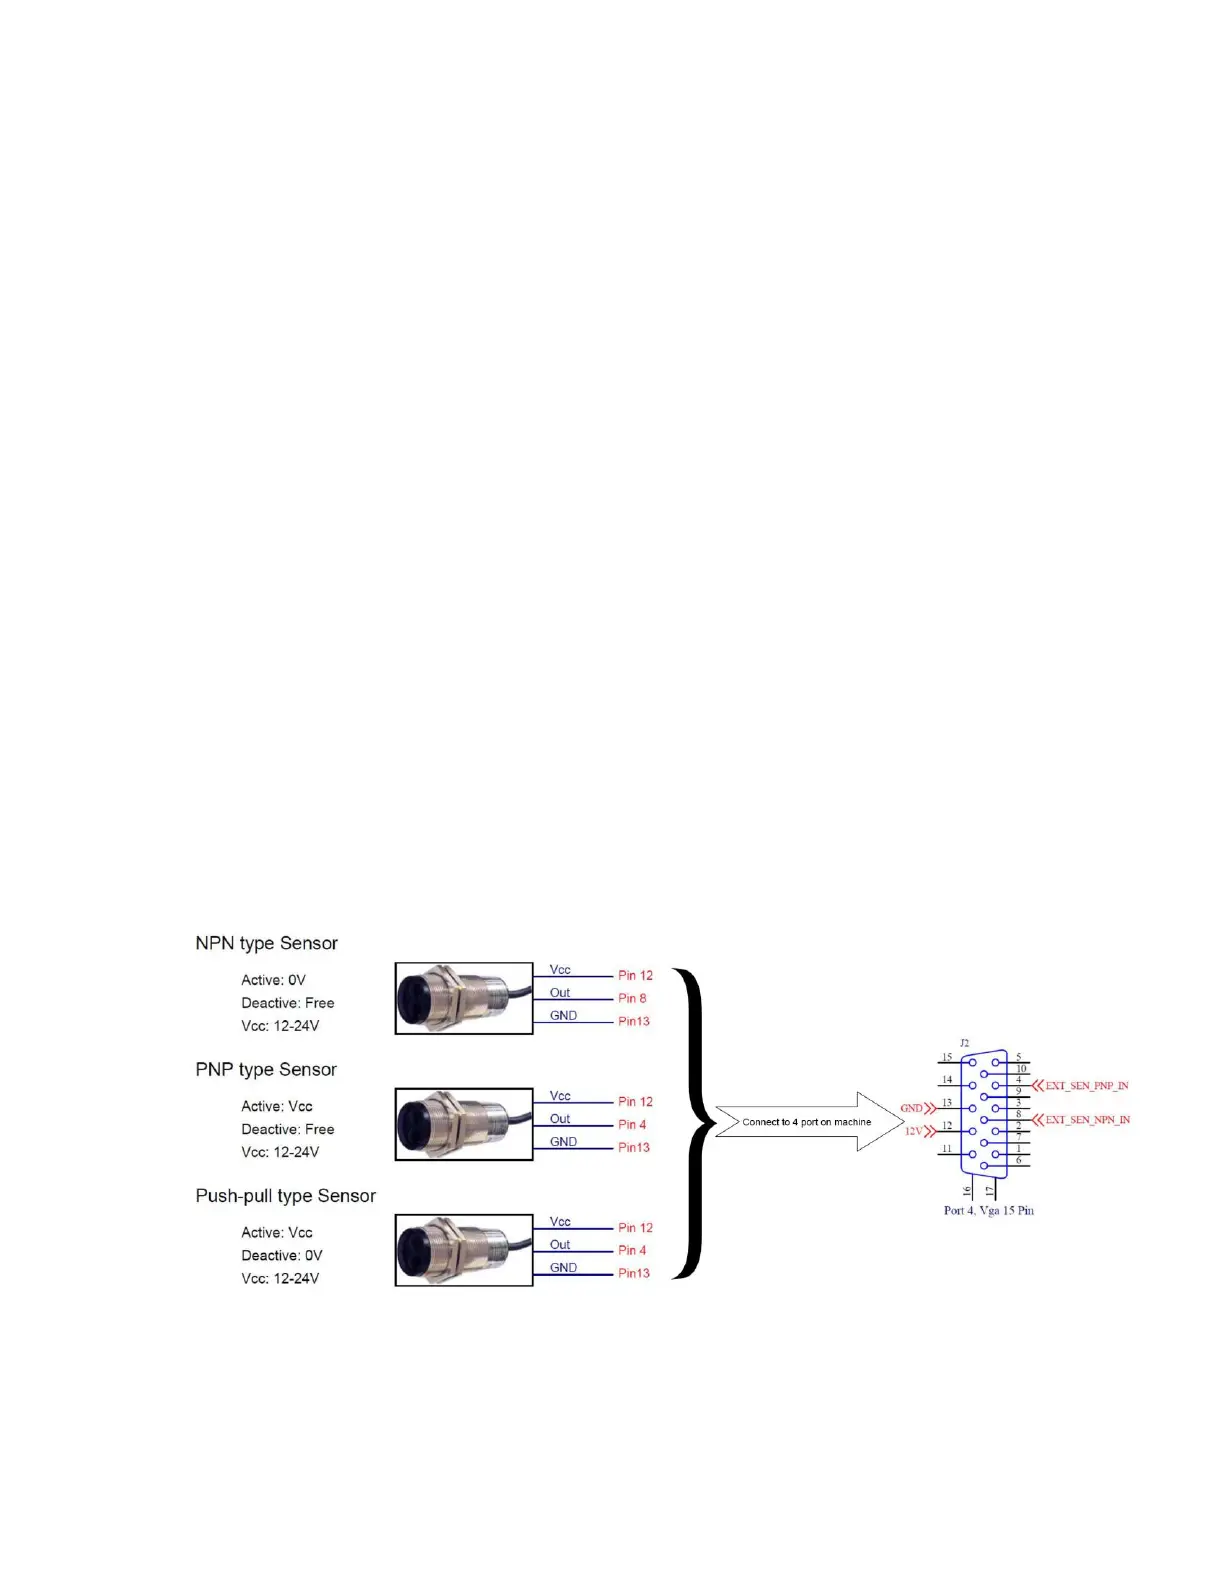
EXTERNAL SENSOR
Machine supports NPN, PNP and Push-pull sensor types.
Connect sensor using power supply on machine.
Connect sensor to machine using external power supply. Below demonstration is for
external power supply of 5V.