USER MANUAL V1.0 | Updated January 19, 2019 32
From the Settings menu, use or arrow keys to move the cursor to Density, press Enter.
Move the cursor to your desired density and press Enter to apply.
NOTES:
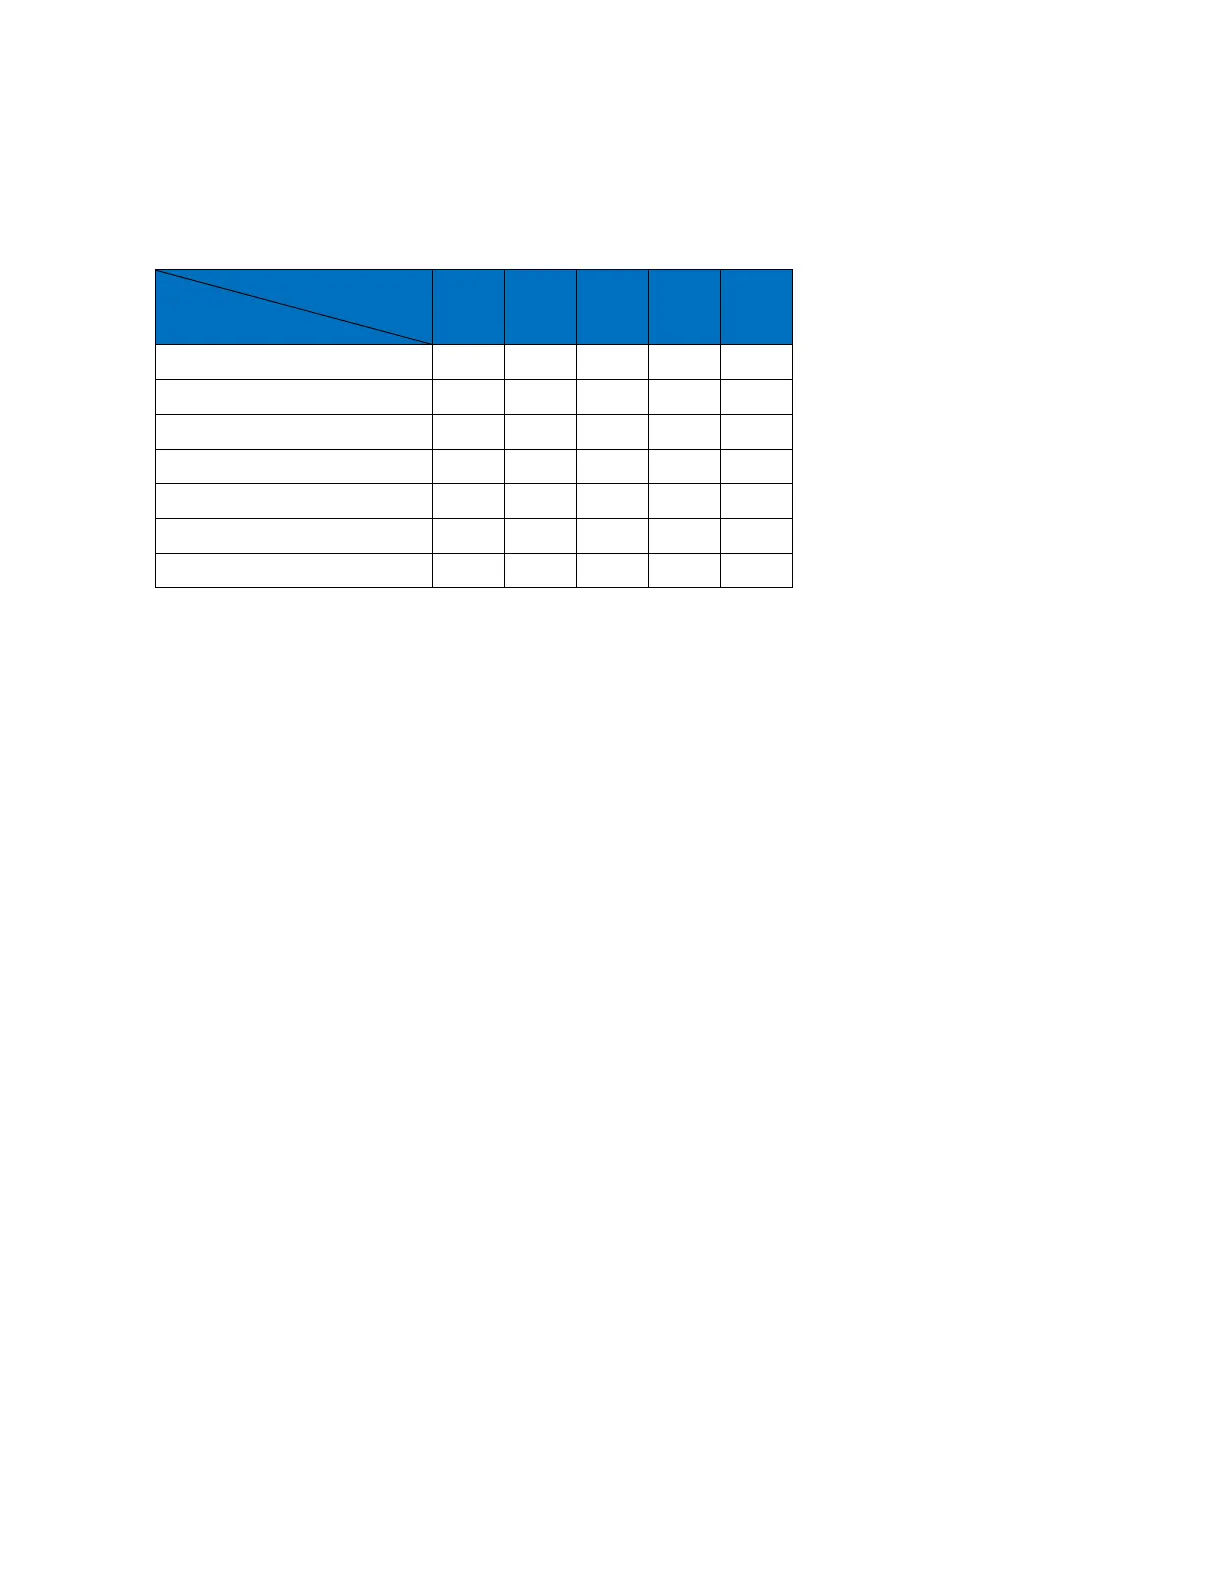
Print speed will be varied according to the resolution and the optical density.
Table below is used to explain about relationship between: Speed, Resolution and Density.
Delay
Delay before print and Delay after print (mm).
• Delay before print: set the distance since the sensor receives signal to the start of printing.
Input value at Value, press Enter to apply settings.
• Delay after print: set the distance that the print head will delay after it finished the previous
print and before it begins the next print. Input value at Value, press Enter to apply settings.
NOTES:
Delay before print varies from 1 to 10.000 mm.
Delay after print varies from 1 to 10.000 mm.
Cartridge
Display the current level of ink in the cartridge (using smartcard).
From the Settings menu, use the arrow keys to go to Cartridge and press Enter.
NOTES:
Alarm is triggered when there is 5ml left in the cartridge.
Printer will stop print when show warning out of ink.
Update Logo
Update logos or images from USB flash to the machine memory. Be sure your new logos are
available on your USB flash.
Logos stored on your USB flash must be processed by our application See Convert logo.
Machine accepts logo with .hex format only. All logos must be named in order as LOGO1,
LOGO2, LOGO3 and LOGO4 as showed below.