STARTER AND CHARGING SYSTEMS
44
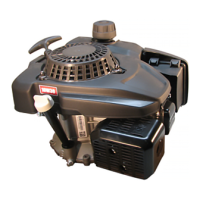
3. Install a starter cup by placing it on the flywheel,
with the dimple on the bottom of the starter cup
in the dimple in the flywheel.
See Figure 6.3.
4. Install the flywheel nut and tighten it to a torque
of 47 - 52 ft-lbs (64 - 70 Nm).
Starter Rope
The most common failure mode for most recoil assem-
blies is a broken rope.
NOTE: If the spring was not damaged when the
recoil sprung back, It is possible to simply
remove the remnants of the old rope and install
a new rope.
1. Remove the starter by following the steps
described earlier in this chapter.
2. Remove the old starter rope by prying out the
starter cord knot and pulling the rope out with it.
3. Cut a piece of #4 recoil rope 7’ (2.1 meters)
long.
4. Heat fuse the ends of the starter rope, and tie a
double half-hitch in one end.
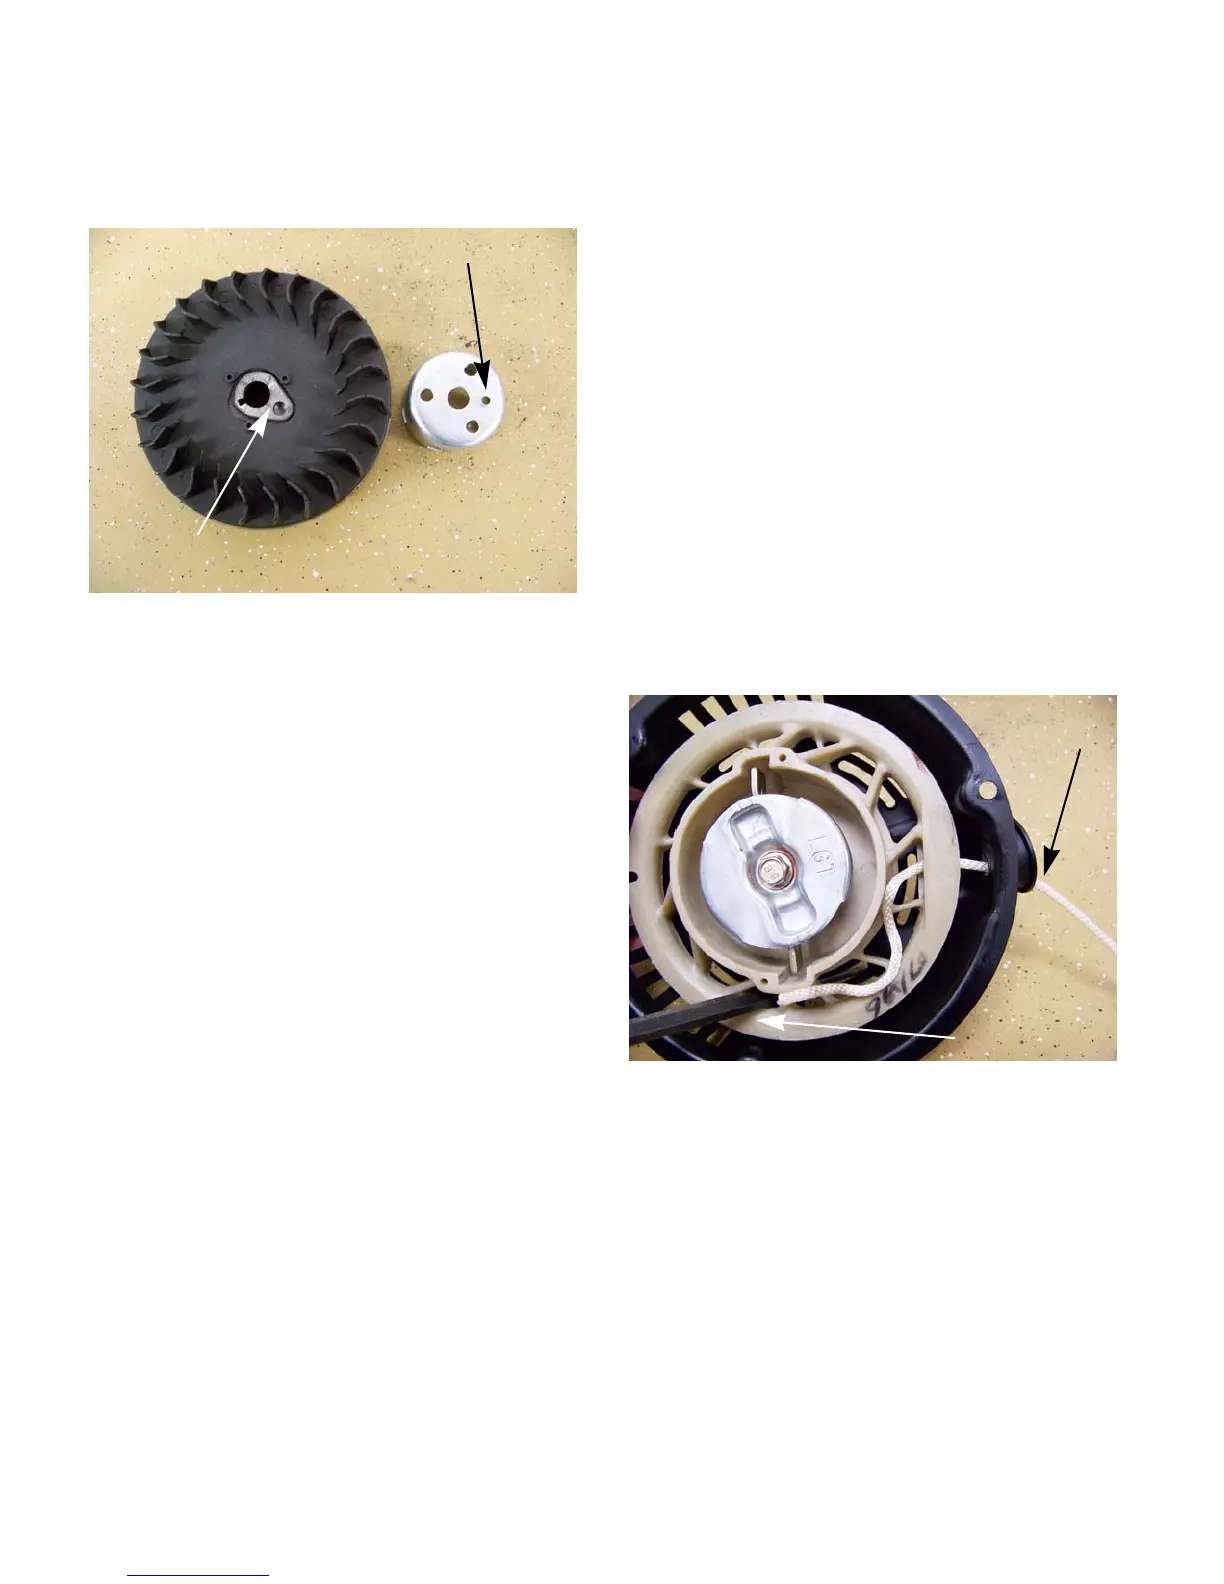
5. The rope may be easily installed from the out-
side-in. Pull the rope tight to seat the knot firmly
in the recess in the back of the pulley.
See Figure 6.4.
NOTE: It may be necessary to wind the pulley
clockwise to line up the hole in the pulley to the
hole in the starter housing. If so, use a punch or
screwdriver to block the pulley, preventing it from
rewinding.
See Figure 6.4.
6. Wind the spring tightly. Then relieve it minimum
1 full turn, counting when the pulley knot aligns
with the rope bushing in the housing. (This usu
-
ally results in about 1.5-1.75 complete turns of
relief), and block it with a punch or screwdriver to
keep it from rewinding.
Figure 6.3
Flywheel dimple
Starter cup dimple
Figure 6.4
Rope inserted
from the inside
out
pulley blocked
www.mymowerparts.com
For Discount White Outdoor Parts Call 606-678-9623 or 606-561-4983
 Loading...