CYLINDER HEAD
62
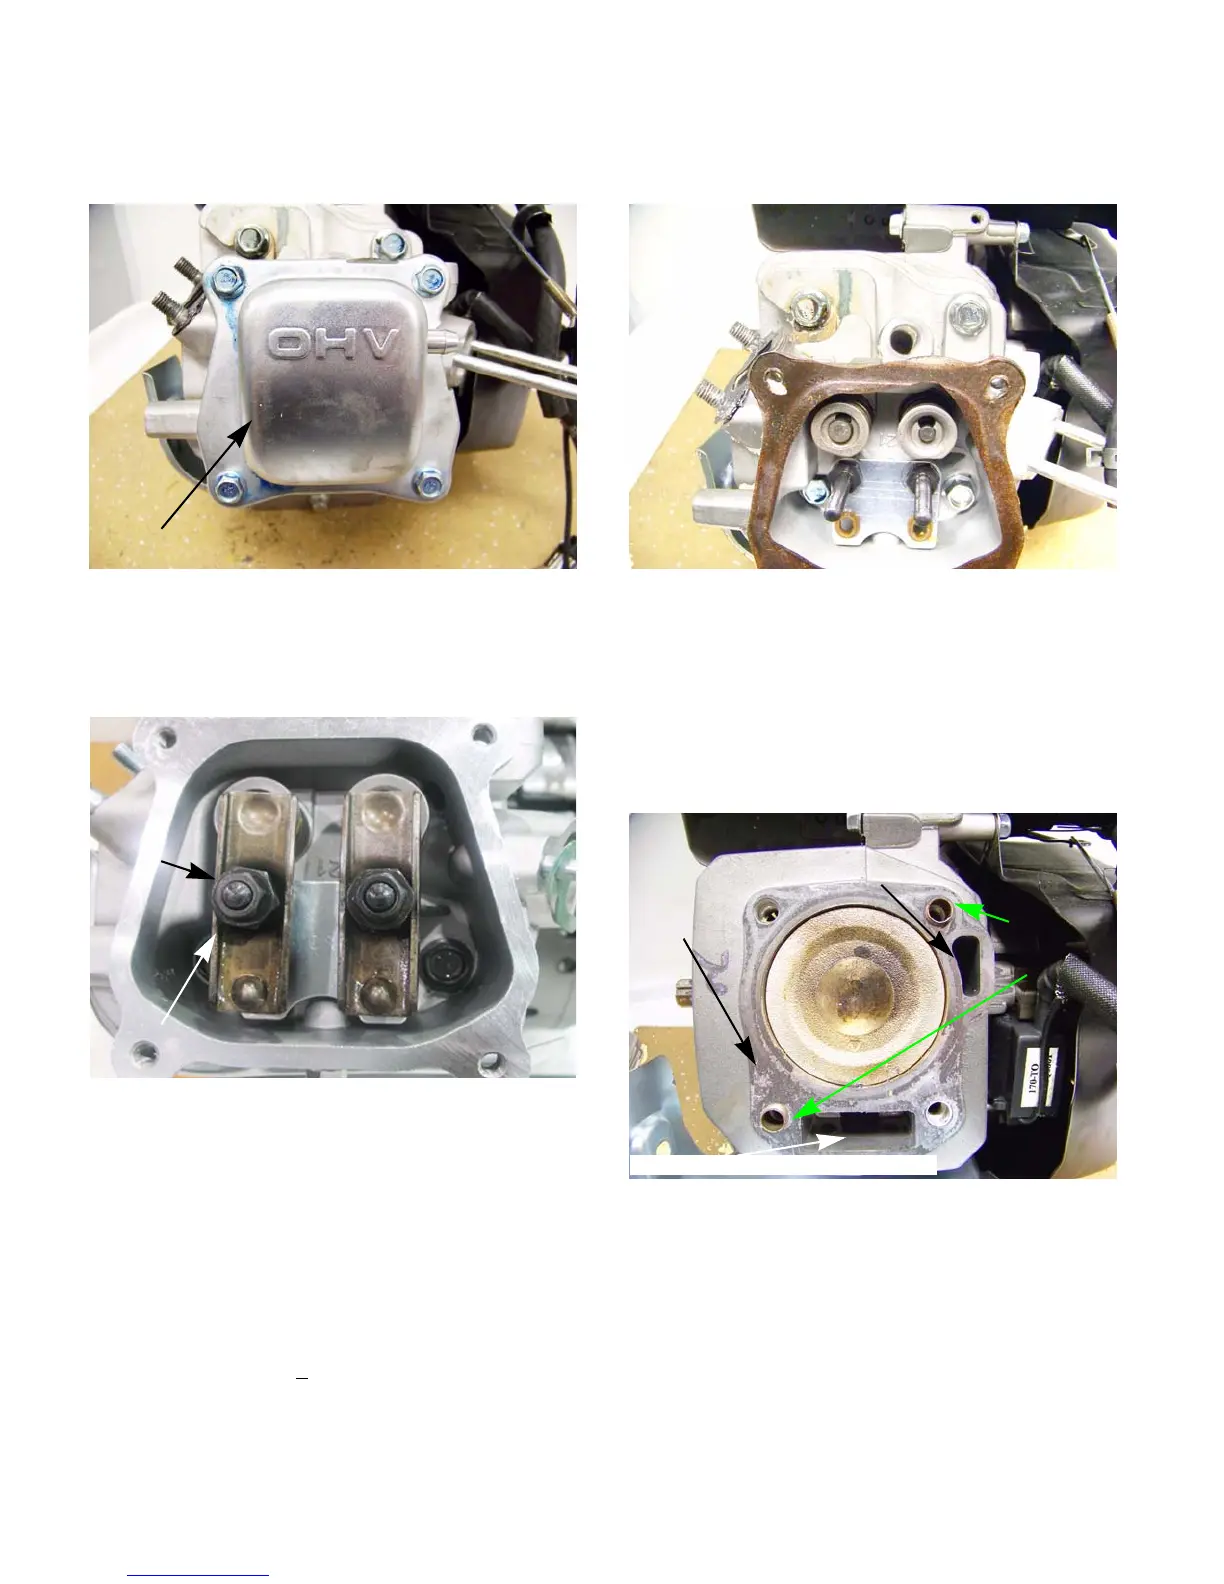
9. Remove the four screws securing the valve
cover using a 10mm wrench.
See Figure 9.4.
10. Loosen the jam nuts and fulcrum nuts that
secure the rocker arms using a 10mm wrench
and a 14mm wrench.
See Figure 9.5.
11. Pivot the rocker arms aside, or remove them
completely, and remove the push rods.
NOTE: Once broken-in, the rocker arm should
be kept with its corresponding valve.
NOTE: The intake and exhaust push rods are
identical and interchangeable. It is preferable,
but not absolutely necessary to return the same
push rods to their original locations on engine
with substantial (
>100 hours) operating time.
12. If replacing the head, double-nut and remove the
exhaust and carburetor studs.
13. Remove the cylinder head bolts using a 12mm
wrench.
See Figure 9.6.
14. Lift the cylinder head off of the engine.
15. Carefully clean all sealing surfaces of all gasket
residue. Do not scratch the sealing surfaces.
See Figure 9.7.
NOTE: Make a visual inspection of the valves
and cylinder bore to confirm the initial diagnosis.
Figure 9.4
Remove valve cover
Figure 9.5
Jam nut
Fulcrum nut
Figure 9.6
Cylinder head
bolts
1
2
3
4
Figure 9.7
Clean gasket
surface
Oil supply passage
Push rod chamber and oil return
Alignment
dowels
www.mymowerparts.com
For Discount White Outdoor Parts Call 606-678-9623 or 606-561-4983
 Loading...