Page 77
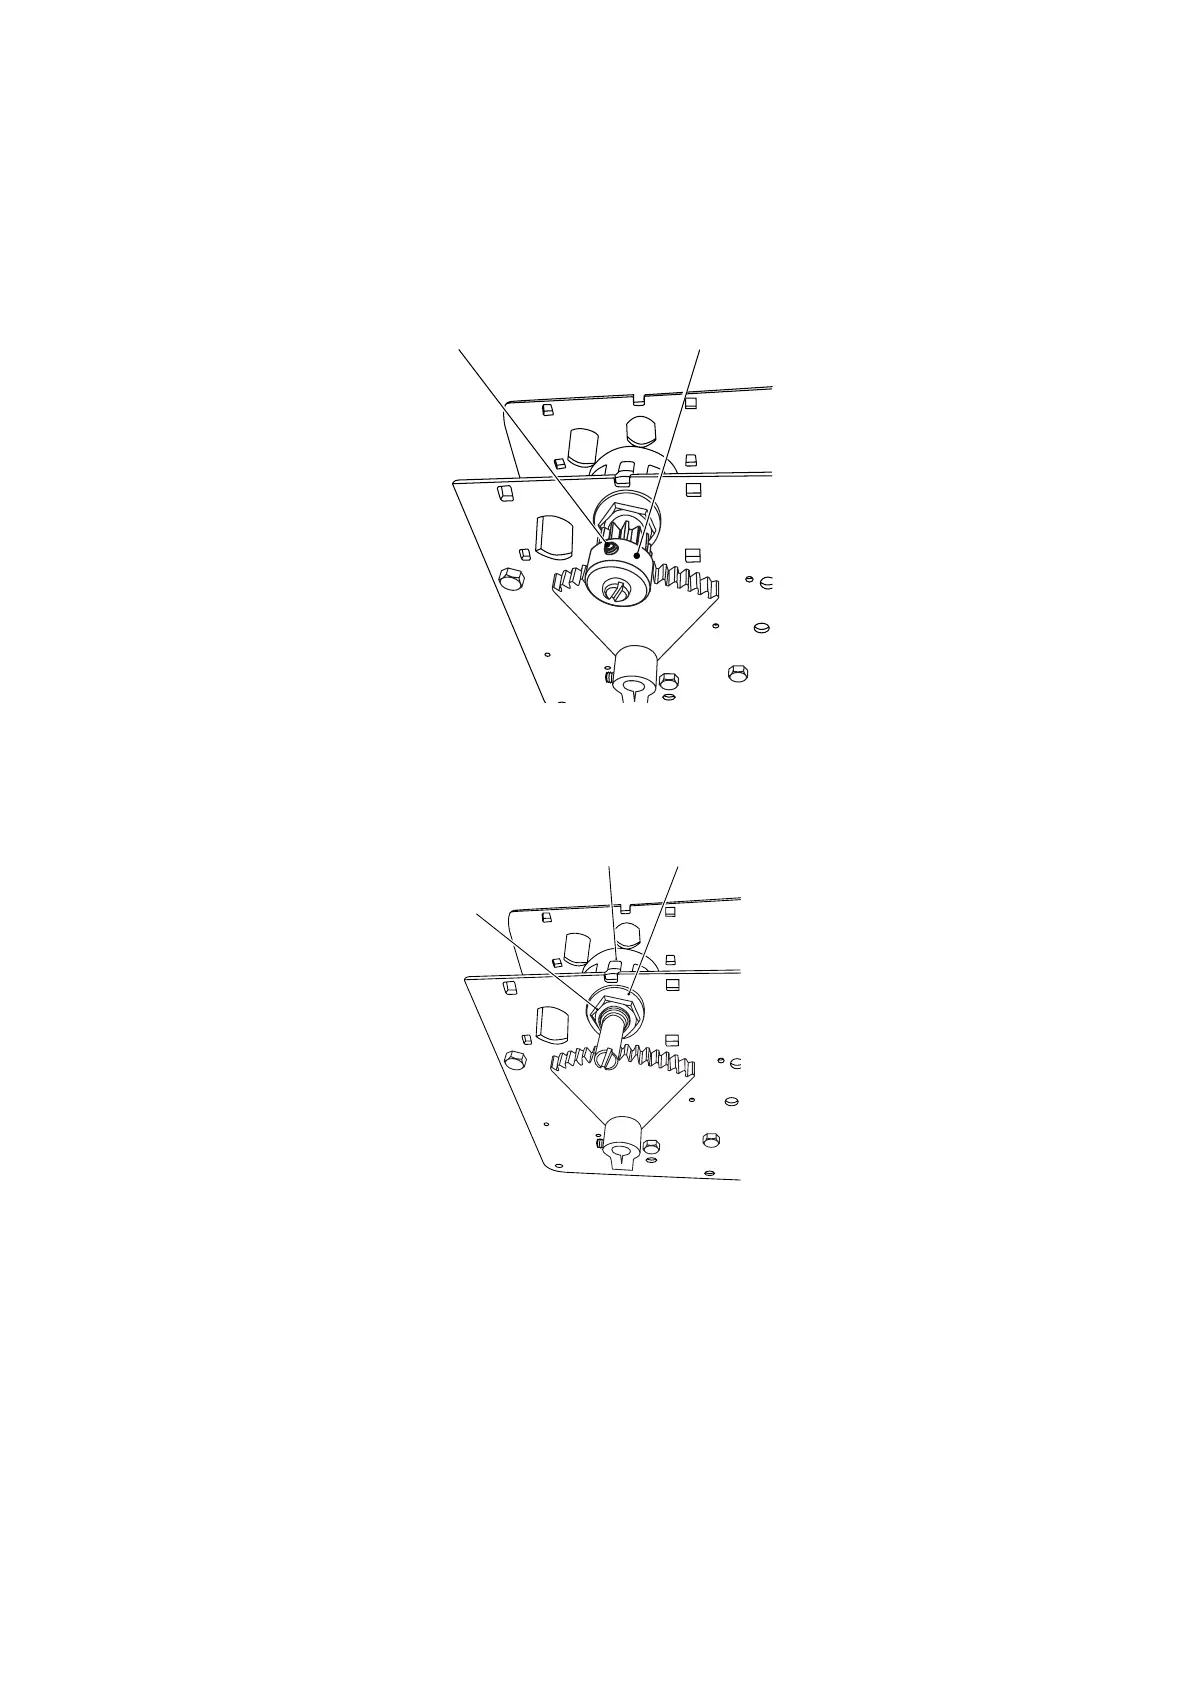
7-12-1 Replacing the Pedal Potentiometer
1. Remove the pedal asembly. (see 7-12 page 75)
2. Slacken the hex socket screw (M4x8) and remove the Gear.
3. Remove the Hex Nut and Washer and replace the potentiometer ensuring that the
correct colour wires go to the correct terminals.
Note: When replacing the potentiometer ensure that before refitting the gear the
potentiometer shaft is turned fully clockwise and then back anti-clockwise
1
/
8
turn.
4. Reassemble in reverse order.
Note: After replacing the potentiometer ensure that the game is re-initialized. (see
5-4 page 40)
Hex Socket Screw
Gear
Hex Nut
Washer
Ptentiometer
 Loading...