Page 38
5-4 Adjusting the Level Adjusters
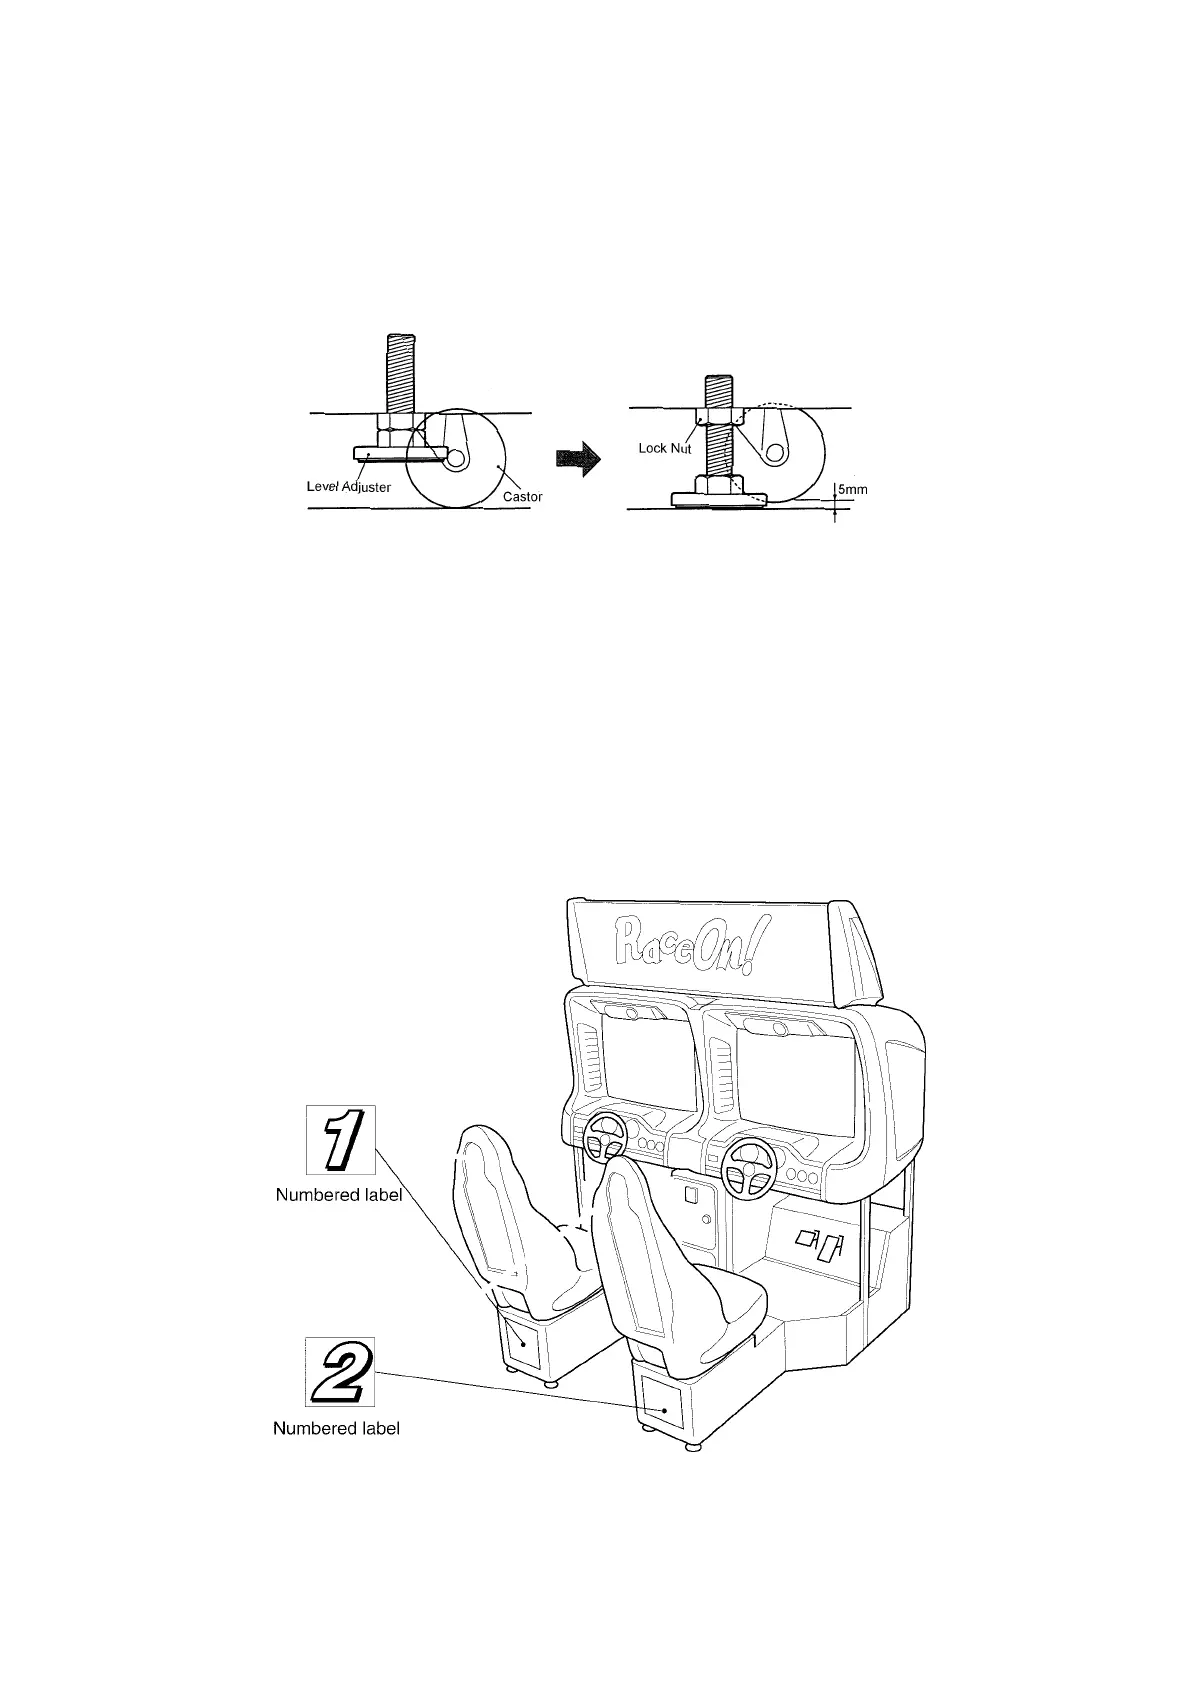
1. When the assembled game is in its final position, lower the twelve (12)
level adjusters,(4off Monitor Assy and 4off each Seat Assy), with a
spanner so that the machine is level and all castors are raised from the
floor by approx. 5mm. Tighten the lock nuts with a spanner to ensure that
the level adjusters do not move.
Note: If the location site of this machine has a polished floor it is recommended
that rubber pads are fitted under the level adjusters to prevent the
machine sliding on the floor when in use.
5-5 Fitting the Number Decals
1. Fit the self adhesive number decals to the rear of each seat with the left
seat, viewed from the rear of the seat, as No1 and the right seat as No.2.
(See Section 6-3-2 page 46 to set the game PCB ID correctly)
2. If linking 2 or more cabinets, the numbering should continue consecutively
from left to right. (viewed from the rear of the seat)
 Loading...