26
W415-0794 / A / 06.08.10
6.4 ACCENT GLASS INSTALLATION
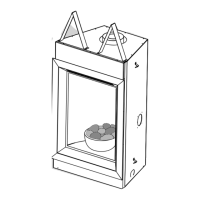
Carefully sprinkle the accent glass onto the glass
support evenly. Ensure no glass falls into the burner
area. If this happens, insert a clean bag into your
vacuum cleaner and vacuum out the accent glass.
Replacement accent glass can be purchased from
Wolf Steel Ltd.
GLASS
SUPPOR
ACCENT
GLASS
BURNER
6.5.1 Turn off the electrical and gas supply to the appliance.
6.5.2 Remove the frame from the appliance by removing the 2
black securing screws from the top, and the 2 silver hex
head securing screws from the bottom.
6.5.3 Lay the frame down on its front, being careful not to
scratch the fi nish.
6.5.4 Starting at the top of the frame, take one light assembly
and carefully snap it into place in the hole provided. Re-
peat for each of the light assemblies. The wires on the
top 2 light assemblies will need to be fed in behind the
heat shields.
NOTE: When installing the light kit be careful not to scratch
your fi ngers on any of the exposed screws in the frame.
6.5.5 Using illustration as a guide, connect the light assem-
blies to the appropriate fl ags on the wire harness. The
wire harness is labeled (TR) top right, (BR) bottom right
(TL) Top left and (BL) bottom left.
6.5.6 Secure the wires into the clips at both sides and the bot-
tom of the frame. Use the extra clips provided to retain
any loose wires.
6.5.7 Re-attach frame onto appliance.
6.5.8 Remove the control panel by removing the 2 screws se-
curing it along the top edge. Leave the wires connected
to the ON/OFF switch.
6.5.9 Place the transformer into the bottom of the appliance.
Plug the transformer into the receptacle.
6.5.10 Lay the control panel fl at along the bottom edge of the
frame. Attach one of the wire leads from the transformer
to the lead on the wire harness labeled “TRANS”, and
the other to the ON/OFF switch. Attach the last lead on
the wire harness labeled “SWI” to the ON/OFF switch.
6.5.11 Re-secure the control panel.
6.5.12 Turn on the gas supply and electrical power.
SWI
TRANS
TR
TL
BR
BL
CLIPS X5
6.5 LK8 LIGHT INSTALLATION (OPTIONAL)
 Loading...
