8-14
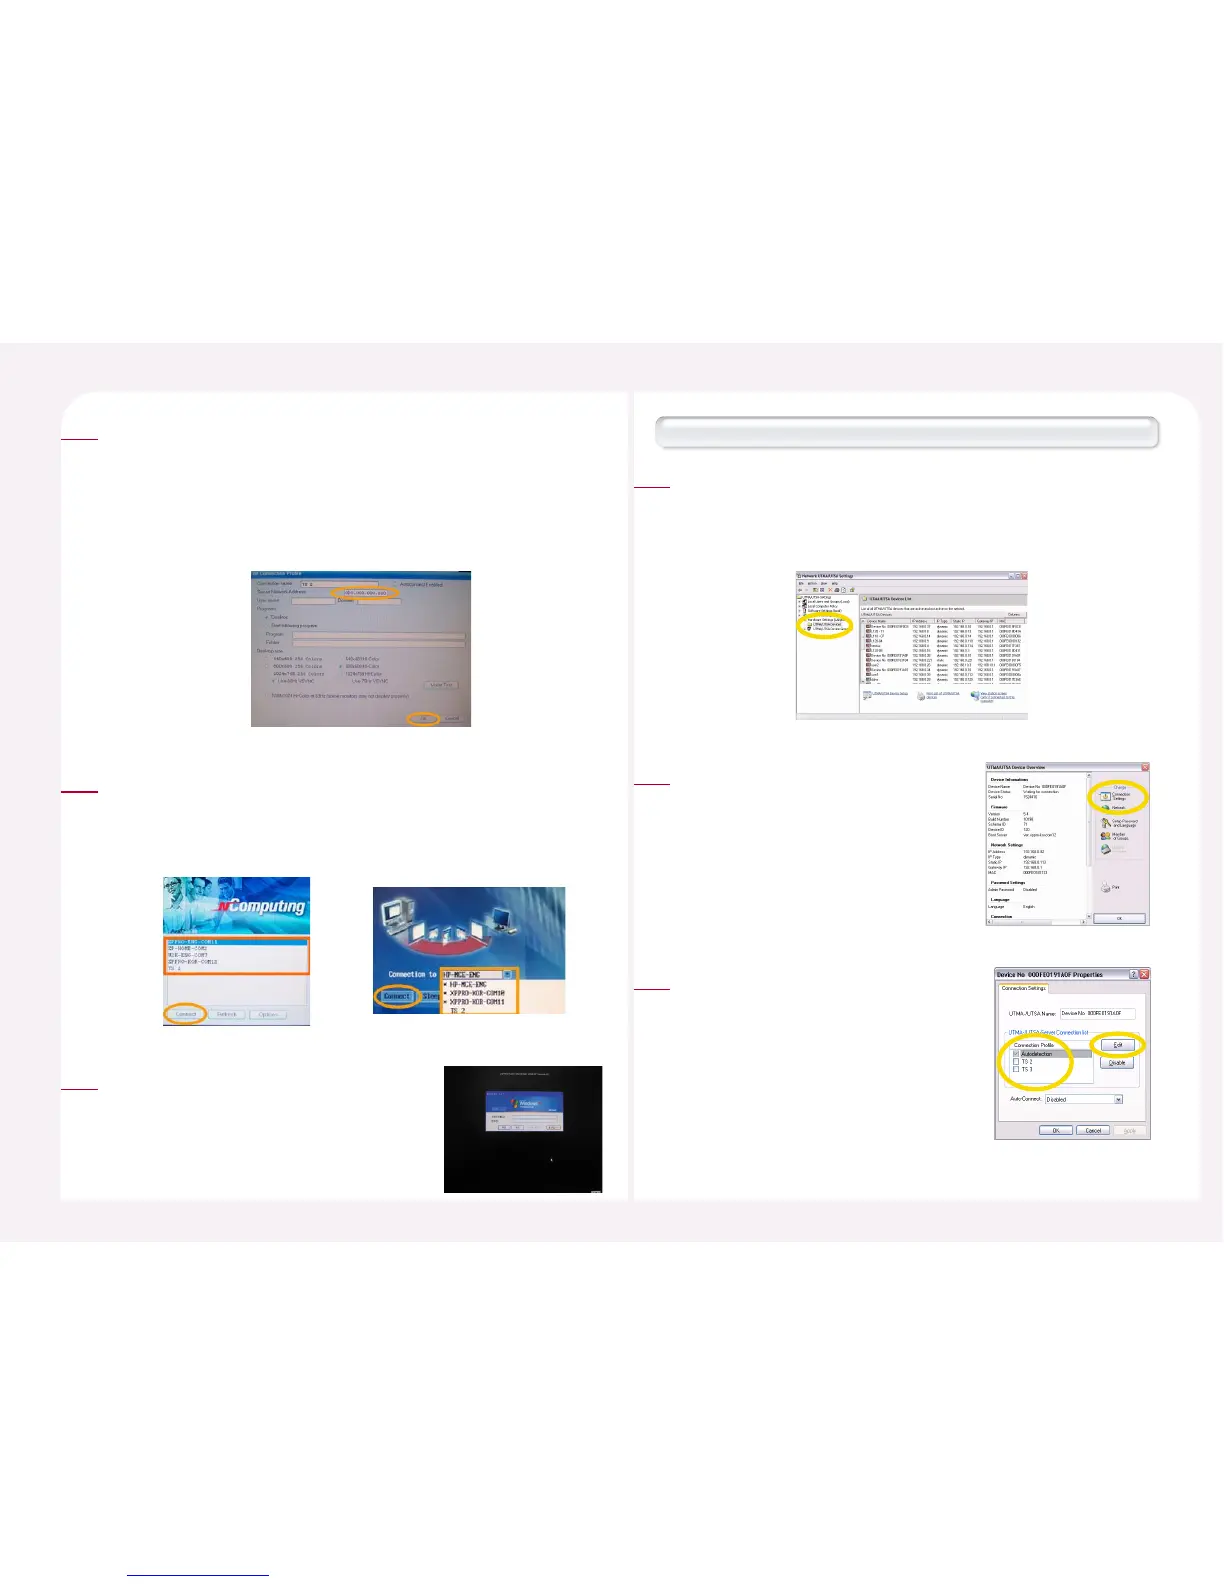
Enter the IP address of the host computer to connect to the Terminal
Server network address field. For the IP address of a host computer, refer
to ‘3. Setting and Confirming the IP Address of a Host Computer.’ If the
IP address is incorrect, the host computer will not be connected. Click
the <OK> button to save the settings and click the <Save> button to
exit the settings.
3
Click the <Connection to> arrow in the PC Expanion’s initial screen
and select a host computer from the list. If ‘Autodetection’ is not
selected and ‘TS 2’ or ‘TS 3’ is selected, ‘TS 2’ or ‘TS 3’ appears in the list
without the ‘*’ symbol.
4
Click the <Connect> button. When the
Windows logon screen appears, type the
user ID and the password.
5
How to map the PC Expanion and connect to the host PC under the NCT-2000-XP console
<Start> ▶ <All Programs> ▶ <NCT-2000-XP> ▶ Select
<NCT-2000-XP Console> in order to run the program. Go to the
<Hardware Settings (Local/LAN)> ▶ <UTMA/UTSA Device>.
Select the specific PC Expanion and then double-click it.
1
Click the <Connection Settings> icon in
the ‘UTMA/UTSA Setup view.’
2
Select ‘TS 2’ or ‘TS 3’ in the connection list
and then click the <Apply> button. Click
the <Edit> button and view the setup
host computer information. If
‘Autodetection’ is selected, up to 8 host
computers within the same sub-network
of the NCT-2000-XP application are
automatically found and listed.
3


 To Next Page