8-17
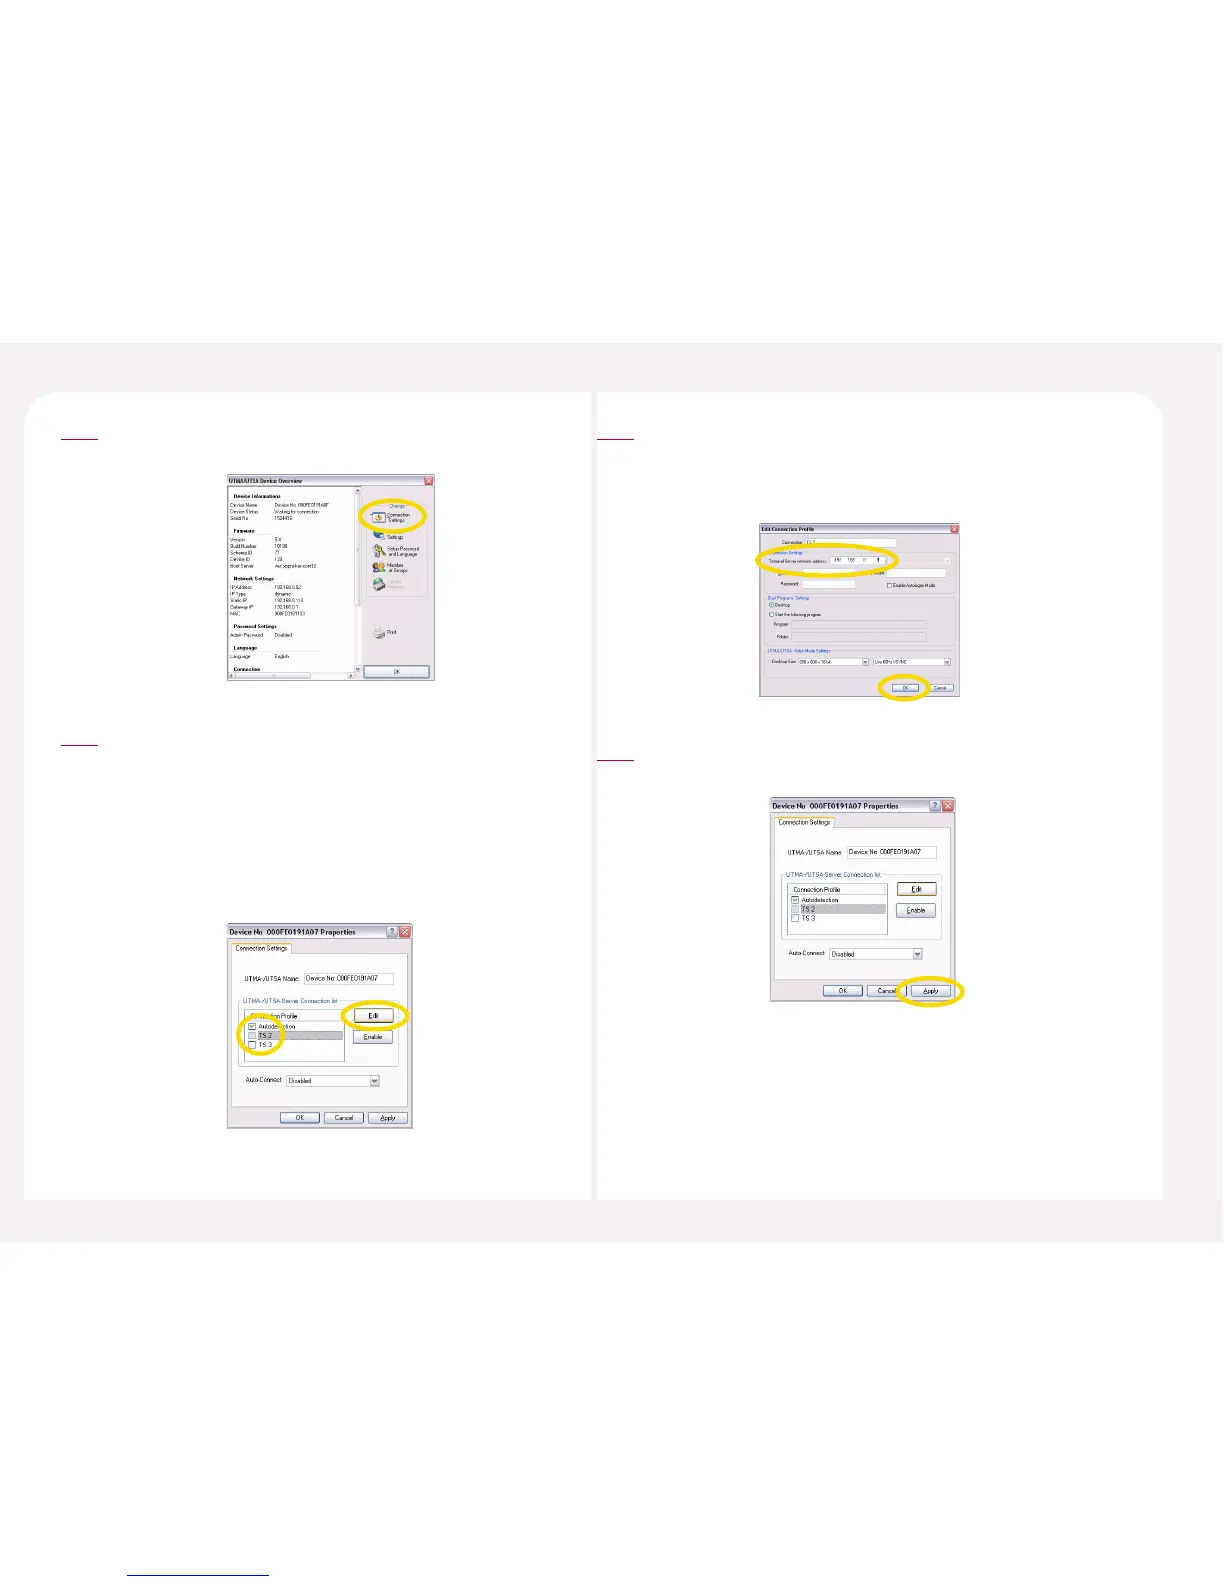
Click the <Connection Settings> icon in the ‘UTMA/UTSA Setup
view.’
2
Select either ‘TS 2’ or ‘TS 3’ from the ‘Host Computer List to Connect
to,’ click the <Apply> button and then click the <Edit> button. To
connect to a specified host computer automatically, there must be
one host computer in the <Connection to> list on the PC
Expanion’s initial screen. If ‘Autodetection’ is selected in the ‘Host
Computer List to Connect to,’ select ‘Autodetection’ and click the
<Enable-Disable> button to unselect the option. Then select either
‘TS 2’ or ‘TS 3’.
3
Input the IP address of the host PC in the “Terminal Server network
address” column of “Edit Connection Profile” window. Then click the
<OK> button. Refer to ‘3. How to check the IP address setting of host
PC” in Part 8.
4
Select the host PC that the PC Expanion is connected to automatically in
the “Auto-Connect” list. Click the <OK> button or the <Apply> button.
5


 To Next Page