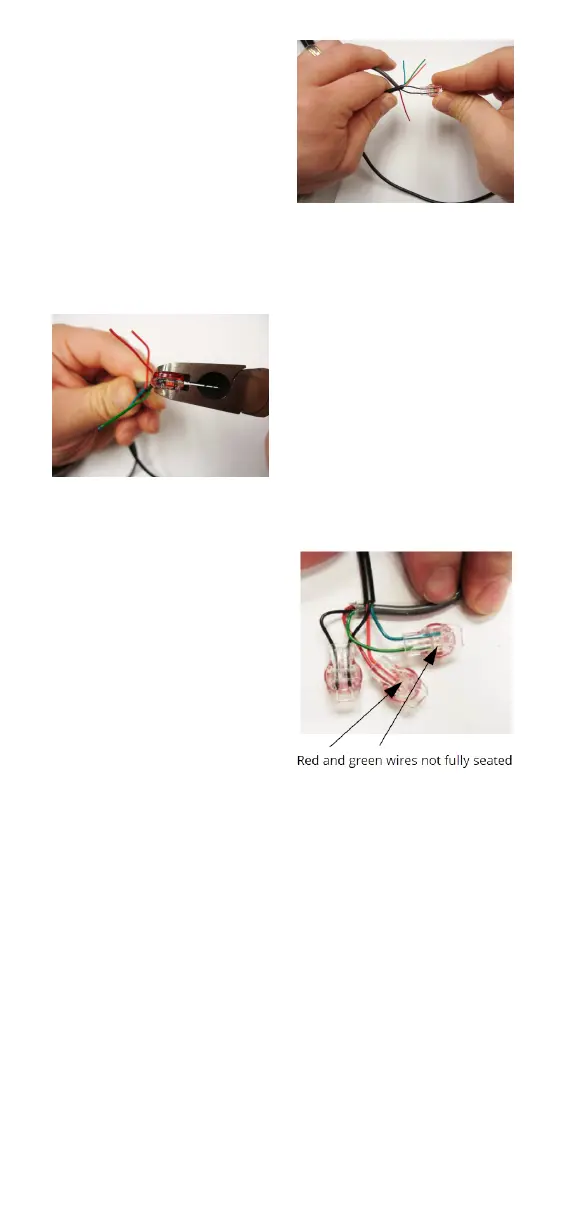
2. Take one non-
stripped black wire
from the pigtail and
one from the
receptacle / MIU and
insert the wires into
the Scotchlok
connector until fully
seated.
Figure 10: Seating
Connector Wires
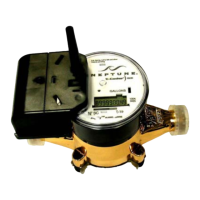
Figure 11: Crimping Tool
3. Place the connector
color cap side down
between the jaws of
the crimping tool. For
part numbers, see
Table 2 on page 14.
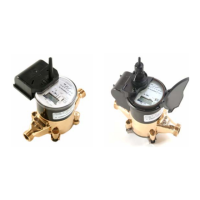
4. Check to ensure that
the wires are still fully
seated in the
connector before
crimping the
connector.
Figure 12: Improper
Connections
5. Squeeze the connector firmly with the proper
crimping tool until you hear a pop and gel oozes
out the end of the connector.
6. Repeat steps one through five for each color wire.
See Table 1 on page 9for the wiring configuration
to connect Neptune
®
MIUs or competitor MIUs to
the E-CODER
®
.
- 8 -