12
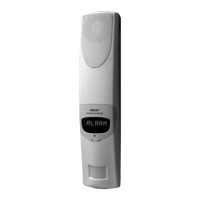
Ness Guardpost Installation & Programming
Intruder Alarms will sound the internal and external (if tted) sirens and
strobe ashes. The siren will turn off after the programmed siren time
and the strobe will ash for 1 hour or 12 hours if the system is running
on mains power.
Press the OFF button on a programmed Radio Key to cancel the alarm
and disarm the GUARDPOST.
When disarming after an alarm, Guardpost will indicate an alarm has
occurred by voice and by display. This warning may indicate that an
intruder is still present. The source of the alarm is then displayed for 5
minutes, and logged to the event memory.
Intruder alarms are not indicated when the system is in ARMED, HOME
or HOME 2 modes.
A time stamp is appended to each of the following alarm messages
displayed when displayed. For example, if the alarm occurred within 24
hours, the time stamp is appended as: ... < 2 HRS < 15 MIN < AGO; for
events older than 24 hours: ... < 1 DAY < 13 HRS < AGO.
DISPLAY DESCRIPTION
ALARM < SENSOR < 1 ALARM from the onboard detector
ALARM < SENSOR < 2-23 ALARMS from radio devices such as radio PIRs, radio reed switches.
TAMPER < SIREN < BOX SIREN TAMPER
In ARMED mode, sound a full alarm & report to the central monitoring station
when applicable.
In HOME, HOME 2 or DISARMED modes, sound a low-volume warning
sound & report. The warning will sound again for further Tamper deactivation/
reactivations.
Arming and Disarming will clear the display.
TAMPER < SENSOR < 2-23 A Sensor has reported a tamper alarm.
In ARMED mode, sound a full alarm & report to the central monitoring station
when applicable. In HOME, HOME 2 or DISARMED modes, sound a low-
volume warning sound & report. The warning will sound again for further
Tamper deactivation/reactivations.
Arming and Disarming will clear the display.
PANIC < KEY < 1-23 PANIC ALARM from a radio key or xed radio panic button or radio medical
key. On silencing a PANIC alarm (OFF button), the status display indicates
which key caused the alarm.
MEDIC < KEY < 1-23 PANIC ALARM from a medical key. During the alarm the display will show
“PRESS < OFF < TO < CANCEL < MEDIC < ALARM”. On disarming, the
status display indicates which key caused the alarm.
RADIO < JAMMED Radio jamming signal detected. If a radio signal is detected in the operating
bandwidth of the Guardpost the unit will go into ALARM mode if enabled.
RADIO < TAMPER TAMPER Radio message that is not an original message has been received.
(If RADSUB = ON).
1. A code that is a retransmitted code of an original message has been received
to try to defeat the system.
2. 20 multiple messages have been received by the system to crack the
encryption. Arming/Disarming the system will reset the count.
ALARM DISPLAYS
Alarm