INSTALLING FROSTIE - pLACEmENT ANd mOuNTING
FROSTIE should be installed so that it experiences the same temperature and humidity as the plants. Ideally, mount FROSTIE onto
a pole near or amongst the plants in the field, out in the open with plenty of free air-flow around the unit. FROSTIE can be exposed
to full weather, but would ideally be in a lightly shaded location (or would have a small roof over it) to prevent the temperature and
humidity readings being affected by direct sunshine, rain and frost. Position FROSTIE away from sprinklers and heat sources such as
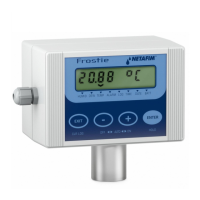
motors, water pipes, lights, direct or reflected sunlight, etc. Temperature and humidity sensors are on the bottom of the unit,
surrounded by a metal cylinder for extra protection from direct sunlight and rain and damage.
Avoid installing the unit close to the ground as heavy rain could cause mud to be spattered up over the sensors.
FROSTIE is designed to be mounted to a metal plate on a pole using four screws or bolts (M4 or M5, or #8 self-tapping). Do not drill
holes in the FROSTIE case! Drill four suitable holes in the mounting plate with centres at the corners of a rectangle 106.0 mm wide
x 65.5 mm high. Then use a small flathead screwdriver to gently lever off the two cover strips to the left and right of FROSTIE’s front
panel. Loosen all four posidrive screws and then open FROSTIE - there are hinges on the right side. (The mounting holes are in the
back panel, but the hinges cover two of the holes.) Remove the plastic hinges from the back panel by loosening the small screws
using a small Philips screwdriver and then gently pulling up on the hinges. (If the hinges appear stuck, loosen the screws further and
try again.) Mount to the plate using the four holes in the back panel, then put the hinges back in and retighten their screws. You are
now ready to continue with installation.
INSTALLATION CHECkLIST
!
Read the entire manual
!
Connect the output (eg. solenoid) Page 14
!
Install AA batteries and set the date and time Page 15
!
Test the output works properly (on and off) Page 17
!
Make all relevant settings
!
Set the alarm to automatic operation
!
Test the system
!
Clear the Log Page 8
!
Record details of your equipment and your settings
14