‣
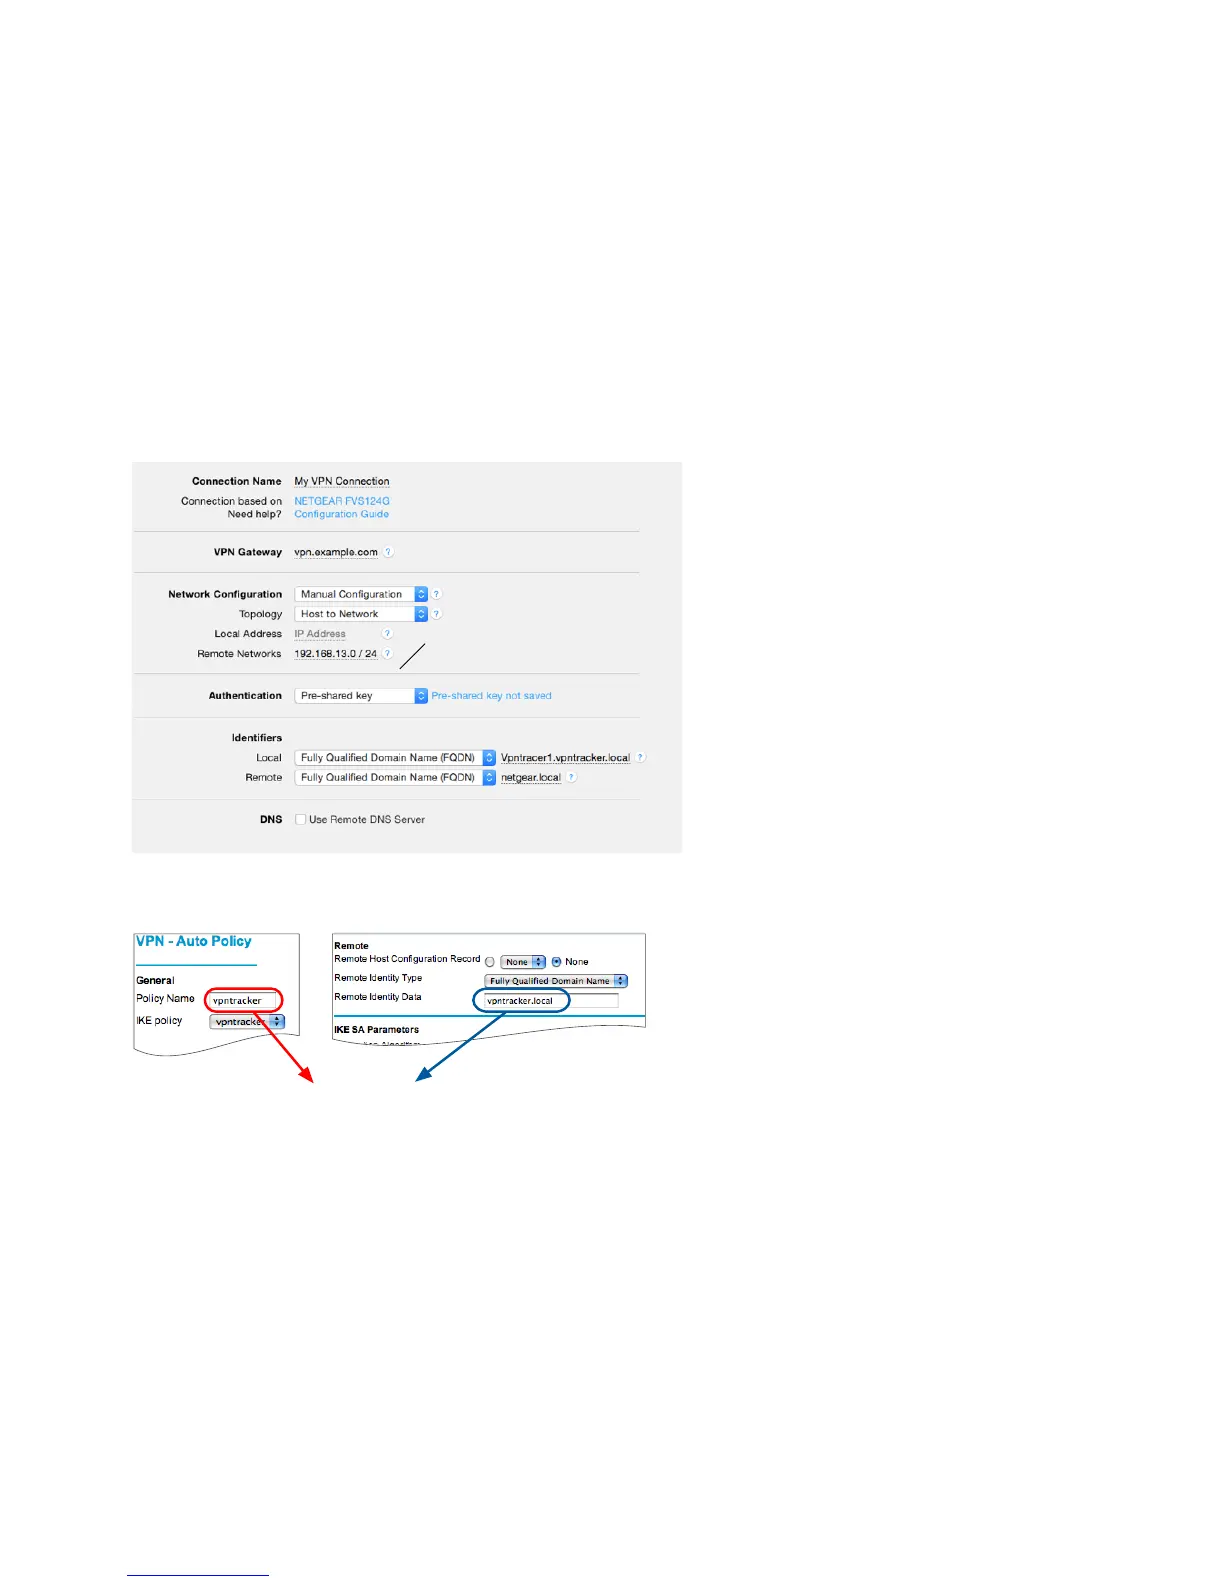
VPN Gateway: Enter your NETGEAR’s public IP
address ➍. If you are using Dynamic DNS, or if the
device has a DNS host name, use it instead (in our
example, we are using the host name
“vpn.example.com”)
‣
Local Address: Leave empty for now.
.
Depending on
your setup, you may have to set a specific Local
Address eventually. Refer to “Supporting Multiple
Users” for details
‣
Remote Networks: Enter the network address ➐
and the subnet mask ➏ of the network that is being
accessed through the VPN tunnel Separate the
subnet mask with a forward slash (“/”)
‣
Identifiers
‣
Make sure the types for both identifiers are set to
“Fully Qualified Domain Name (FQDN)”
‣
Local: The local identifier consists of the
NETGEAR’s VPN policy name ➑, a number
between 1 and 10 (different for each user of this
connection), and the NETGEAR’s remote identifier
➌ (see the diagram on the left). In our example, the
local identifier is “vpntracker1.vpntracker.local”
‣
Remote: Enter the local identifier from your
NETGEAR (e.g. “netgear.local”) ➋