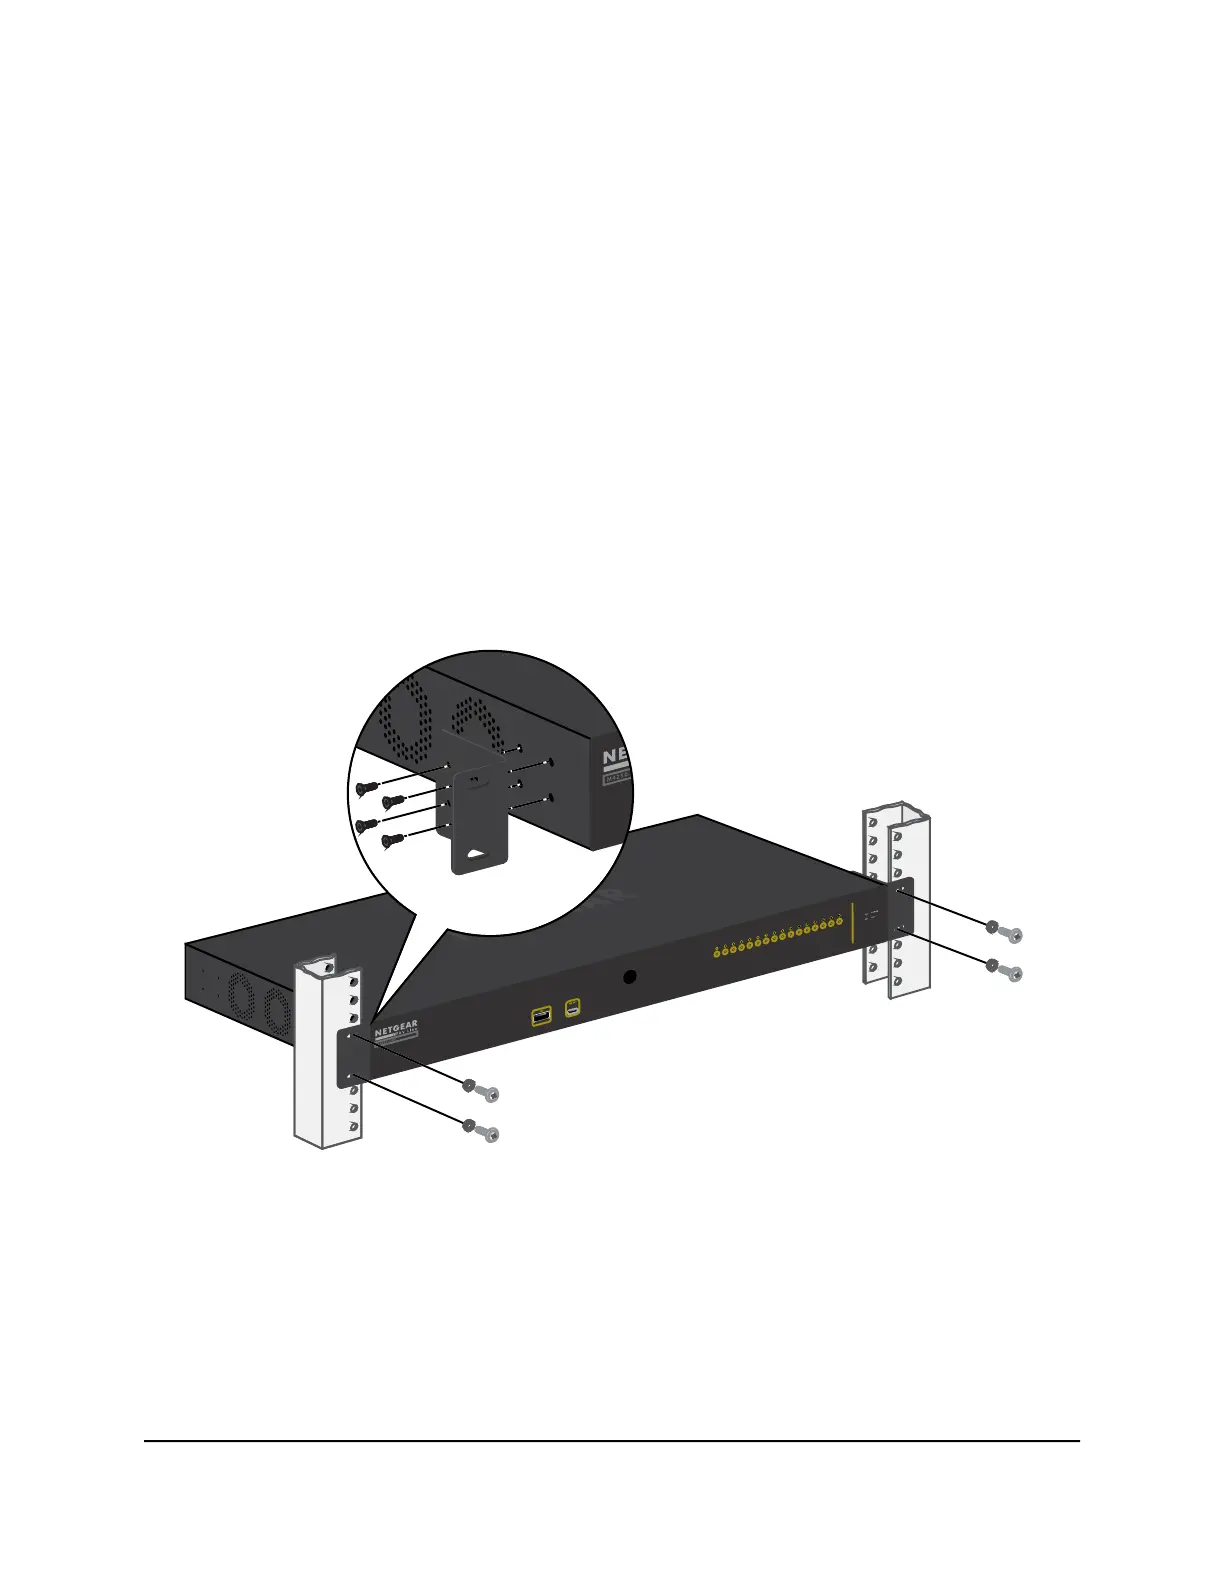
•
Screws. Depending on the rack, use either the large screws or the medium-sized
screws to attach the brackets to the rack.
The form factor of all models is one rack unit of height (1U). The only exception is model
M4250-40G8XF-PoE++, for which the form factor is 2U.
To install the switch in a rack with its front panel facing you:
1.
Attach the supplied small brackets to the side of the switch.
2. Insert the screws provided in the product package through each bracket and into
the bracket mounting holes in the switch.
3. Tighten the screws with a No. 2 Phillips screwdriver to secure each bracket.
4. Align the mounting holes in the brackets with the holes in the rack, and insert two
pan-head screws with nylon washers through each bracket and into the rack.
5. Tighten the screws with a No. 2 Phillips screwdriver to secure the mounting brackets
to the rack.
Hardware Installation Guide52Installation
AV Line of Fully Managed Switches M4250 Series
 Loading...


