NetGear Print Server Manual
46
NETGEAR Add Printer Wizard - Write Down the Port Name
1. You can reach this setup procedure by answering Yes to the previous Figure 4-16 Information. Or
open NETGEAR Print Server group and run NEYGEAR Add Printer Wizard.
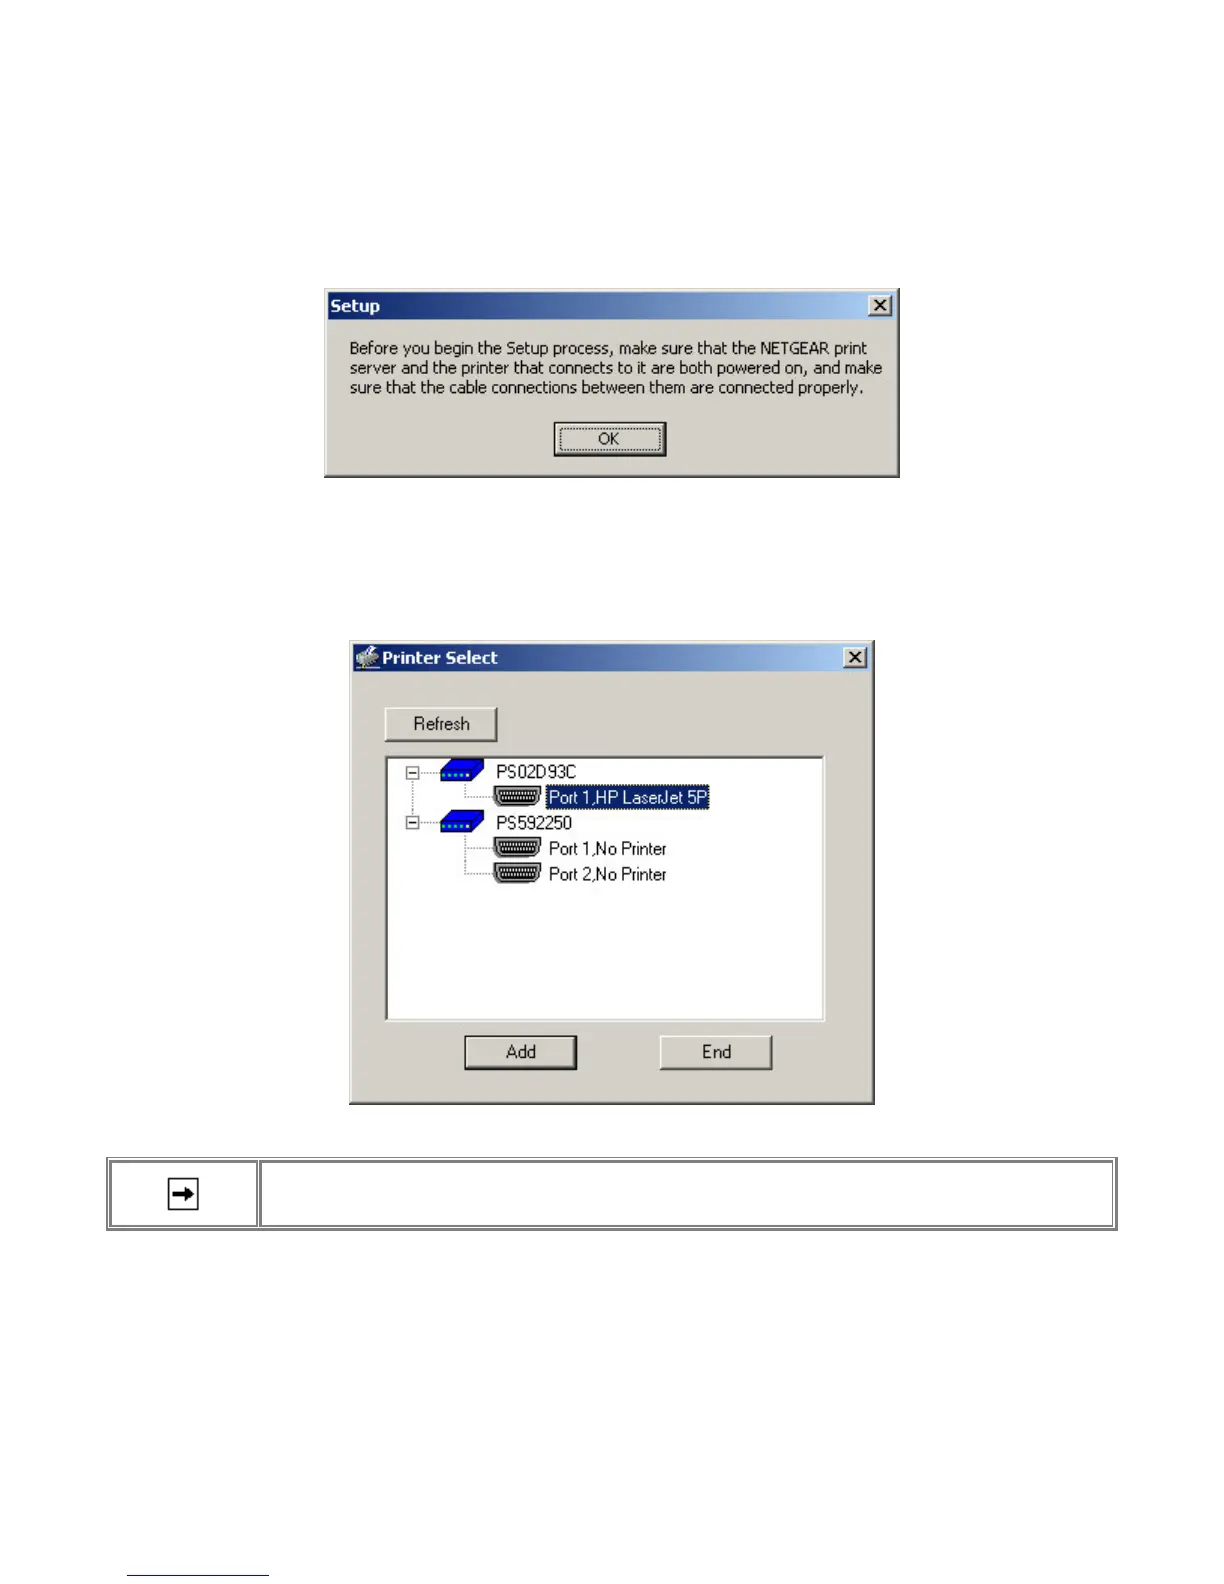
2. Make sure that the NETGEAR Print Server and the printer that connects to it are both powered on.
3. Make sure that the cable connections between them are properly connected.
Figure 4-17 Set up printer
4. Click on OK.
The Printer Select window, as illustrated in See Figure 4-18 Printer Select Window (Add Port), opens.
Figure 4-18 Printer Select Window (Add Port)
If the cables are not properly connected, your PC screen will appear empty when the Printer Select window opens.
If so, check the cable connections and click on the Refresh button, which will initiate the PC to browse again for a
port.
5. Click on the printer port you want to use with the print server, and click on Add.
The ADDPORT window for Epson print connection, as illustrated in below.