Next, thread the backing paper under the Label Guide bobbin (j) so
that the backing paper is
NOT between Platen (d) and the Label Guide
bobbin (j).
6) Then, wind the backing paper over the Pick-
about 1 turn.
7) Next, fit the Pick-up Clamp (f) over the Pick-
that the backing paper slides through the slit located on the Pick-
Clamp (f). Also, make sure that the Pick-
up Clamp (f) slides all the
way into the Pick-up Motor Shaft (e)
8) Then, wind the Pick-
up Clamp (f) until the edge of the first label is
aligned with the Platen (d). When done, make sure that the lever
located on top of the Pick-up Clamp (f) is folded down against the Pick-
up Clamp (f).
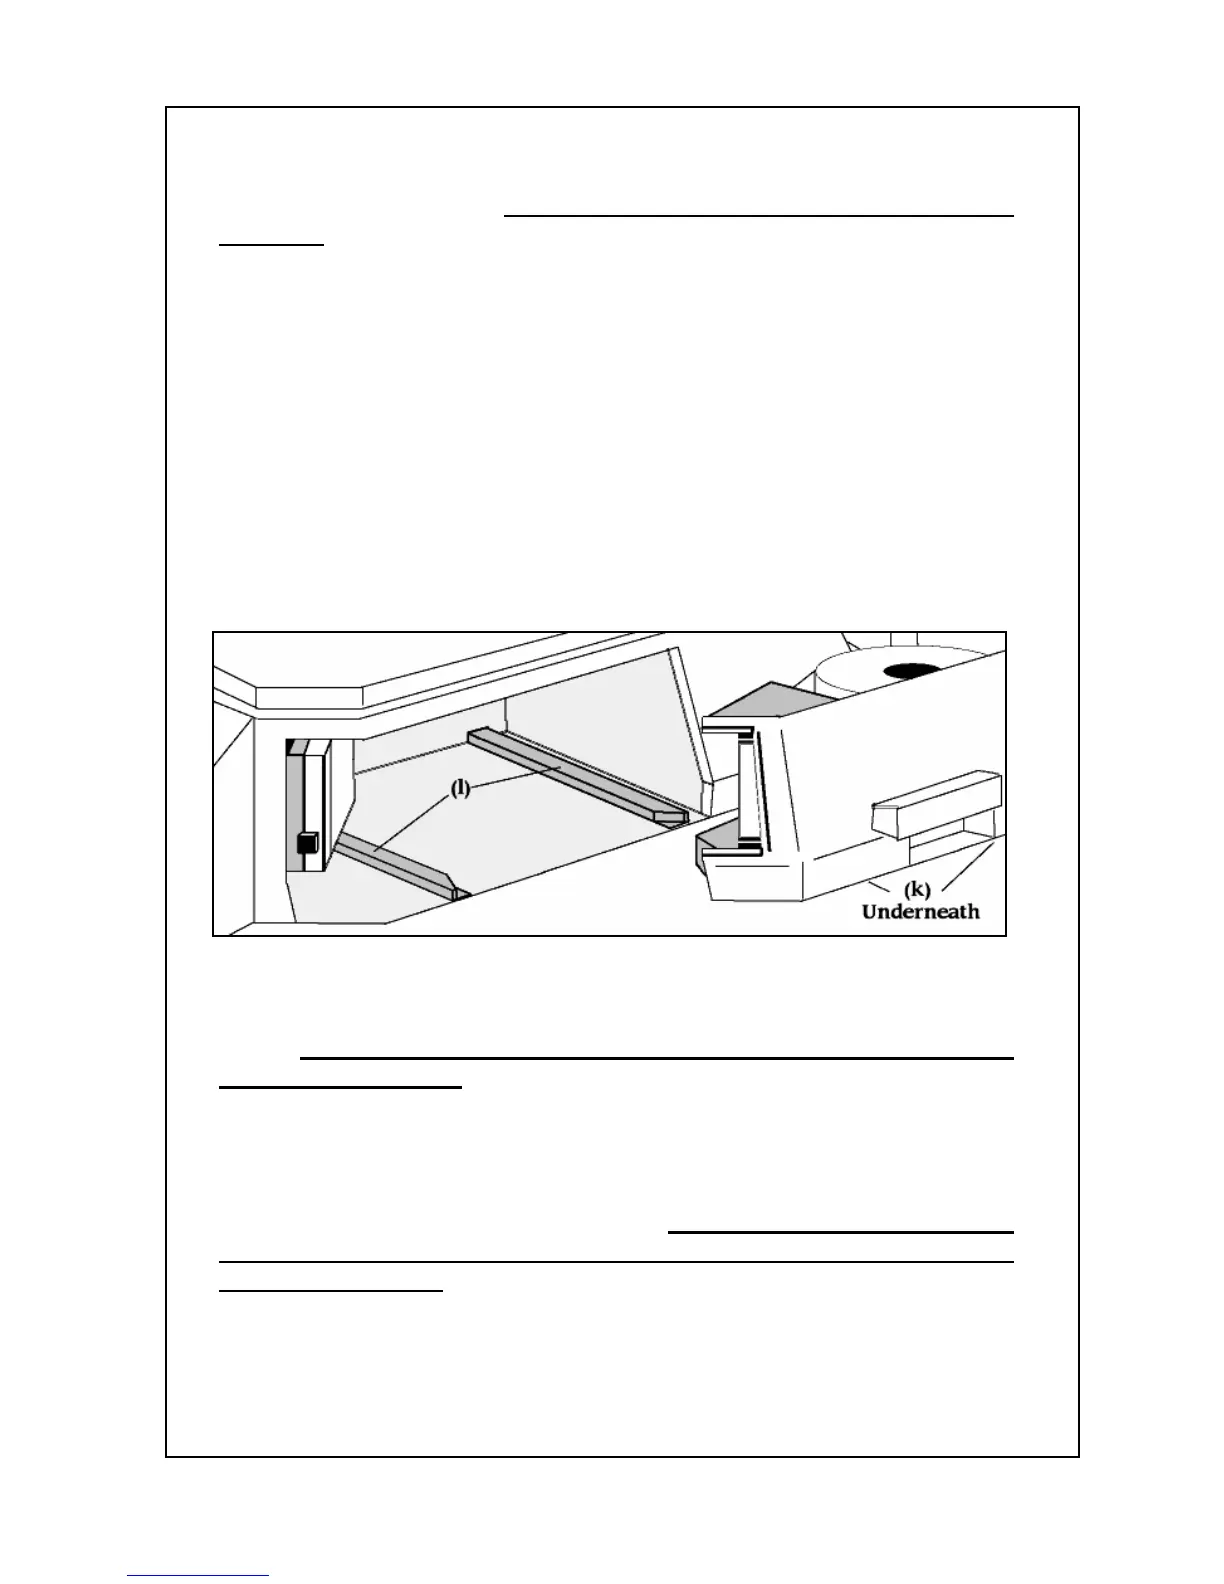
9) Finally, slide the casse
tte drawer back into the scale making sure to
align the Metal Rails (k) of the cassette with the Plastic Rails (l) of the
After you turn the scale on you must feed out 2 or 3 labels
using the FEED key.
When you remove the cassette drawer from the
exposed. You should only remove the cassette drawer when replacing
labels or servicing the printer; you should never leave the printer bay
exposed for long periods of time.
cassette drawer, you must feed o
ut 2 or 3 labels using the FEED
 Loading...