31
Configuring The Meter
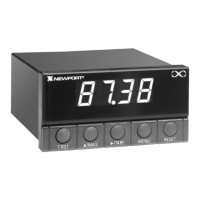
4.15 BRIGHTNESS CONFIGURATION (bRit)
Refer to Table 6-1 for a summary list of menu configuration.
Changing “Display Brightness” is not active unless your meter is a Version “B”.
1. Press the MENU button until the meter shows “bRit”
(
after “LK.CF”
)
.
2. Press the ∂DEV button from “bRit”. The meter shows one of the following:
•“M.brt” Medium Brightness (Default)
•“L.brt” Low Brightness
•“H.brt” High Brightness
3. Press the ßMAX button to toggle between available choices.
4. Press the MENU button to store your selection. The meter momentarily shows “StRd”
followed by “StRd”, “RSt”, “Rtd”, then measured value.
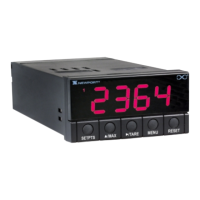
4.16 TUNING PROPORTIONAL CONTROLLER (TUNE)
The Proportional Controller is not active unless your meter has analog output capabilities. The
menu will display whether analog output is present or not. This function allows you to tune your
controller. Select proportional on Output Configuration (refer to Section 4.9.3) prior to tuning your
controller. Include the meter in the process loop and turn on the meter. Allow enough time for the
system to settle.
1. Press the
䊳
/DEV button. The meter momentarily shows "DEV" followed by a blinking
value. This value is the deviation (error) between Reading and Setpoint 1 values. If this
error is zero, your controller is tuned. If a value other than zero shows, proceed with
step 2.
2. Press RESET button. The meter shows "TUNE", tuning your controller and canceling any
error. Once tuned, the meter shows "RST" and returns to the run mode.
"TUNE" will be active if your meter has analog output and/or relay output capabilities.
3. Allow enough time for process to settle. Press the
䊳
/DEV button. Verify that blinking
value is zero. If blinking value is not zero, repeat step 2.
4