37
III. Operation of Each Part
18
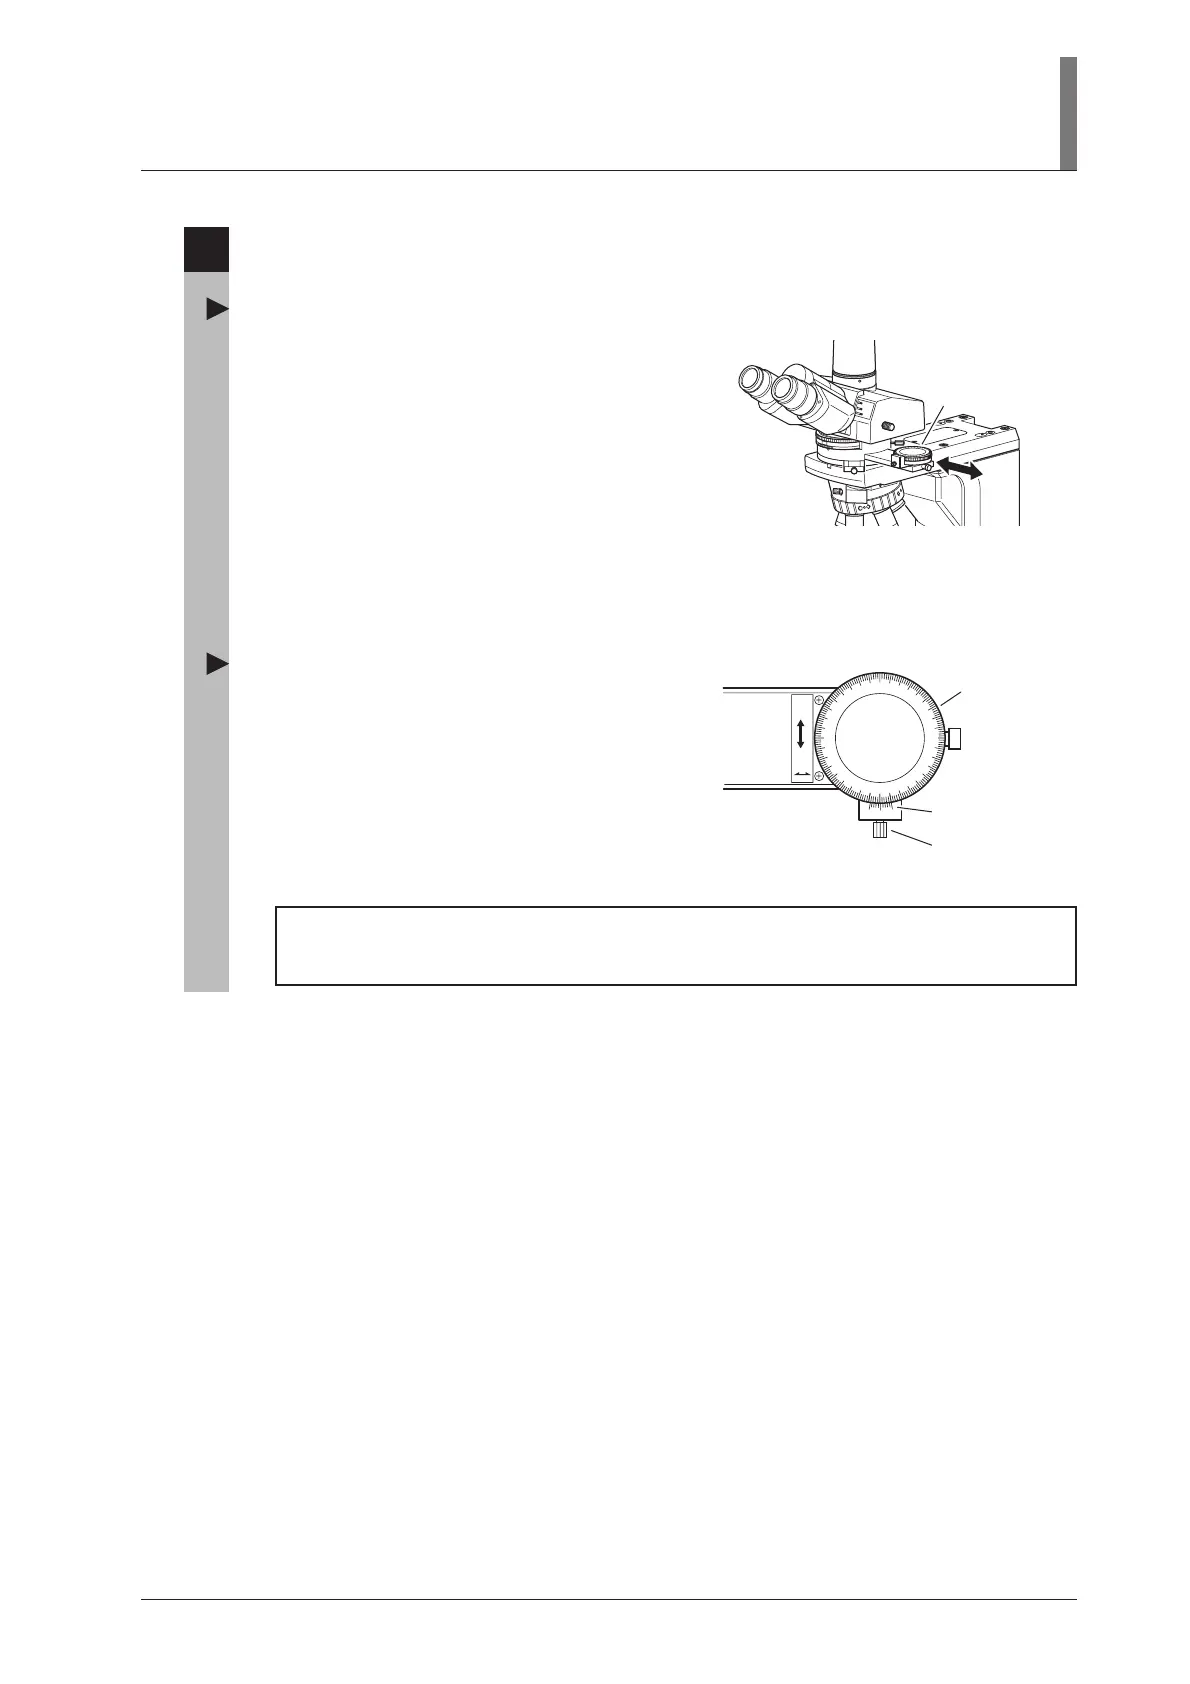
Operation of the Analyzer
Attach/detach the analyzer
The polarizing intermediate tube has the analyzer
slider. The analyzer can be placed into the optical
path with the operation of the slider.
To place the analyzer into the optical path, pull
out the slider. To remove the analyzer from the
optical path, push in the slider.
The analyzer is designed to be inserted from the
right side of the polarizing intermediate tube in
normal use, but it can be inserted from the left. In
the later case, its scale displays the opposite way.
Be careful.
Rotate the analyzer
The analyzer slider has a rotating dial. The
orientation of the analyzer can be rotated with it.
To adjust the analyzer, loosen the analyzer
rotation clamp screw and rotate the rotating dial.
The angle of rotation can be read from 0 to 180
degrees in steps of 0.1 degrees with the two
vernier scales.
The intermediate tube also has a de-polarizer. You can use the photomicrography device or
so on independently of the orientation of the polarizer.
0
BINO
PH
OT
O
PHOTO
BI
NO
&
Analyzer
slider
0
10
OUT
IN
0.
120
110
100
1
30
30
20
10
40
80
70
60
50
90
170
160
150
140
0
A
Analyzer
rotating dial
Analyzer rotation
clamp screw
Vernier