12
Microscopy
This chapter explains microscopy procedures with the LV100POL microscope.
• For detailed information about operations of parts of the microscope, refer to Page 22, “III. Operation of
Each Part.”
• If the microscope is not assembled yet, refer to Page 46, “IV. Assembly” and assemble the microscope
before hand.
1
Diascopic Bright-field Microscopy
This section describes the diascopic bright-field microscopy using the diascopic illumination lamp.
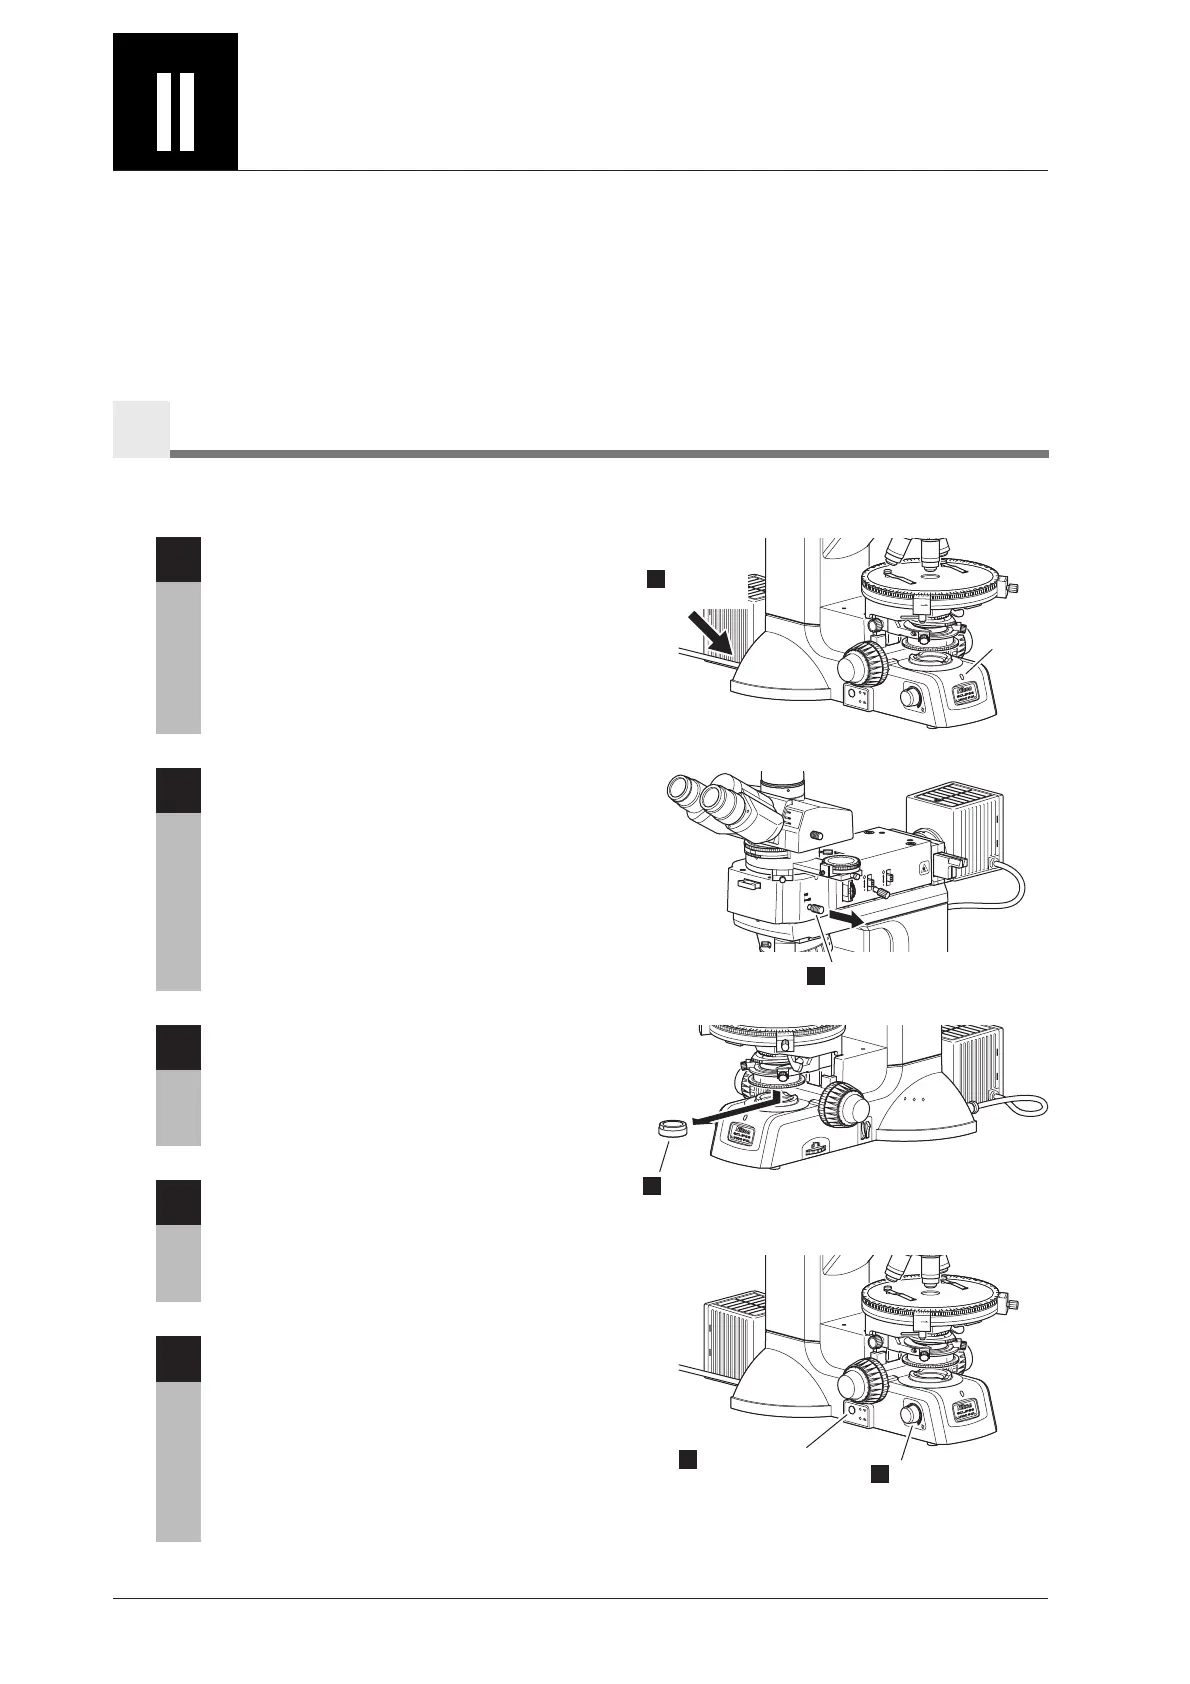
1
Turn on the power switch.
When the microscope power is turned on, the
power indicator on the microscope base is lit.
See Page 22.
2
When the episcopic illuminator is attached,
pull out the illumination selector lever to
set the dark-field position (DF) for it.
See Page 42.
3
Remove the polarizer for the diascopic
microscopy.
See Page 36.
4
Push the epi/dia selection switch to select
the diascopic illumination. The indicator
for the diascopic illumination (lower side)
turns on.
See Page 23.
5
Turn the brightness control knob to adjust
the brightness.
When the brightness control knob is turned, the
brightness of the illumination selected by the epi/
dia selection switch is changed.
See Page 23.
When the lamp lights, the power indicator on the
microscope base lights green.
EP
I/D
IA
OFF
0.6
0.
8
0.
2
0.
4
J
A
P
A
N
A
c
h
r
0.
9
0
CL
ICK
ON
1
Power
indicator
Tu r n on
the power.
F
.
STOP
A
.
STOP
BF
DF
0
BIN
O
PHO
T
O
PHOTO
BIN
O
&
2
Select the dark-field (DF) side.
ND8
NCB
F.S.
0
.4
0
.
2
0
.
8
0.
6
JAP
A
N
A
chr
0
.
9
0
3
Remove the polarizer for the diascopic microscopy.
EPI/DIA
OFF
0.6
0
.
8
0.
2
0.
4
J
A
P
A
N
A
c
h
r
0.
9
0
CL
I
CK
ON
4
Select the diascopic
illumination. The
lower indicator lights.
5
Adjust the
brightness.