© 2005-2016 Nira Control AB 56
You can switch quickly between the x-axis cells and the table cells by hitting
X or between the y-axis cells and the table cells by hitting Y. The arrow keys
can also be used; if you hit the up key when you’re in the top row of table
cells, you’ll enter the x-axis. The same is true for the y-axis by hitting the left
key when you’re in the leftmost column of table cells.
Adding Axis Values
The axis values can only be edited in offline mode
Modifying the axes often involves adding more points for greater resolution,
rather than moving points around.
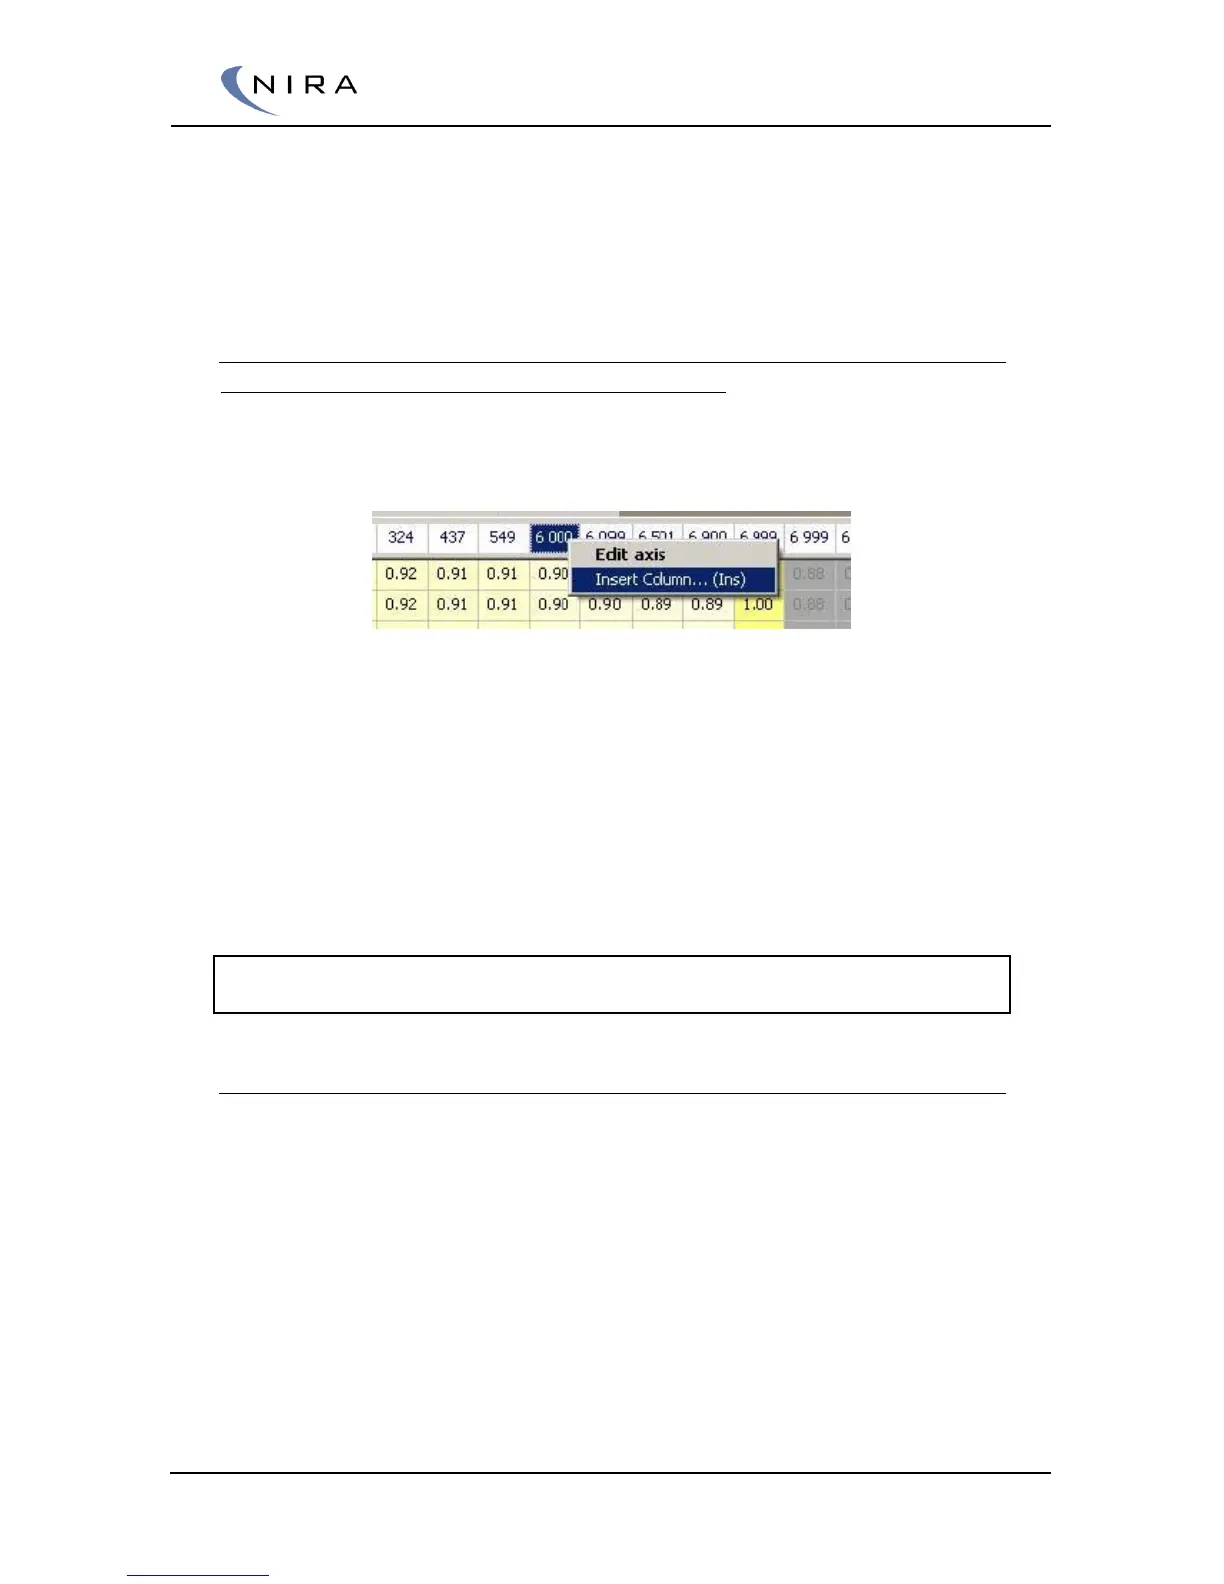
Picture 4-15: Inserting an x-axis column in order to add rpm values.
To add more points, right-click on an axis value, use ”Insert Column...” or
“Insert Row…” respectively. You can also hit the Insert key on the keyboard.
Both methods bring up a dialog box in which the new axis value can be
entered. Note that the new value must be between the values to the
immediate left and right or up and down.
The new column/row will automatically get interpolated table values, based
on the new axis value. This way, the overall calibration doesn’t actually
change until you change the table values explicitly.
Note: When a new column or row is added, the rightmost column or the bottom
row will fall off the edge.
Drag Fill; Filling Axis and Table Cells
There’s also a function to fill entire columns or rows, including the axes. This
can be done by dragging and dropping a single axis cell value onto a
different axis cell value. You can also hold down the Ctrl key while using the
arrow keys to perform the same function.
The entire column or row will be marked green. Once you let go of the
mouse button or the Ctrl key, a dialog box will appear in which you can
choose among different fill methods.
 Loading...