Comprehensive Manual38
© 2018 Nortek AS
Options
The Vectrino can be shipped with the following components to suit different requirements:
Standard or Vectrino Plus firmware. Upgrading to Vectrino Plus is also available as retrofit
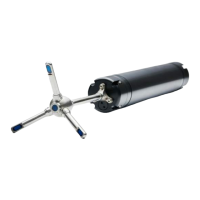
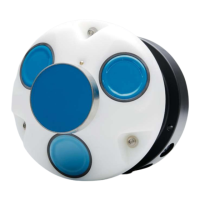
4-beam down-looking probe or side-looking probe. Fixed stem or flexible cable. Changing the
probe is available as retrofit.
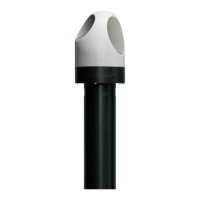
Field probe
2.2.2 Instrument software
The Vectrino software is designed to aid in the planning and execution of on-line data collection, and
is available in two versions:
Vectrino, 25 Hz sampling
Vectrino Plus, 200 Hz sampling
The Vectrino Plus software is used with Vectrinos with the Plus firmware installed, and provides a
wider range for some of the settings than the standard version does. It is emphasized that the
Vectrino and Vectrino Plus software is not primarily designed for controlling multiple instruments. For
these types of measurements, we instead recommend using Polysync.
The Vectrino and/or the Vectrino Plus software can be found on the flash disk that came with the
instrument, or on the Nortek web site: www.nortekgroup.com/software. Nortek Windows programs
run on all versions since XP (SP3), including Windows 8.
Installing the PC Software
Follow these steps to install the software on a computer running Windows:
1. Insert the Flash disk
2. Follow the on-screen instructions. Accept the default settings. The Setup program will by default
install the application in the c:\Nortek\Vectrino folder and create an application shortcut in the
Nortek programs folder and on the desktop.
3. Restart your PC if prompted to, to finalize the installation process.
Software Help
An on-line help is integrated in the software, and it contains answers to all questions you may have
on how to use the software. Click Help > Help Topics.
2.2.3 Initial preparation
Communication
Check that you have installed the software correctly according to the procedure in the previous
section, and then follow this procedure to test the communication:
1. Using the enclosed cable, plug in the AC adapter, and connect the Vectrino cable and the Serial-
to-USB converter to the USB port on your computer.
2. Start the Vectrino software.
3. Select Communication > Serial Port, and specify which port number to use.
4. Accept the default baud rate settings (19200 baud), which is also the default baud rate for the
instrument.
5. Click the Connect toolbar button. The Vectrino instrument should reply with an identification
string.
Baud rates
The baud rate is specified in the Serial Port dialog box. There are two baud rates that can be
specified; one for normal communication and data transfer, and one for firmware upgrades. For the
standard Vectrino, the default baud rate is19200. For the Vectrino Plus, the default is 57600.
The baud rate settings for transfer of head files and firmware upgrades may differ from those for
transmission of deployment setups and for online data collection. The reason is that the former
 Loading...