Comprehensive Manual74
© 2018 Nortek AS
probe head to the pressure case.
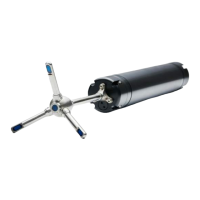
E. Carefully, slide out the probe with the circuit board attached. Do
not put a lot of pressure on the probe itself, as the connection
between the sensor head and head board represent the weakest
point. Pull/push the main board instead.
When reassembling the system, the following is important:
Make sure that there are no dust or particles on the O-rings on the head or the endbell, and that
they are whole.
A fresh desiccant bag should be included in the pressure case, as humid air can condense
enough water do damage the electrical circuitry.
Be careful when sliding the circuit board into the pressure housing; it is easy to make scratches,
and these scratches may cause instrument leakage.
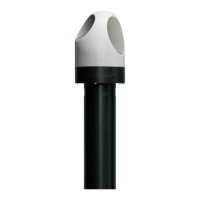
Attach the probe to the housing with the titanium bolts. Make sure the bolts have both a spring
washer and a flat washer.
Insert and connect the battery, and attach the endbell. Make sure that also these bolts have both
a spring washer and a flat washer.
Read also about Recommended Torque for securing screws.
3.3.3 Installing a Memory Board (Vector)
When ordering a memory upgrade from Nortek you will receive the following:
1. Recorder / ProLog
2. Screws / Bolts
3. Standoffs
4. Nuts
5. Lock Washers
To install it, follow the procedure as described below
A. Access the circuit board.
B. Loosen the four (relatively short) screws and remove the compass
board from the main board
C. Insert the four long screws (2) through the holes in the corners of
the compass board, and then through four standoffs (3). Carefully
insert the screws through the holes on the main board, and then
through four more standoffs. Make sure the connector between the
compass board and the main board ‘Clicks’.
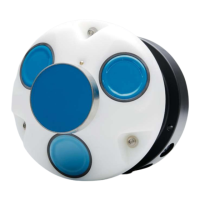
D. Carefully position the Recorder board (1) (image to the right) and fit
it gently to the matching connector on the main board (image to the
left).
 Loading...