Connecting BACnet GW-3 to an IP Network BACnet GW-3 Embedded Installation
23BACnet Gateway-3 Installation and Operation Manual - P/N: 53372:Rev: A 5/6/09
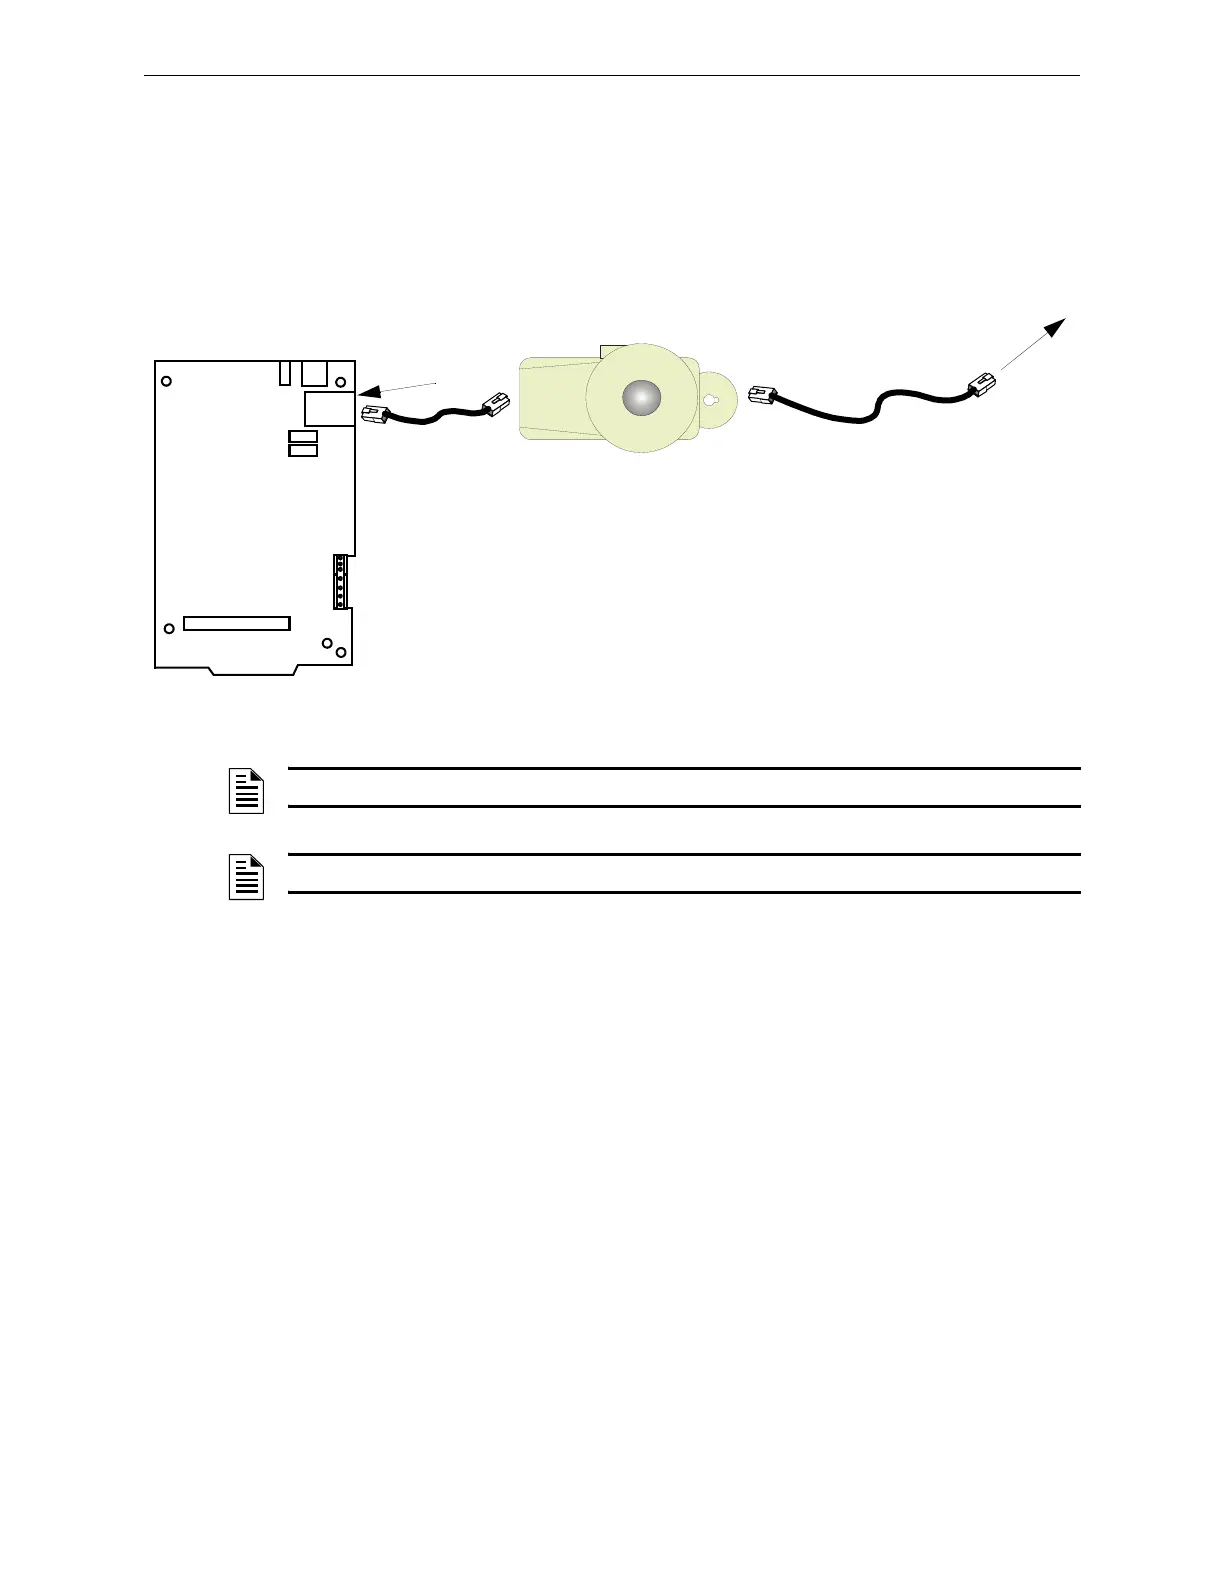
2.6 Connecting BACnet GW-3 to an IP Network
This allows the BACnet GW-3 to communicate through your IP network (Internet or Intranet)
Step 1. Plug the PNET-1 surge suppressor into the BACnet GW-3 board Ethernet connector.
Step 2. Plug the RJ45 cable into the PNET-1.
Step 3. Plug the RJ45 cable into your IP network.
Figure 2.9 IP Cable Connection
2.7 Connecting BACnet GW-3 to an NFN Network or High
Speed NFN Network
The BACnet GW-3 should not be connected to the NFN network until after it has been properly
configured. For more information, please refer to Section 3, “BACnet GW-3 Configuration and
Operation”, on page 25.
Once the BACnet GW-3 has been configured, refer to Section 3.2, “Connect the BACnet GW-3 to
the NFN Network or FACP” on page 33 for more information.
To Internet or Intranet
Customer Supplied Cable
Ethernet
Connector (J8)
PNET-1
NOTE: The Ethernet wire must be connected through the PNET-1 surge suppressor.
NOTE: The Ethernet port is power limited.