BACnet GW-3 Configuration BACnet GW-3 Configuration and Operation
27BACnet Gateway-3 Installation and Operation Manual - P/N: 53372:Rev: A 5/6/09
Step 4. Record your current Internet Protocol (TCP/IP) property settings so you can restore them
later.
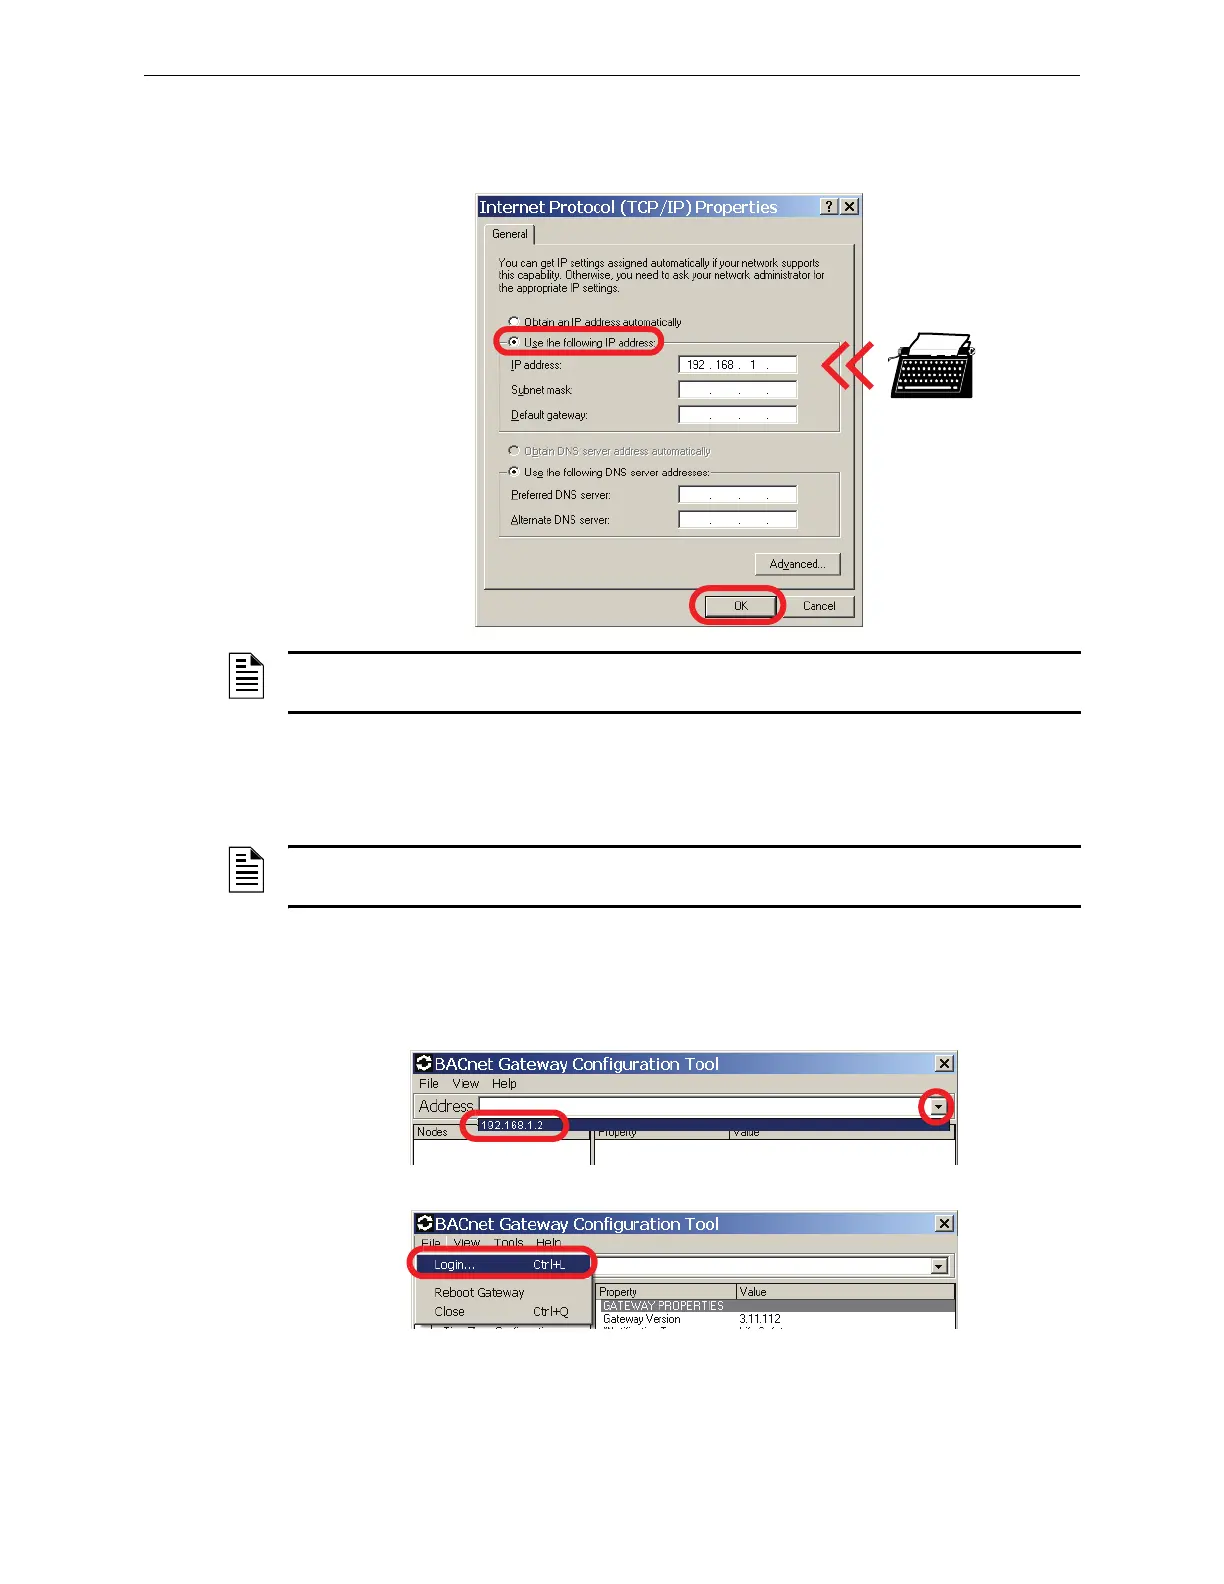
Step 5. Click Use the following IP address, and then type 192.168.1.X into the IP address field.
Step 6. Click OK, and then close all remaining open windows.
3.1.5 Log into the BACnet GW-3 for Configuration
Step 1. Launch the BACNet Gateway Configuration Tool by clicking Start Ö All Programs Ö
BACnet Gateway Config Tool from the Windows taskbar.
Step 2. Click the Address field, and then click the default gateway IP address 192.168.1.2 in the
menu that drops down.
Step 3. Click File Ö Login....
NOTE: X can be any number between 0 and 255 except for 2 (since the BACnet GW-3 default IP
address is 192.168.1.2).
NOTE: The BACNet Gateway Configuration Tool must run at a resolution of 1024 X 768 or
greater.