DOC-13000 Rev. E 7–11
Connex500/350 User Guide
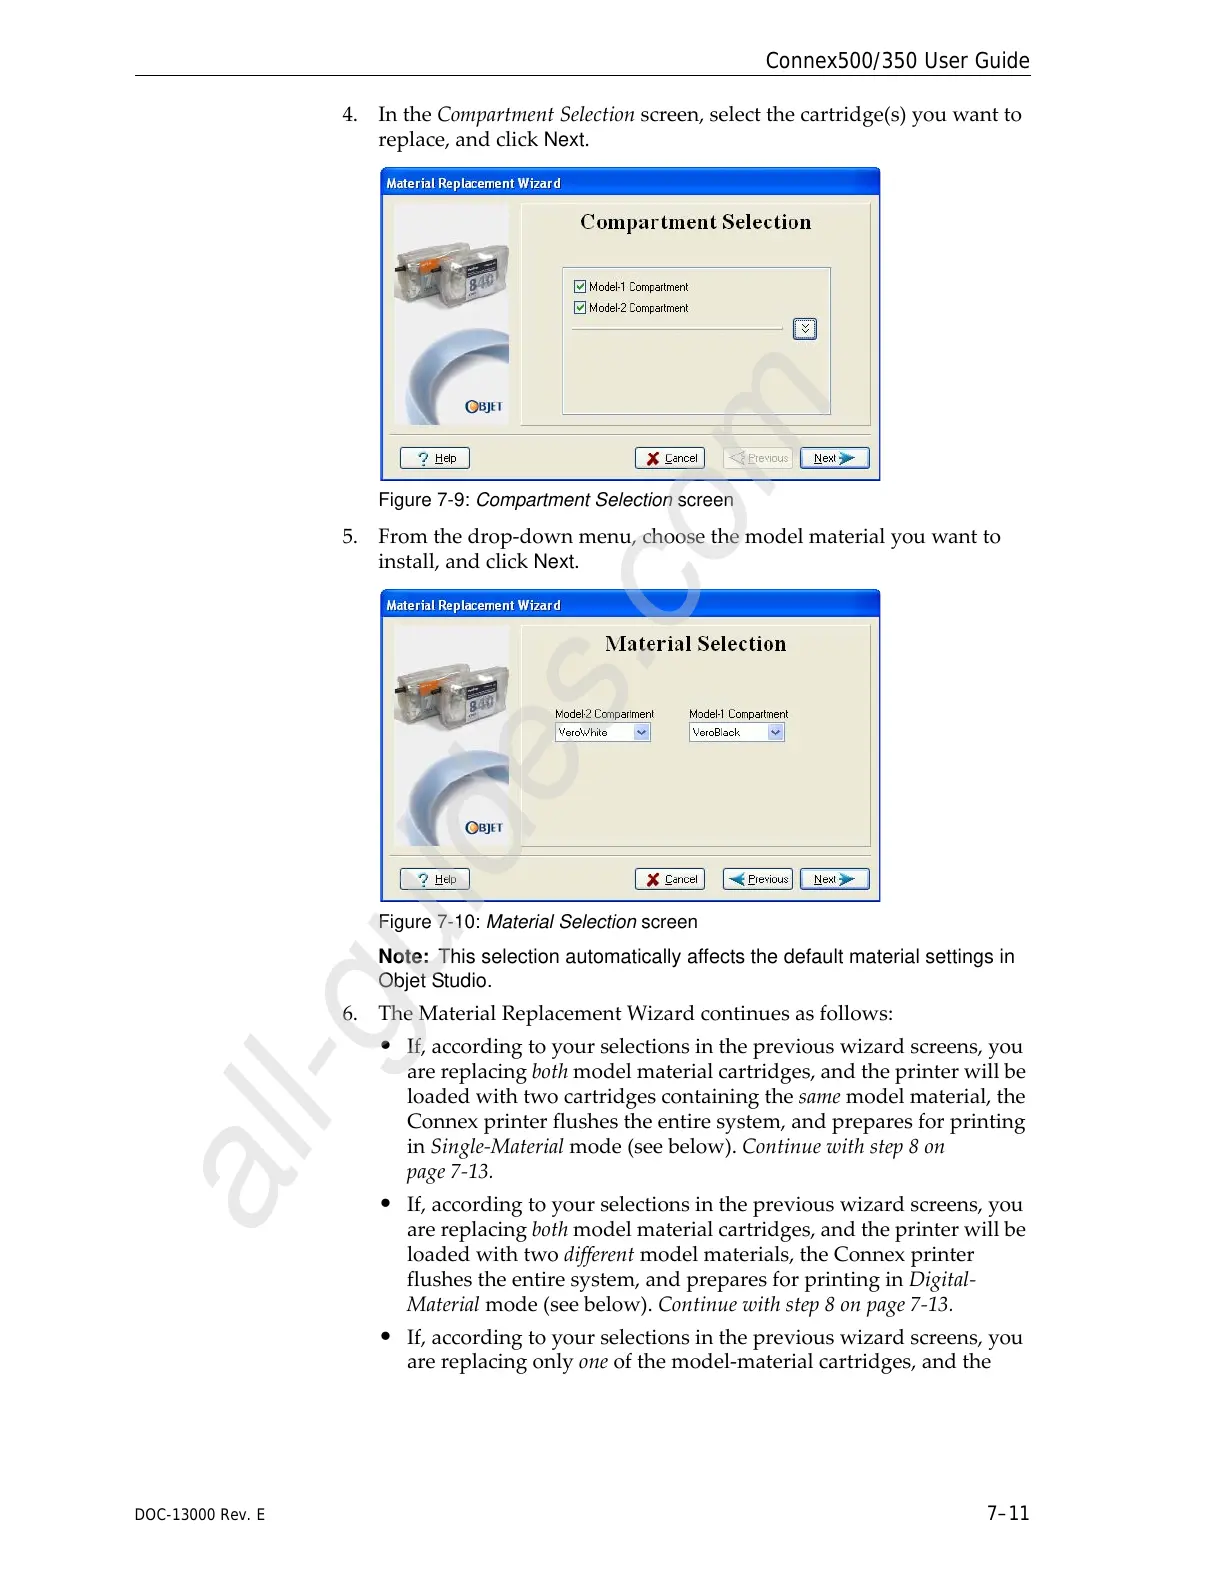
4. IntheCompartmentSelectionscreen,selectthecartridge(s)youwantto
replace,andclick
Next.
Figure 7-9: Compartment Selection screen
5. Fromthedrop‐downmenu,choosethemodelmaterialyouwantto
install,andclick
Next.
Figure 7-10: Material Selection screen
Note: This selection automatically affects the default material settings in
Objet Studio.
6. TheMaterialReplacementWizardcontinuesasfollows:
• If,accordingtoyourselectionsinthepreviouswizardscreens,you
arereplacingbothmodelmaterialcartridges,andtheprinterwillbe
loadedwithtwocartridgescontainingthesamemodelmaterial,the
Connexprinterflushestheentiresystem,andpreparesforprinting
inSingle‐Materialmode(seebelow).Continuewithstep8on
pag
e 7‐13.
• If,accordingtoyourselectionsinthepreviouswizardscreens,you
arereplacingbothmodelmaterialcartridges,andtheprinterwillbe
loadedwithtwodifferentmodelmaterials,theConnexprinter
flushestheentiresystem,andpreparesforprintinginDigital‐
Materialmode(seebelow).Continuewithstep8onpage 7‐13
.
• If,accordingtoyourselectionsinthepreviouswizardscreens,you
arereplacingonlyoneofthemodel‐materialcartridges,andthe