Operating & Maintaining the Connex500/350 3-D Printer
7–30
DOC-13000 Rev. E
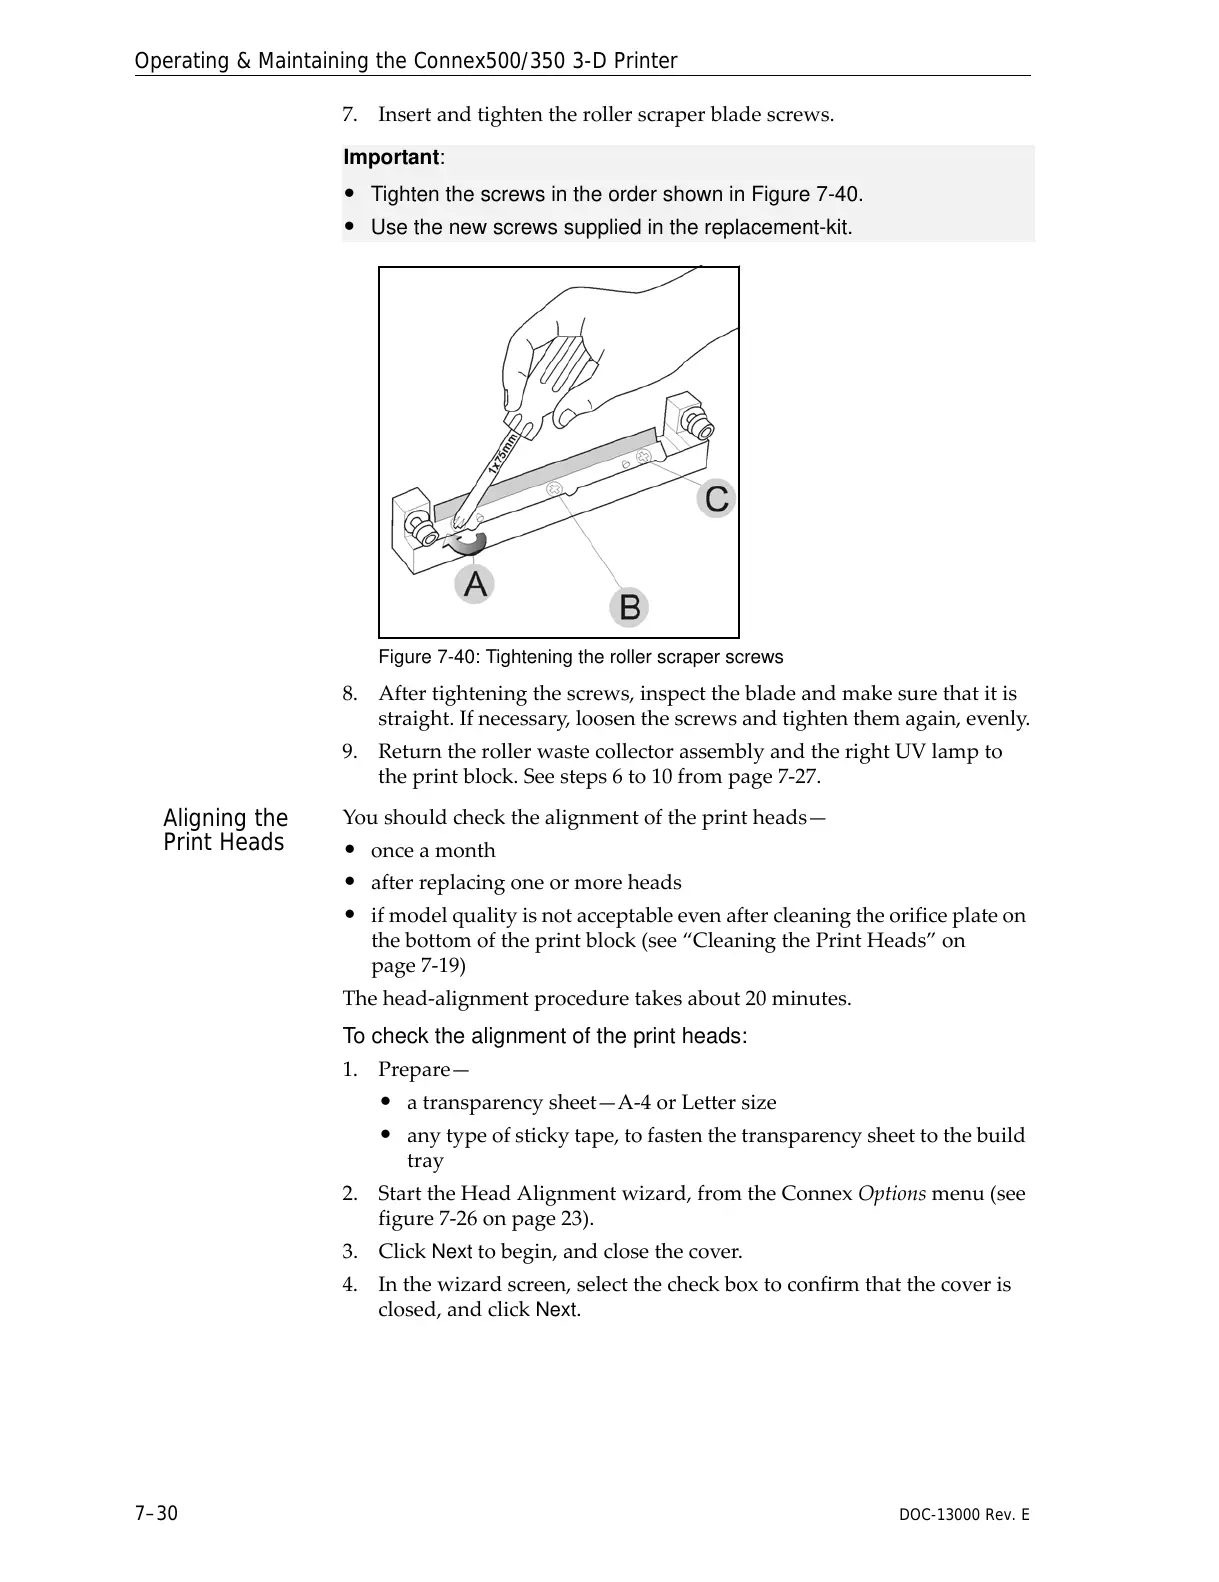
7. Insertandtightentherollerscraperbladescrews.
Figure 7-40: Tightening the roller scraper screws
8. Aftertighteningthescrews,inspectthebladeandmakesurethatitis
straight.Ifnecessary,loosenthescrewsandtightenthemagain,evenly.
9. ReturntherollerwastecollectorassemblyandtherightUVlampto
theprintblock.Seesteps6to10frompage 7‐27.
Aligning the
Print Heads
Youshouldcheckthealignmentoftheprintheads—
• onceamonth
• afterreplacingoneormoreheads
• ifmodelqualityisnotacceptableevenaftercleaningtheorificeplateon
thebottomoftheprintblock(see“CleaningthePrintHeads”on
page 7‐19)
Thehead‐alignmentproceduretakesabout20minutes.
To check the alignment of the print heads:
1. Prepare—
• atransparencysheet—A‐4orLettersize
• anytypeofstickytape,tofastenthetransparencysheettothebuild
tray
2. StarttheHeadAlignmentwizard,fromtheConnexOptionsmenu(see
figure 7‐26onpage 23).
3. Click
Nexttobegin,andclosethecover.
4. Inthewizardscreen,selectthecheckboxtoconfirmthatthecoveris
closed,andclickNext.
Important:
• Tighten the screws in the order shown in Figure 7-40.
• Use the new screws supplied in the replacement-kit.