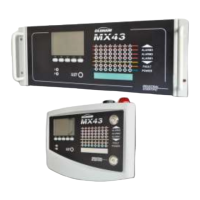
C: Relay configuration switches
The output status of each relay depends on the configuration of the switch
block (Figure 20, ref. C). Set the switch to ON (energized) or OFF (de-
energized) according to the safety type desired; each switch acts on the relay
having the same number (switch 1 acts on relay 1). The contacts are
represented when no power and no alarm apply.
For the 4-relay module, only switches 1 to 4 are active.
E – Programmable relays
In its maximum configuration, the MX 43 can manage 24 external relays (or
24 modules with 1 stated relay or 3 modules of 8, all stated relays). The relays
are individually programmable. The operation of each relay depends on its
configuration.
Each of the 6 detector events [AL1 - AL2 - AL3 – High-range excess – Low-
range excess – Failure] can control one or several external or internal relays.
Several events can be assigned to the same relay.
Setting of relay parameters
The alarm limits governing the relays can only be set by the COM 43
application.
■ Normal: Relay operation as per the normal management of an alarm. (The
relay is launched only if the event exceeds the duration of the time lapse).
■ Buzzer function (releasable relays): The same as in normal operation,
with, in addition, the release of the relay even if the event is still present.
The time lapses are:
. Duration of maintenance: Minimum time of activation, adjustable from 0
to 900 seconds.
. Automatic release: If activated, the time is adjustable between 15 and
900 seconds, beyond which the buzzer relay is automatically released.
. Reactivation: If checked, time is adjustable between 15 and 900 seconds,
beyond which the buzzer relay is reactivated.
Controls of the alarm relay.
■ Logic equations of up to 4 levels of parentheses by the logic operators OR,
AND, NOR, and NAND. The result of the equation controls the relay.
■ Polling operations (x over y). There must be at least “x” events over the
total of “y” to activate the relay. Optionally, the user may define whether a
failure is considered an event in the same category as an alarm.
F – Relay status indicator
The status of each relay is visualized by a red LED (Figure 20, F):
■ LED off: Coil not powered.
■ LED lit: Coil powered.
G – Relay output connectors
The normal resistive load of each contact is 2A / 250 V AC or 2 A / 30 V DC.
Connection
Refer to Chapter 6, on page 33.