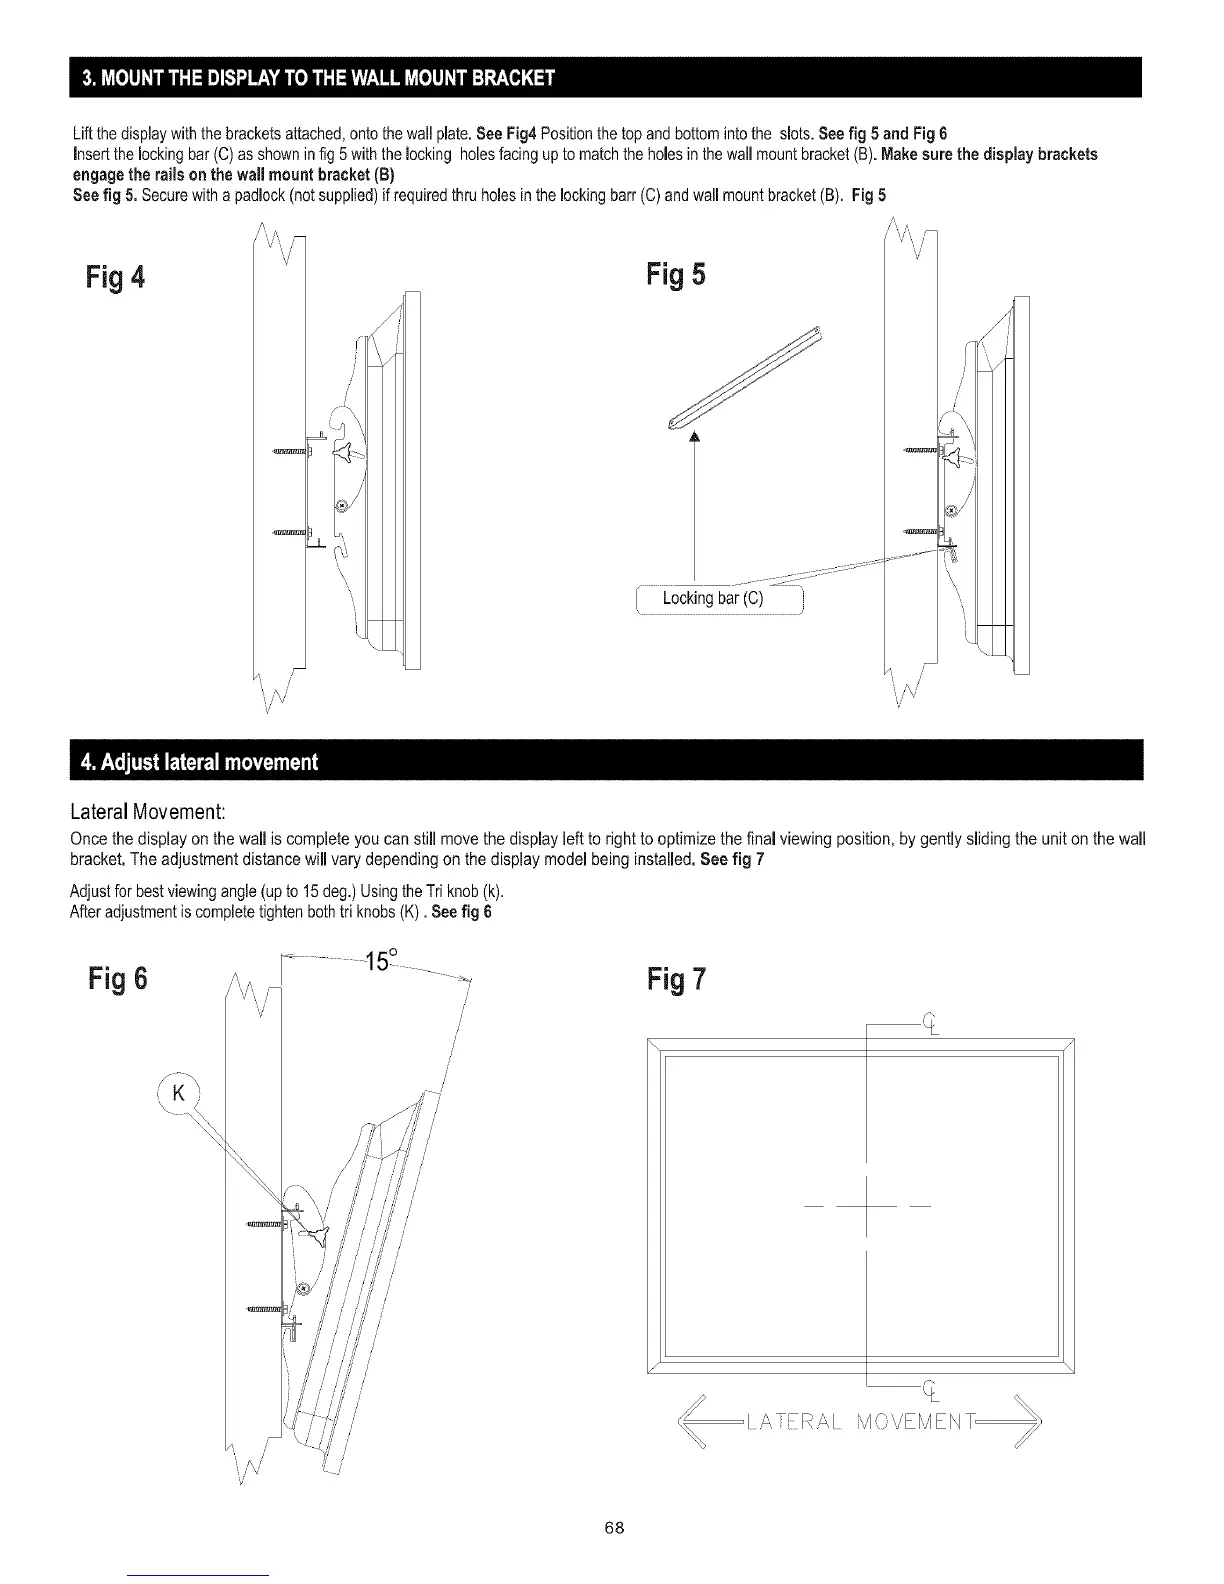
Liftthedisplaywiththebracketsattached,ontothewallplate.See Fig4 Positionthetop and bottomintothe slots.Seefig 5 and Fig 6
insertthe lockingbar(C) asshownin fig 5with the locking holesfacing upto matchthe holesin the wallmount bracket(B).Makesure the dispJaybrackets
engage the rails on the wall mount bracket (B)
Seefig 5. Securewith apadlock(notsupplied)if requiredthru homesin themockingbarr (C)and wall mountbracket (B). Fig 5
Fig 4
"V'
Fig 5
J
_,,//\/
V
LateralMovement:
Once the display on the wail is complete you can still movethe display left to right to optimize the finaJviewing position, by gently sliding the unit onthe wall
bracket.The adjustment distance will vary depending on the display model being installed. See fig 7
Adjust forbestviewingangle(upto 15 deg.)Usingthe Triknob(k).
After adjustmentis completetightenbothtri knobs(K). Seefig 6
Fig 6 Fig7
[ A,TER,_I iv1,,_,,Er,J/EN
68
 Loading...