USING YOUR PRINTER FROM A COMPUTER 25
SCANNING AN ORIGINAL FROM THE PRINTER FRONT PANEL
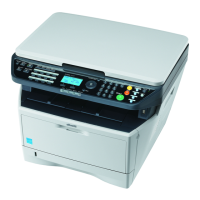
1 Open the top cover and place the document or photo you want to scan face down on the scanner
glass and aligned with the upper left corner. For more information see "Placing Your Document on the
Scanner Glass".
2 Press the Scan button on your printer’s front panel. A pop-up is displayed with the following Toolbox
tools: Scan to file, Scan to application, Scan to e-mail and Scan to fax. Select where you want to send
the scanned image by clicking on the corresponding tool icon. See "Printing, Copying and Scanning
From the Toolbox".
The scanner driver user interface screen is displayed with a low resolution preview of the document or
image on the left-hand side of the screen. You can:
• Use selection handles to delimit the area of the preview image that you want to scan.
• Rotate, flip, enlarge or reduce the preview image.
• Scan a new preview in case you accidentally removed the original from the scanner glass.
• Launch your final scan according to the settings that you have made.
On the right-hand side of the scanner driver interface screen, customise your scan settings as indicated
in the following table:
Custom • Select the resolution at which you want to scan.
• Select the colour depth, meaning the number of distinct colours that
can be represented in number of bits.
• Lighten or darken the image you want to scan.
• Increase or decrease the contrast of the image you want to scan.
• Activate a filter that smooths the image, for example when scanning
magazine pages.
• Return the screen settings to their factory default values, or save the
settings so they are applied to your next print job.
Driver of the scanner You can:
Driver of the scanner You can:
Standard • Define whether the document to scanned consists of black text or line
art only, a combination of black text or line art and colour graphics or
photos, or just photos, and therefore scan at 150 dpi, 300 dpi or
600 dpi respectively.
• Select whether to scan in full colour at 24 bits/pixel, in grey at
8 bits/pixel or in black and white at 1 bit/pixel.
• Return the screen settings to their factory default values, or save the
settings so they are applied to your next print job.
Custom • Select the resolution at which you want to scan.
• Select the colour depth, meaning the number of distinct colours that
can be represented in number of bits.
• Lighten or darken the image you want to scan.
• Increase or decrease the contrast of the image you want to scan.
• Activate a filter that smooths the image, for example when scanning
magazine pages.