/'
AA870800
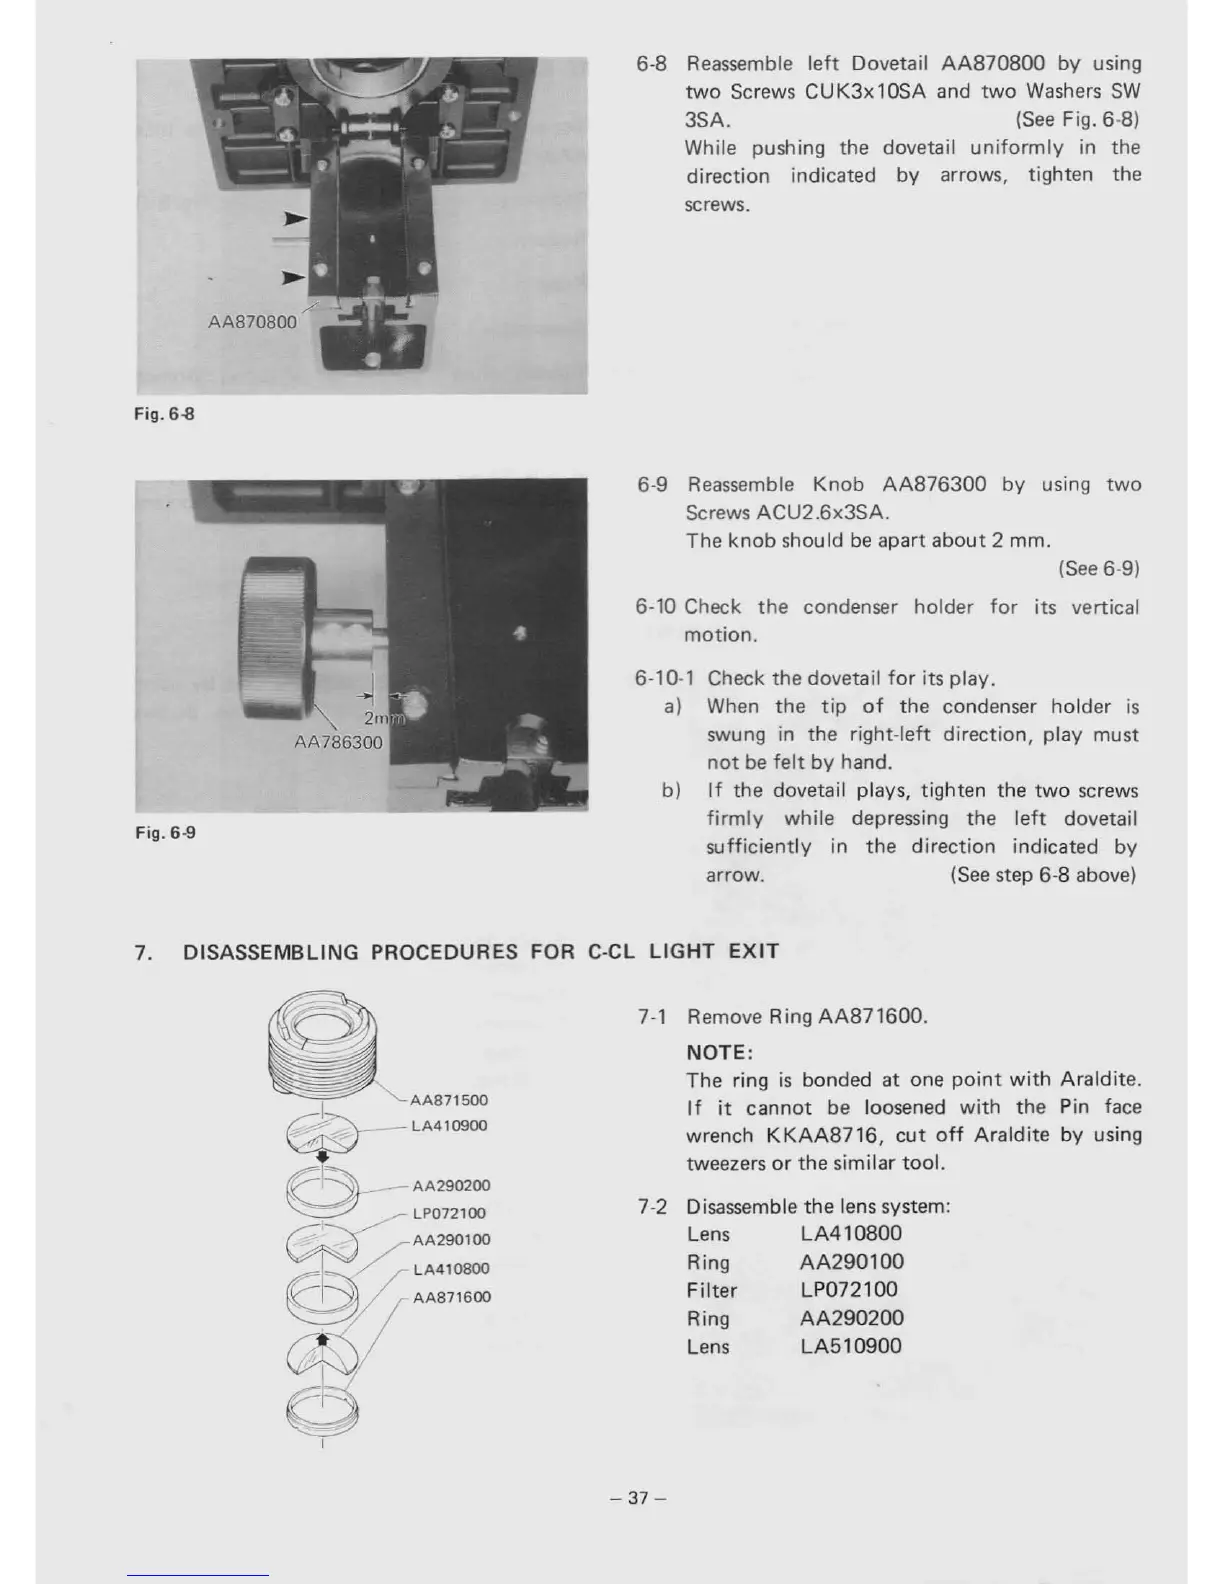
6-8 Reassemble
left
Dovetail
AA870800
by
using
two
Screws
CU
K3x
10SA and
two
Washers
SW
3SA.
(See
Fig. 6-8)
While pushing the dovetail
uniformly
in the
direction indicated by arrows, tighten the
screws.
Fig. 6-8
6-9 Reassemble
Knob
AA876300
by
using
two
Screws ACU2.6x3SA.
The
knob
should
be
apart
about
2 mm.
(See
6-9)
6-10 Check
the
condenser holder
for
its vertical
motion.
Fig. 6-9
6-10-1
a)
b)
Check the dovetail
for
its play.
When
the
tip
of
the condenser holder
is
swung in the right-left direction, play must
not
be
felt
by
hand.
If
the dovetail plays, tighten the
two
screws
firmly
while depressing
the
left
dovetail
sufficiently
in
the
direction indicated by
arrow.
(See
step 6-8 above)
7.
DISASSEMBLING
PROCEDURES FOR C-CL
LIGHT
EXIT
1L--_AA290200
7-1
Remove Ring
AA871600.
NOTE:
The ring
is
bonded at one
point
with
Araldite.
If
it
cannot
be loosened
with
the Pin face
wrench
KKAA8716,
cut
off
Araldite
by
using
tweezers
or
the
similar
tool.
7-2 Disassemble the lens system:
Lens
LA410800
Ring
AA290100
Filter
LP072100
Ring
AA290200
Lens
LA510900
-
37-