38
5
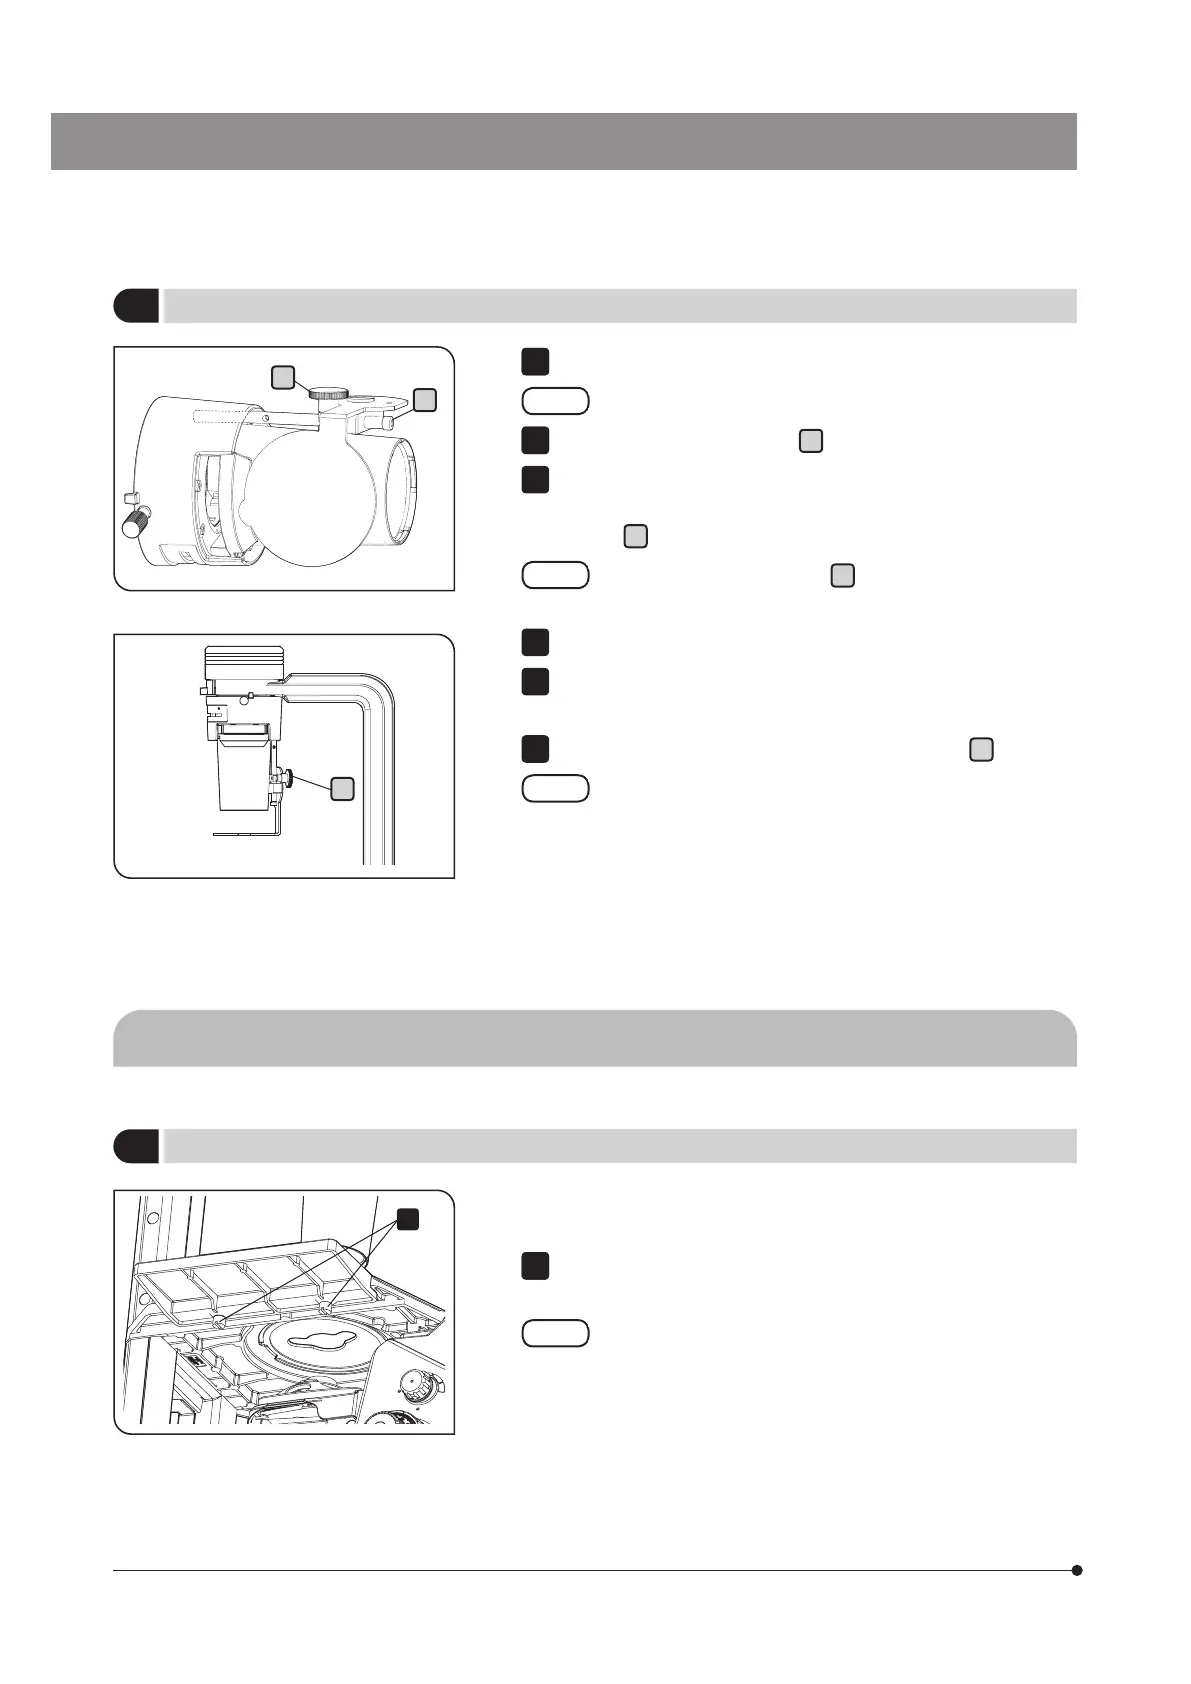
Attaching the umbra shield (ambient light shielding plate)
Remove the condenser portion from the microscope frame CKX53SF.
For procedures to remove the condenser portion, see page 33.
Loosen the umbra shield knob
a
.
Insert the tip of the umbra shield column into the screw hole of the
condenser portion, and insert the Allen screwdriver in the hole of the
column
b
to tighten it and secure the column.
While the umbra shield knob
a
is loosened, hold the umbra
shield with one hand and rotate the Allen screwdriver.
Attach the condenser portion to the microscope frame CKX53SF.
Set the umbra shield to the closed status. Then, move the umbra shield
along with the umbra shield column to adjust the height.
Decide the height and tighten the umbra shield knob
a
firmly.
The lower the position of the umbra shield is, the more the
ambient light can be blocked. Adjust the height according to
the height of the container, etc.
11
12
3
4
5
6
b
a
a
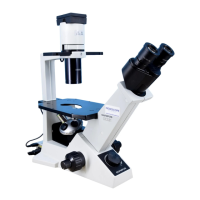
7-4 Assembling the stage (Phase contrast standard set / Fluorescence set)
1
Attaching the sub stage CK2-SS
Attaching the sub stage CK2-SS to the plain stage makes the stage
surface larger.
Tighten the attaching knobs (2 pcs.) to secure the sub stage at the
bottom of the right side surface or the left side surface of the plain stage.
When using the mechanical stage CKX3-MVR, the sub stage
can be attached only to the left side surface of the plain stage.
If you use the camera, the camera cables must be wired before assembling the stage. For details, see page 45.
1