43
CKX53
Set the main switch of the power supply for mercury burner to
ON.
Wait for 5 to 10 minutes until the arc image is stabilized before
proceeding with the mercury burner centering.
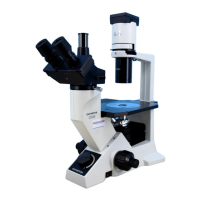
Remove the cap (or objective) of the revolving nosepiece and engage
that screw hole in the light path.
Hold the selection lever of the fluorescence mirror unit and engage
the B-excitation fluorescence mirror unit attached to the fluorescence
mirror unit slider in the light path.
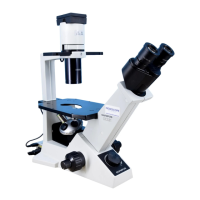
Rotate the field iris diaphragm lever in the direction shown in the picture
and open the iris diaphragm.
Place thin white paper such as copy paper, etc. on the stage top
surface, engage the empty hole of the filter slider for reflected light
illumination in the light path and expose the paper surface to light.
2
3
4
Centering the mercury burner (only when combined with the mercury lamp housing U-LH100HG )
The mercury burner emits the light by means of discharge produced
when a current is supplied across the poles. If the positions of the
poles were moved for example during replacement of the burner, the
brightness of the light would be uneven. If this happens, it is necessary to
adjust the positions of the poles. This operation is called the centering of
the mercury burner.
The light guide illumination system U-HGLGPS does not need centering.
The mercury burner centering is not required every time before
observation, but is recommended after the burner has been replaced or
when the brightness of the observation image is uneven.
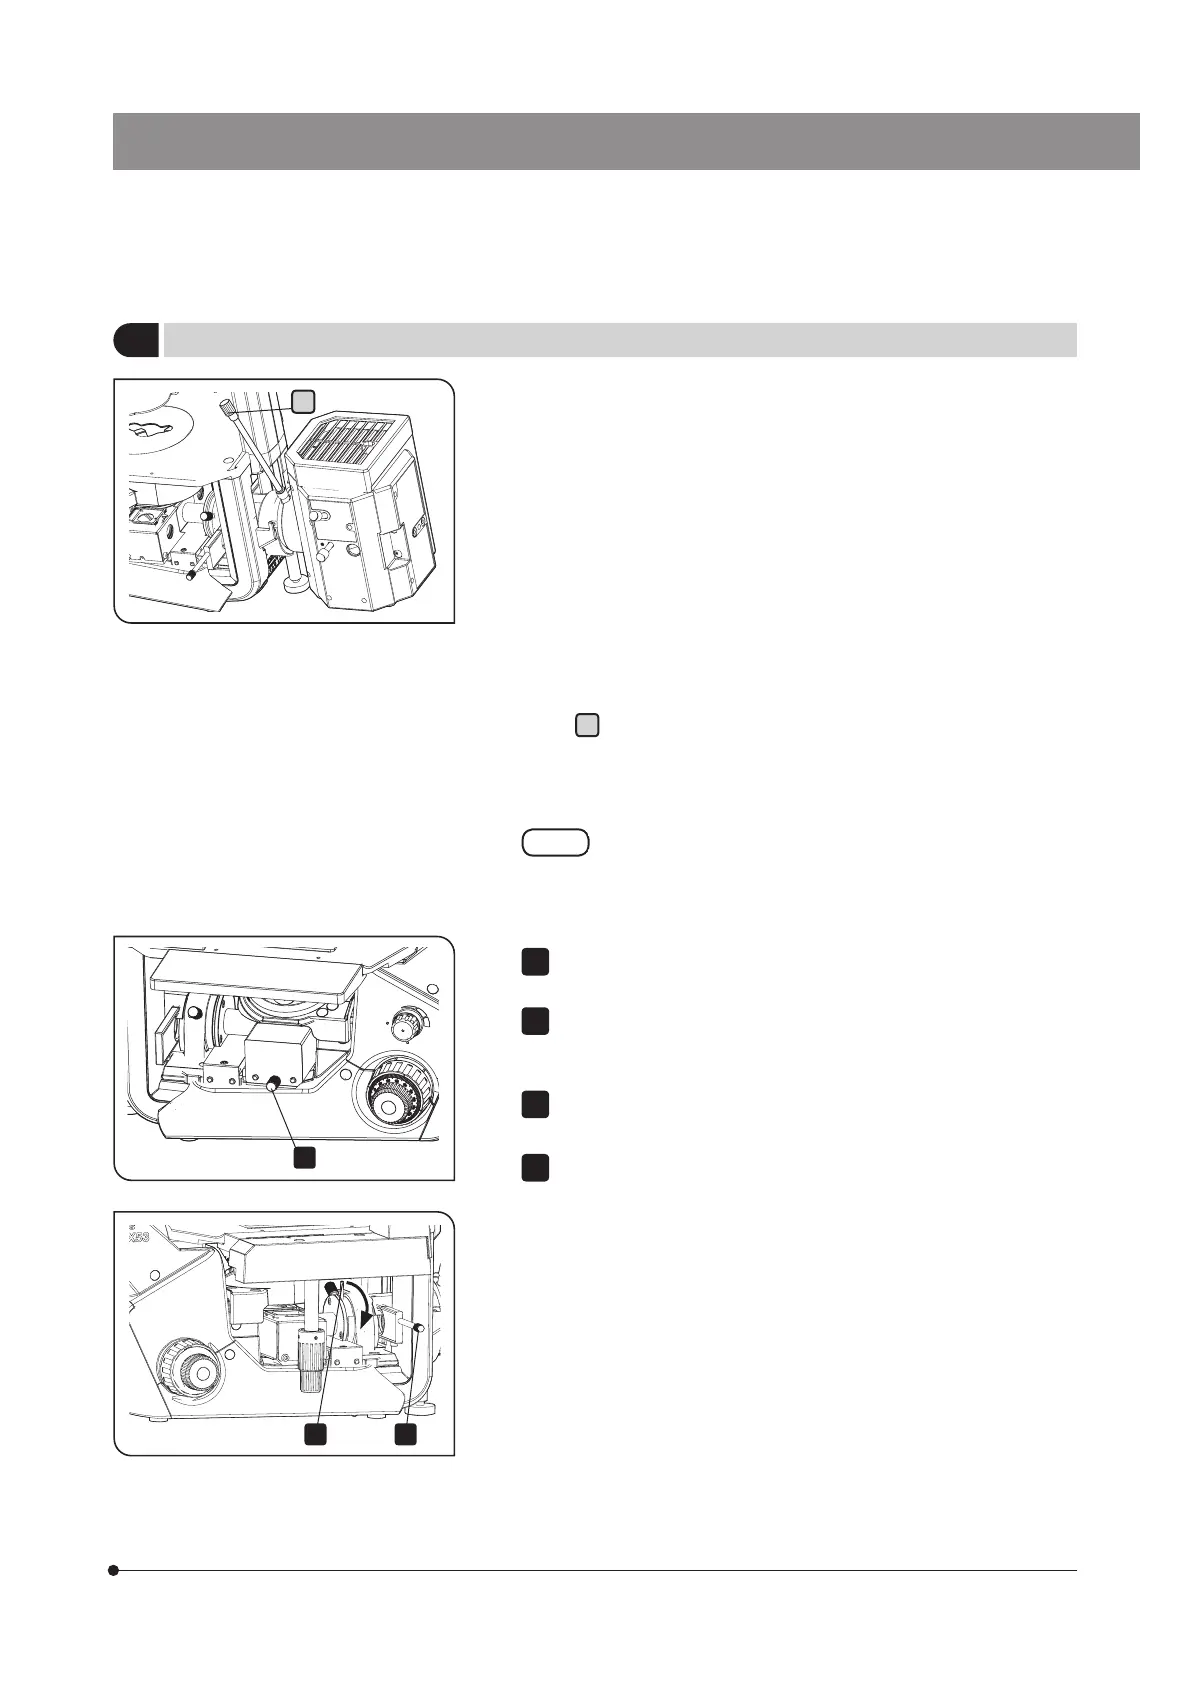
If the collector lens focusing knob of the lamp housing is hard to operate
due to the location behind the microscope, use the extension handle
U-CLA
a
(option) by inserting it on the knob.
a
2