19
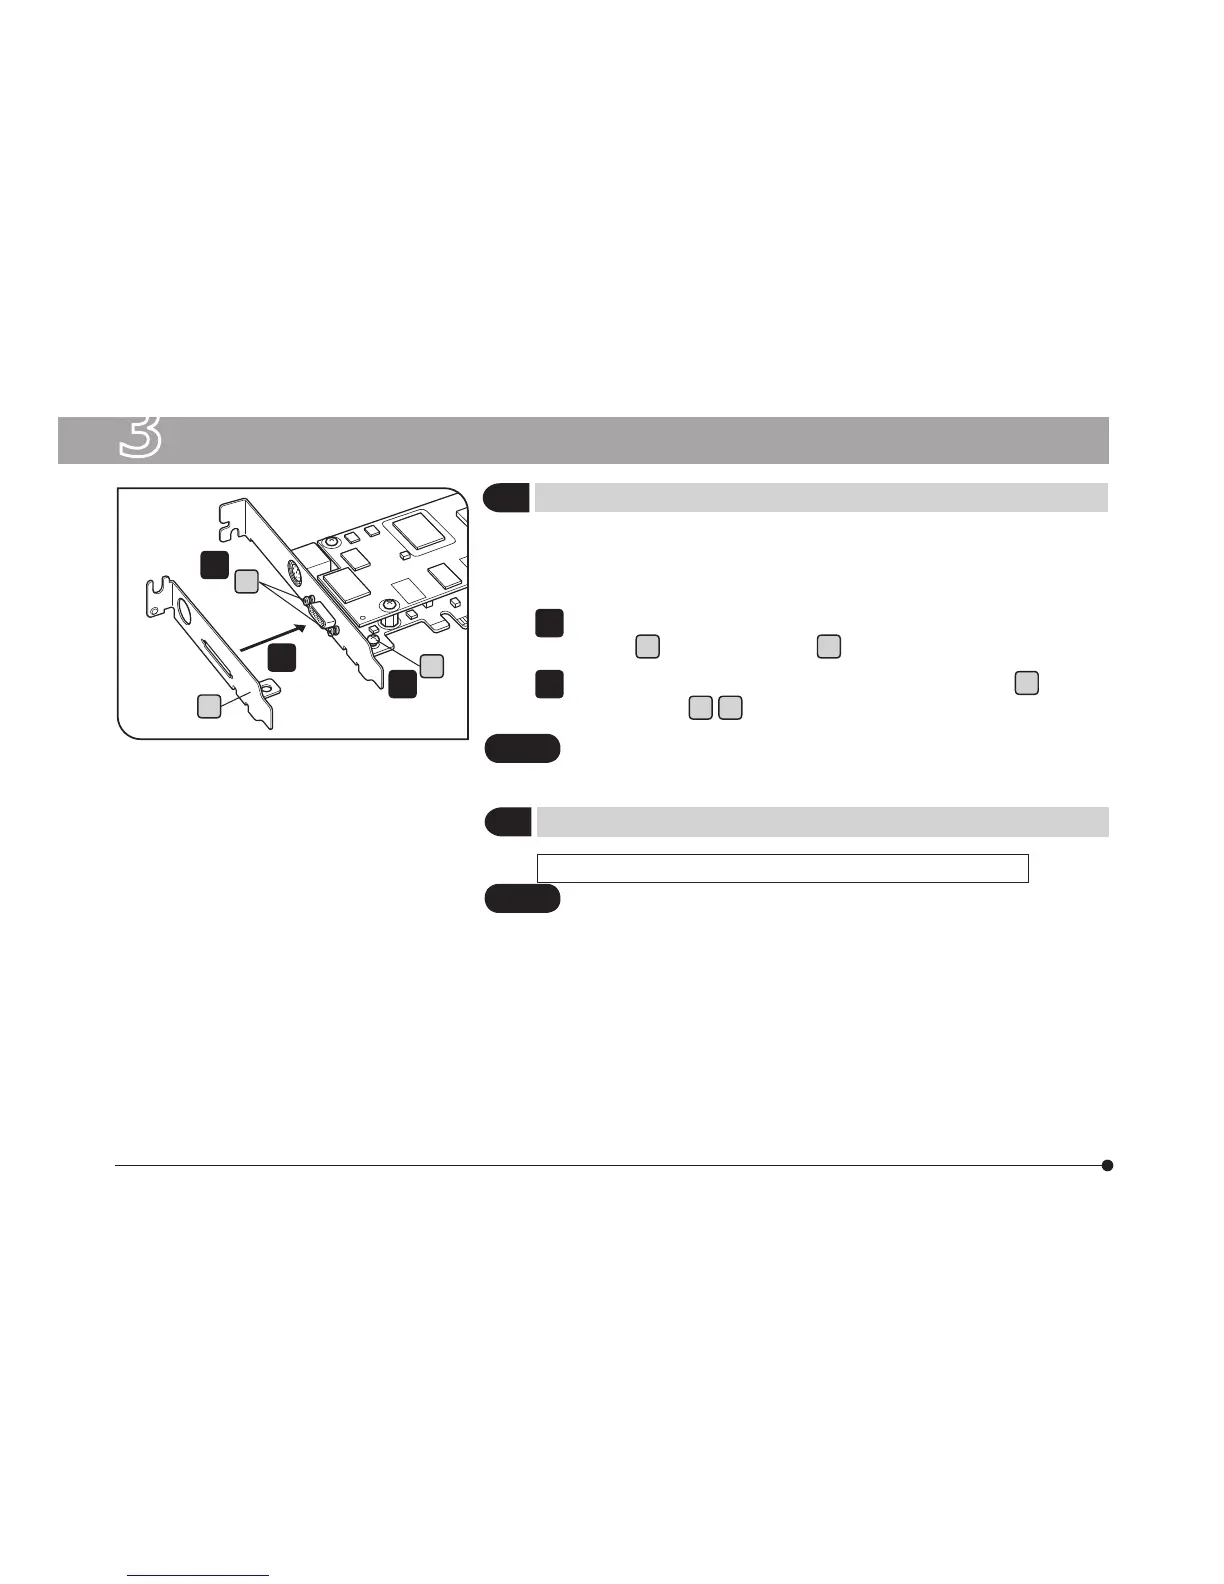
Fig. 1
3 HARDWARE INSTALLATION
a
b
c
1
1
2
If the computer’s extension slot is of the low-profile specifications or
the PCIe extension box is used, it is required to replace the existing
bracket with the low-profile bracket.
Prepare flat-blade and Phillips screwdrivers and remove the “ – ”
screws
a
and the “ + ” screw
b
.
Replace the existing bracket with the low-profile bracket
c
and
attach screws
a
b
.
Do not provide excessive force when tightening the screws of PCIE
I/F boad, since they may be damaged if tightened excessively.
1
2
CAUTION
DP73 / DP73WDR (For Desktop Computer) Set (Figs. 2 & 3)
· Before installing the PCIe interface board in the computer, be
sure to read the instruction manual for the computer in order
not to damage it.
· Be sure to turn off the computer and peripherals and unplug
their power cords before installing the PCIe interface board.
· To avoid damage due to static electricity, touch an unpainted
metallic surface of the computer with your hand to discharge
the static electricity before installation.
· The SATA-to-HDD(4-pin) power conversion adapter is sensi-
tive to excessive force. Please handle it with care.
CAUTION
(Fig. 1)
(Fig. 2 - Fig. 6)
1
Installing the Low-Profile Bracket
2
Installing the PCIe Interface Board