Using the clearer boards
Lift the supers that you want to clear and place the clearer board on
the hive. Make sure the bee escape is on the bottom.
Put the supers on top of the clearer boards. Note: When you re-
attach the lid it will be on a slight angle which is okay.
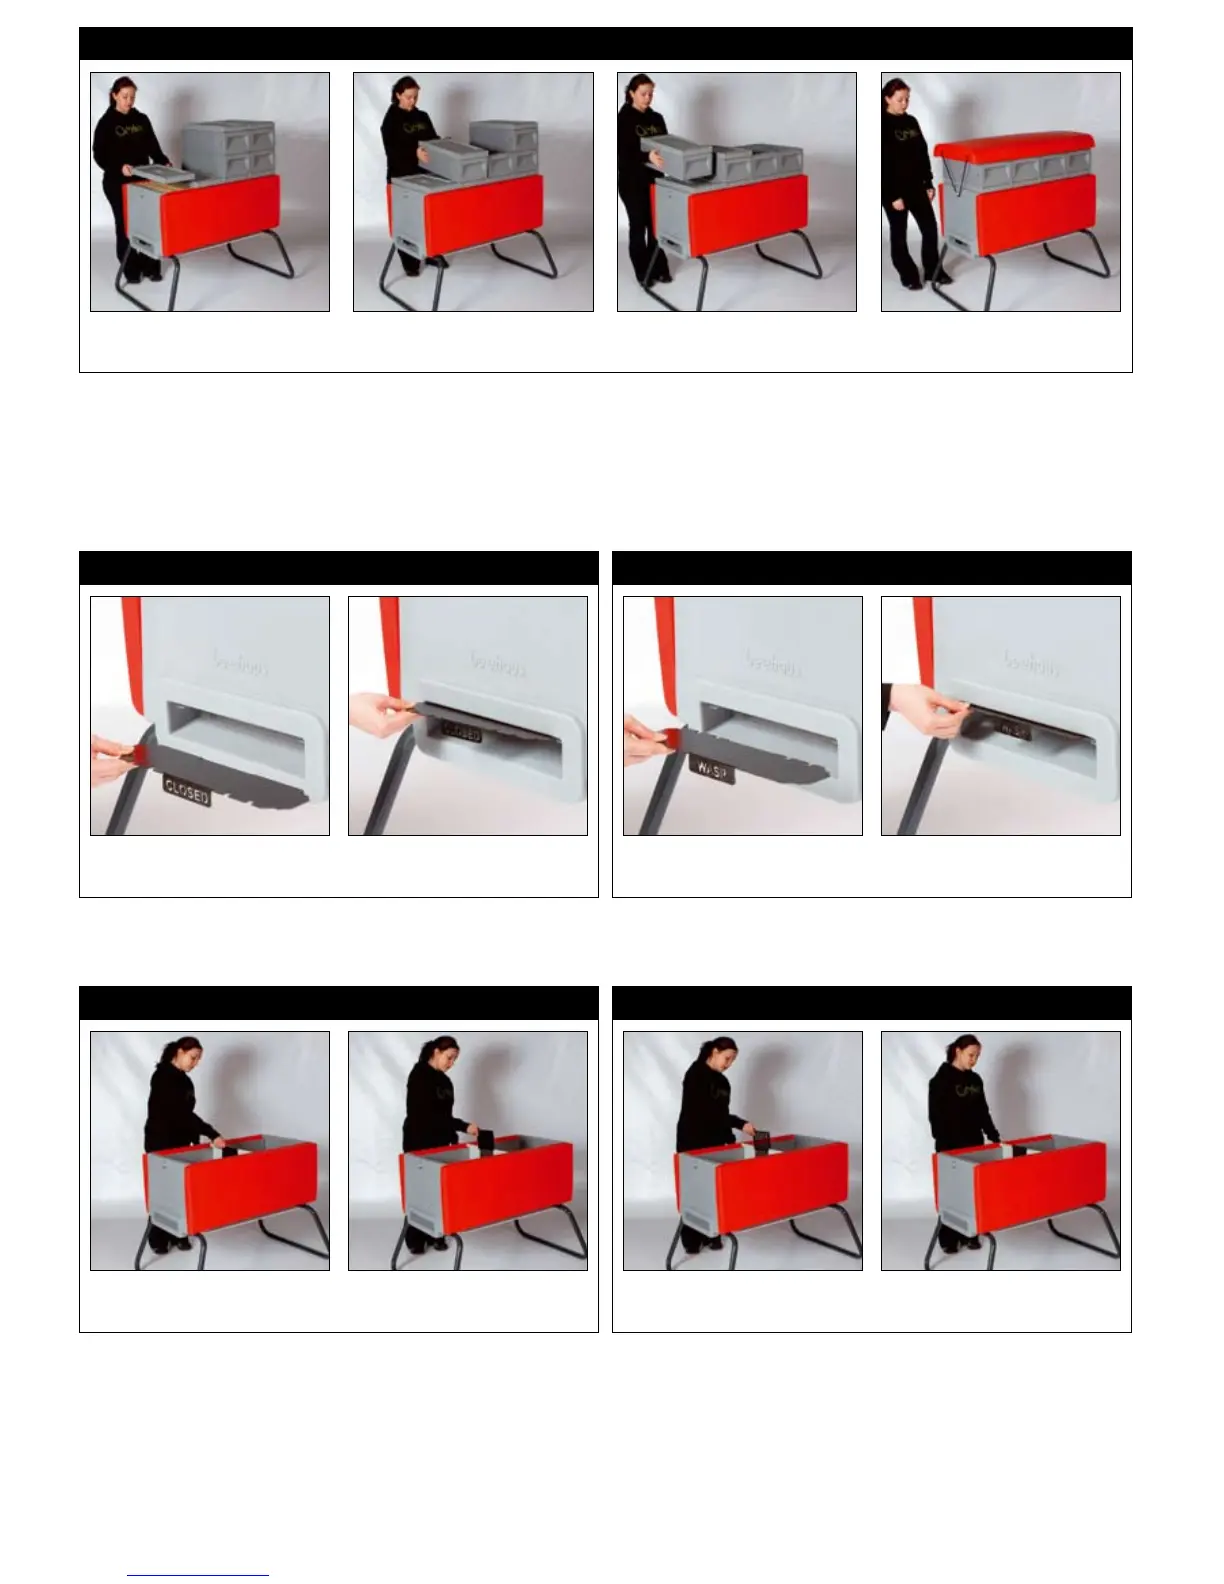
Wasp guard
Slide the adapter in so that the word ‘wasp’ is shown.
Once it is pushed in, it will hold in place.
Completely closing the entrance
Slide the adapter in so that the word ‘closed’ is shown.
Two sprung clips hold the adapter in place.
Using the entrance adapter
You can use the entrance adapter to completely close the entrance to the Beehaus. For example, if you are transporting your bees.
If you turn the entrance adapter around it becomes an entrance restrictor, which makes it easier for the bees to defend the hive
against wasps. You can also use it like this over winter to protect against mice or to reduce the entrance when initially hiving a
swarm of bees.
Step 2 - Inserting the mini queen excluder
With the blanking plate removed you can fit the queen excluder
Step 1 - Removing the blanking plate
The blanking plate can be removed by pulling up.
Divider board - See page 42 in the Bee Guide for details