28
4.4.10 Setting the Origin Points
When Origin Set is selected, press ENT and the following dialogue box will pop up:
The operation method is the same as the previous setting. When Continue is selected, press PULSE to fire the laser, and
release the key to finish firing. When you finish your adjustments, save them by selecting Write with the ENT key or
hit ESC to leave without saving your changes. Read can load saved parameters.
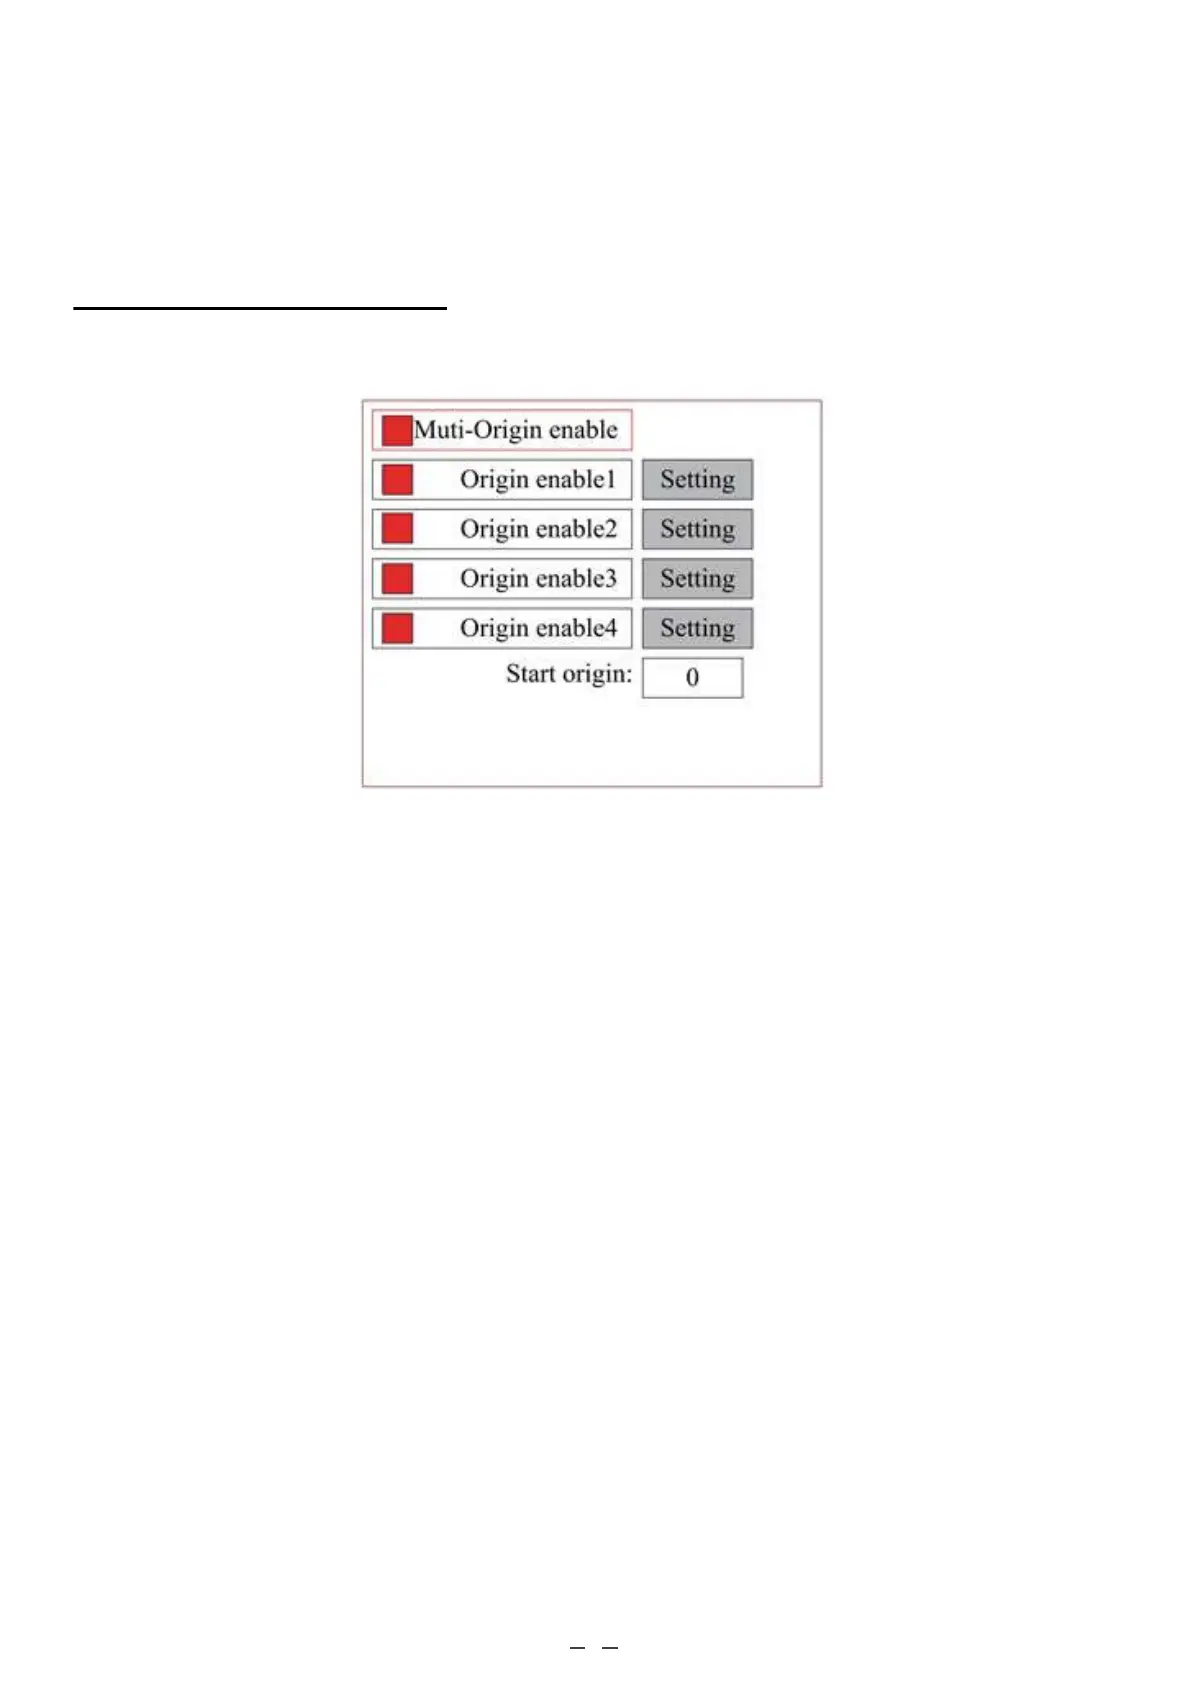
Press FN to select an item. When Multi-Origin Enable is selected, press ENT to enable or disable the item. When
enabled, the small box will be red and, when disabled, the small box will be grey. When selecting Set Origin or Next
Origin, push ◄ or ► to select the value. When changing the parameters of Set Origin, remember to press ENT to
validate the change. Parameters will be saved automatically when the interface is closed.
Details of each item are shown below:
• Multiple Origins Enable: Yes or No can be selected. If you select No, the system will use single-origin
settings. You can press ORIGIN and set the origin. If you select Yes, the system will use multiple-origin
settings and ORIGIN on the keyboard becomes invalid. In this case, the parameter of each origin must be set
in the menu as follows.
• Set Origin 1/2/3/4: After the multiple-origin setting is enabled, put the cursor on Set as Origin 1/2/3/4. Press
ENTER on the keyboard and the system will take the coordinates as the corresponding ones of the origin
1/2/3/4.
• Origin Enable 1/2/3/4: After the multiple-origin setting is enabled, the four origins can also be individually
disabled and enabled.
Once multiple-origin logic is selected, if the number of the next origin is 1 and four origins are enabled, when
the memory file function is started (via the keyboard or PC) or the processing file is uploaded into the PC
and this file selects “Take the Original Origin as the Origin”, the work will use different origins each time it
starts. The rotation order of the origins is 1→2→3→4→1→2… If the processing file is uploaded to the PC
and this file selects “Take the Current Origin as the Origin”, the system will always use the current origin.