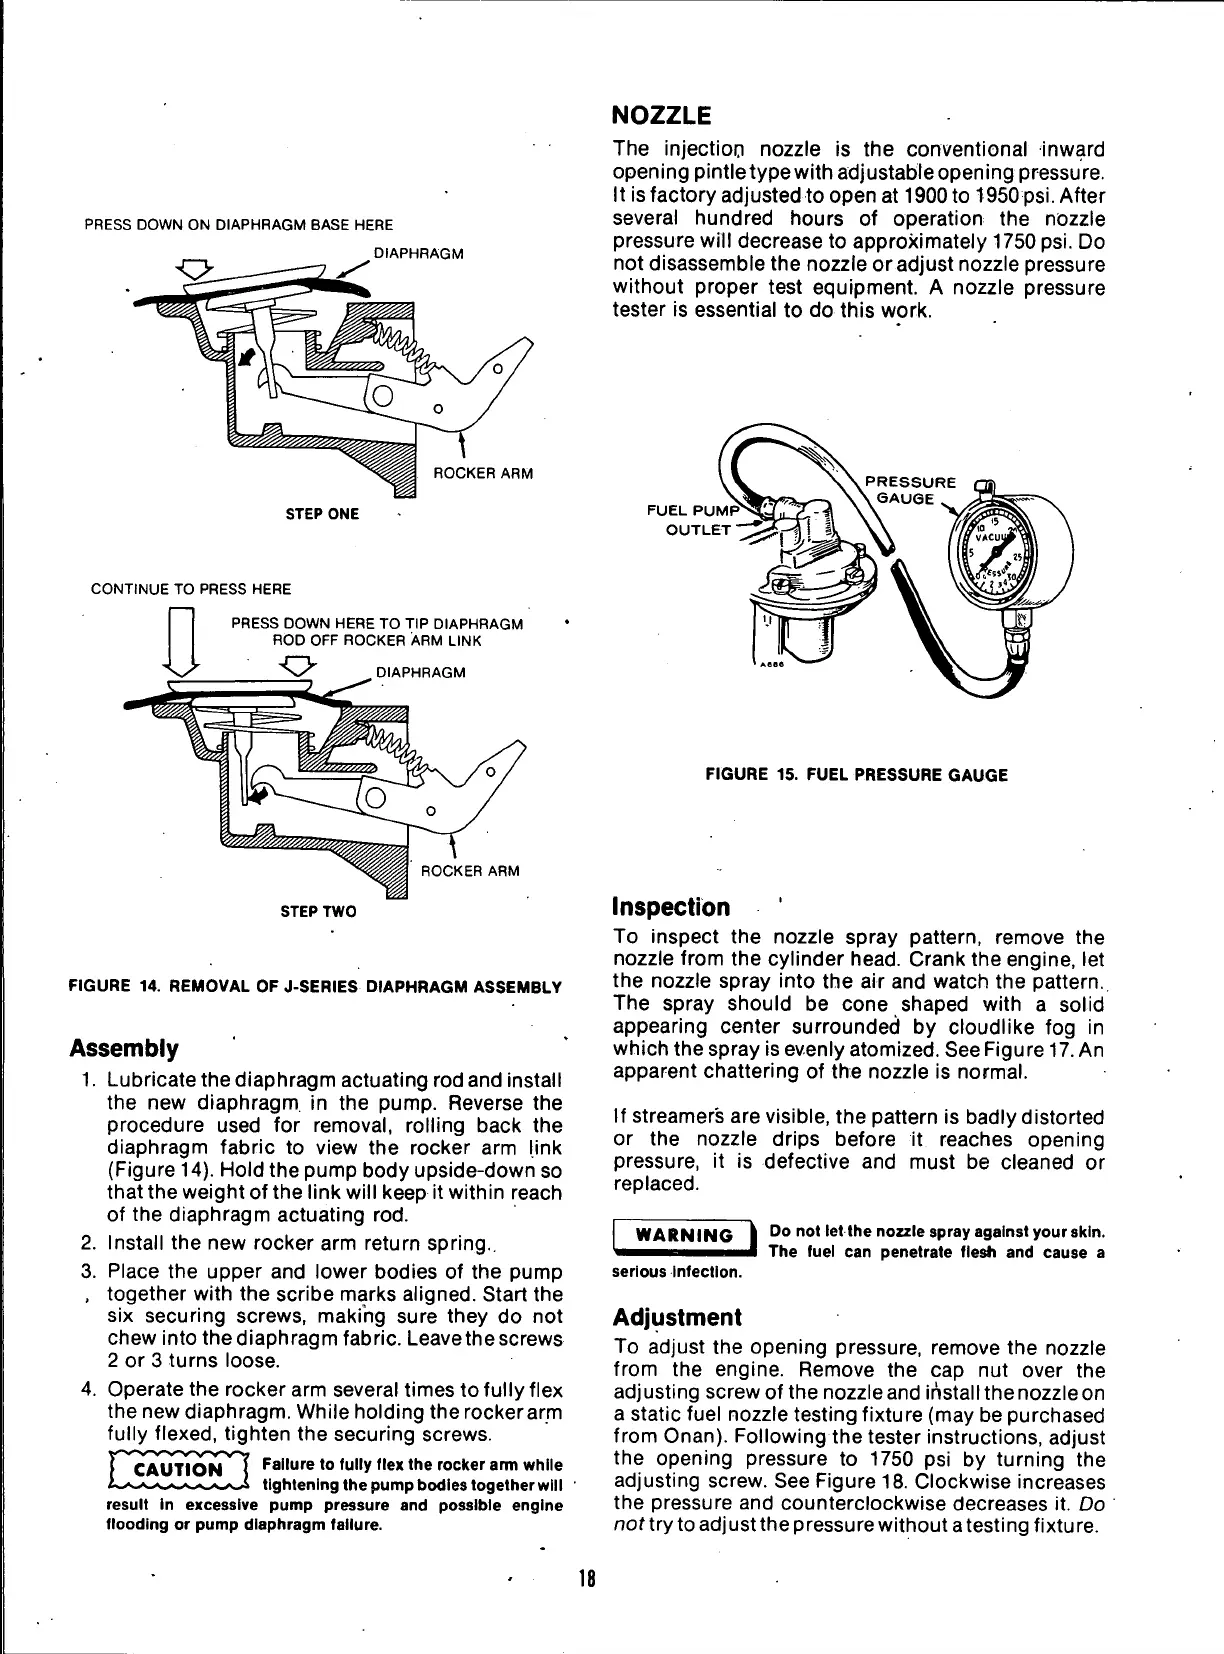
PRESS DOWN ON DIAPHRAGM BASE HERE
DIAPHRAGM
ROCKER ARM
STEP ONE
CONTINUE TO PRESS HERE
PRESS DOWN HERE TO TIP DIAPHRAGM
ROD OFF ROCKER ARM LINK
DIAPHRAGM
ROCKER ARM
STEP TWO
FIGURE 14. REMOVAL OF J-SERIES DIAPHRAGM ASSEMBLY
Assembly
1.
Lubricate the diaphragm actuating rod and install
the new diaphragm in the pump. Reverse the
procedure used for removal, rolling back the
diaphragm fabric to view the rocker arm link
(Figure 14). Hold the pump body upside-down so
that the weight of the link will keep it within reach
of the diaphragm actuating rod.
2.
Install the new rocker arm return spring..
3. Place the upper and lower bodies of the pump
, together with the scribe marks aligned. Start the
six securing screws, making sure they do not
chew into the diaphragm fabric. Leave the screws
2 or 3 turns loose.
4.
Operate the rocker arm several times to fully flex
the new diaphragm. While holding the rockerarm
fully flexed, tighten the securing screws.
Failure to fully flex the rocker arm while
tightening the pump bodies together will
result in excessive pump pressure and possible engine
flooding or pump diaphragm failure.
CAUTION
NOZZLE
The injection nozzle is the conventional inward
opening pintletypewith adjustable opening pressure.
It is factory adjusted to open at 1900 to 1950
psi.
After
several hundred hours of operation the nozzle
pressure will decrease to approximately 1750 psi. Do
not disassemble the nozzle oradjust nozzle pressure
without proper test equipment. A nozzle pressure
tester is essential to do this work.
FUEL PUMP
1
OUTLET
FIGURE 15. FUEL PRESSURE GAUGE
Inspection
To inspect the nozzle spray pattern, remove the
nozzle from the cylinder head. Crank the engine, let
the nozzle spray into the air and watch the pattern.
The spray should be cone shaped with a solid
appearing center surrounded by cloudlike fog in
which the spray is evenly atomized. See Figure
17.
An
apparent chattering of the nozzle is normal.
If streamer's are visible, the pattern is badly distorted
or the nozzle drips before it reaches opening
pressure, it is defective and must be cleaned or
replaced.
WARNING
serious infection.
Do not let the nozzle spray against your
skin.
The fuel can penetrate flesh and cause a
Adjustment
To adjust the opening pressure, remove the nozzle
from the engine. Remove the cap nut over the
adjusting screw ofthe nozzle and installthenozzleon
a static fuel nozzle testing fixture (may be purchased
from Onan). Following the tester instructions, adjust
the opening pressure to 1750 psi by turning the
adjusting screw. See Figure 18. Clockwise increases
the pressure and counterclockwise decreases it. Do
not try to
adj
ust the pressure without
a
testi
ng
f ixtu
re.
18
 Loading...


