10-10
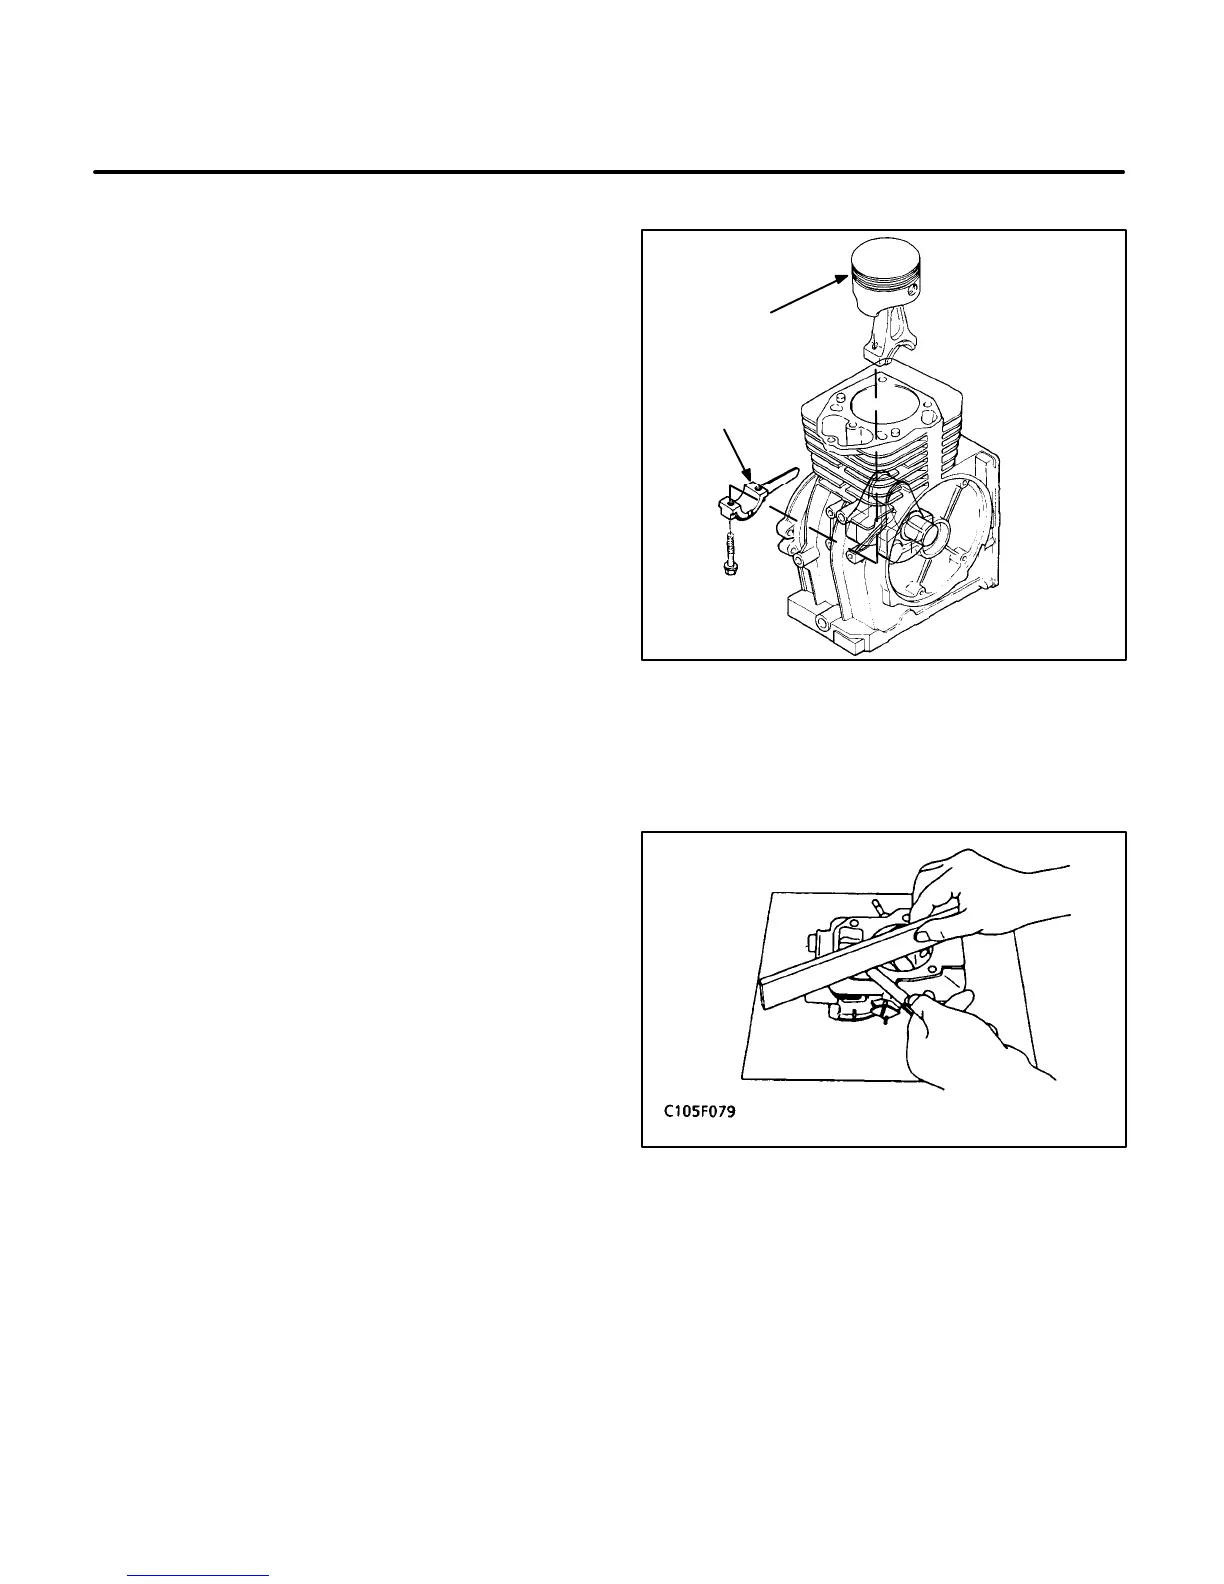
1. Remove the two bolts from the connecting rod
cap. Mark direction of assembly for connecting
the rod, cap, and splasher.
2. Remove the rod cap from the rod and push the
piston assembly out the top of the cylinder (Fig-
ure 10-18). Be careful not to scratch the crank
pin or the cylinder wall when removing the pis-
ton.
3. Carefully pull the crankshaft out of the oil seal
and bearing.
INSPECTION OF ENGINE PARTS
The following section describes procedures for in-
specting each of the major engine components.
Cylinder Head
1. Clean the cylinder head surface.
2. Place a straight edge on the top of the cylinder
head as shown in Figure 10-19. Use a feeler
gauge to measure the amount of distortion.
3. If the measurement exceeds the specified limit,
replace the cylinder head (see Section
3.
Di-
mensions and Clearances
).
Cylinder Block
Cleaning:
After removing the piston, crankshaft,
cylinder head; etc., inspect the block for cracks and
extreme wear. If the block is still serviceable, pre-
pare it for cleaning as follows:
1. Scrape all of the old gasket material from the
block.
2. Remove grease and scale from the cylinder
block by agitating in a bath of commercial
cleaning solution or hot soapy washing solu-
tion.
3. Rinse block in clean hot water to remove clean-
ing solution.
C1134-1s
PISTON
ROD CAP
FIGURE 10-18. PISTON REMOVAL
FIGURE 10-19. CYLINDER HEAD SURFACE
FLATNESS
 Loading...

